2015 manual transmission cars

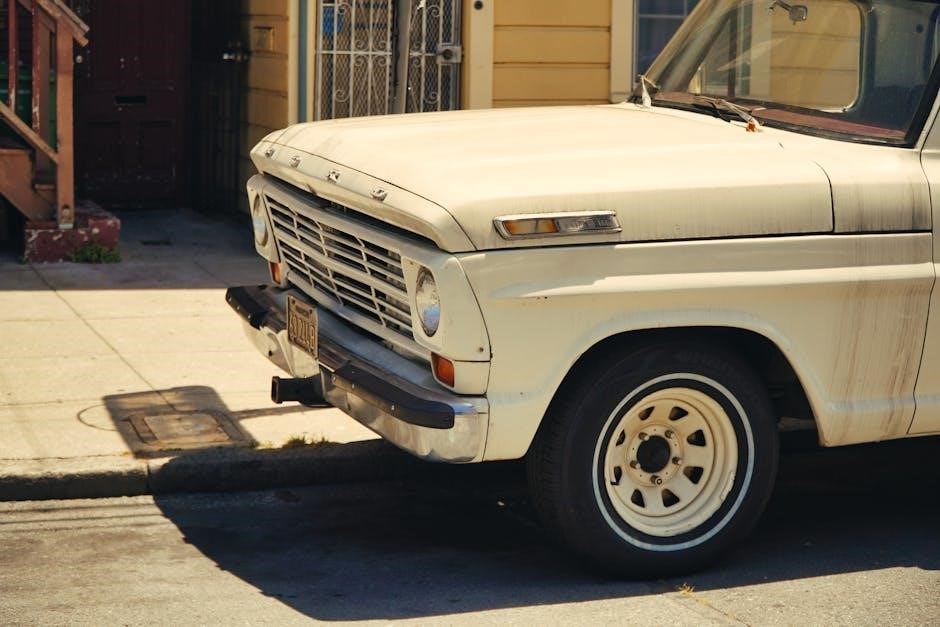
Manual transmission cars offer a unique driving experience, combining control and engagement. In 2015, models like the Mazda 3 and Ford Mustang stood out for their precise gear shifts and driver connectivity, making them favorites among enthusiasts who value the art of driving over convenience.

Overview of 2015 Models

In 2015, manual transmission cars remained popular among driving enthusiasts, with models like the Mazda 3, Ford Mustang, and Honda Civic offering precise shifting and engaging performance. These vehicles featured refined clutch systems and smooth gear engagement, making them enjoyable for both daily commutes and spirited drives. The Subaru BRZ and Toyota 86 also stood out as sporty options with manual transmissions, emphasizing driver control and agility. Many 2015 models incorporated advanced technologies, such as rev-matching systems, to enhance the manual driving experience. These cars were praised for their fuel efficiency, lower purchase costs, and superior driver connectivity compared to automatic counterparts. The 2015 lineup showcased the versatility of manual transmissions, catering to a wide range of budgets and preferences while maintaining the timeless appeal of hands-on driving.

Historical Context of Manual Transmissions

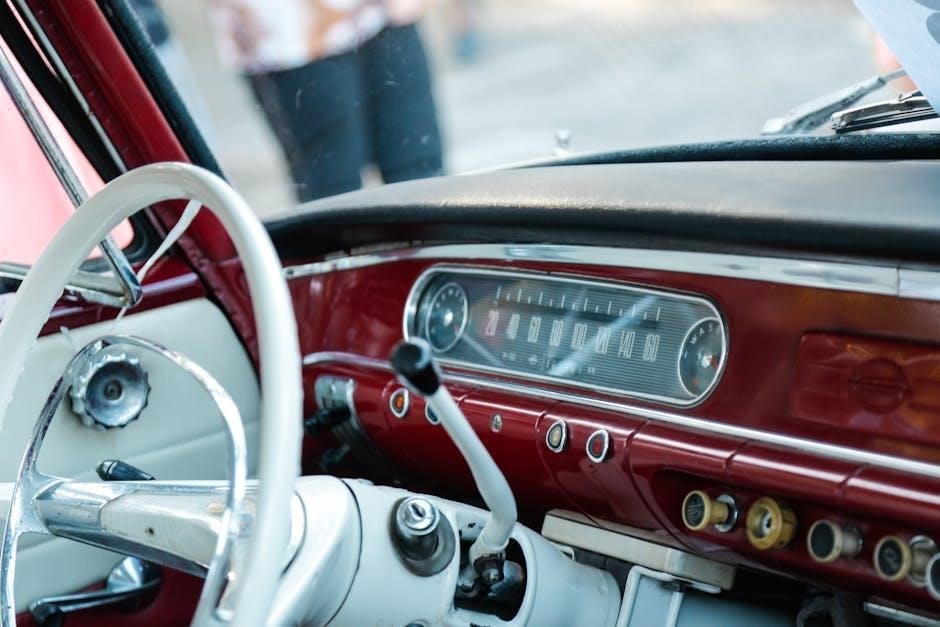
Manual transmissions have a long history, dating back to the early 20th century. The first manual gearboxes were introduced in the 1920s, offering drivers more control over their vehicles. By the mid-20th century, manual transmissions became standard in many cars, particularly in Europe, where fuel efficiency and cost-effectiveness were priorities. In the 1980s, advancements like cable-operated systems improved shifting precision. By 2015, manual transmissions remained popular among driving enthusiasts, despite the rise of automatics. They were celebrated for their direct driver-car connection and were often featured in performance and budget-friendly models. While automatics gained traction for convenience, manuals held a special place in automotive culture, symbolizing the joy of driving and mechanical simplicity. Their enduring appeal in 2015 reflected a timeless appreciation for hands-on control behind the wheel.

Benefits of Manual Transmission

Manual transmissions offer better fuel efficiency, lower purchase costs, and increased driver control. They provide a more engaging driving experience and often require less maintenance than automatics, making them a practical choice for many drivers.

Advantages Over Automatic

Manual transmissions in 2015 models offer distinct advantages over automatics, including improved fuel efficiency and lower production costs. They provide drivers with greater control during acceleration and deceleration, enhancing the overall driving experience. Additionally, manual transmissions tend to have fewer mechanical components, reducing the likelihood of costly repairs; This simplicity also contributes to better performance, as drivers can manually optimize gear shifts for varying road conditions. Furthermore, the absence of torque converters in manual transmissions results in quicker response times, making them ideal for both daily commuting and spirited driving. These factors make manual transmission cars a preferred choice for those seeking a more engaging and cost-effective vehicle option.

Why Enthusiasts Prefer Manual

Enthusiasts often favor manual transmissions for the tactile connection they provide between driver and vehicle. The ability to control gear shifts manually enhances the driving experience, offering a sense of engagement and precision that automatics often lack. For many, the satisfaction of mastering smooth shifts and heel-toe techniques is unparalleled. Additionally, manual transmissions allow drivers to optimize power delivery, making them particularly appealing for spirited or performance-oriented driving. The direct feedback from the engine and gearbox creates a more immersive experience, fostering a deeper bond between the driver and the car. This emotional and mechanical connection is a key reason why enthusiasts continue to advocate for manual transmissions, even as automatics gain popularity.

Popular 2015 Models with Manual Transmission

In 2015, the Mazda 3, Ford Mustang, and Subaru BRZ were standout models offering manual transmissions. These cars combined performance, fuel efficiency, and driving enthusiasts’ preferred control.

List of Notable Cars

The 2015 Mazda 3, Ford Mustang, and Subaru BRZ were notable for their manual transmissions. The Mazda 3 iTouring model, with its precise shifting, was particularly praised. These cars offered a blend of performance and fuel efficiency, appealing to driving enthusiasts who valued control and engagement. The Ford Mustang’s manual option provided a classic driving experience, while the Subaru BRZ emphasized handling and driver connection. These models stood out in 2015 for maintaining the tradition of manual transmissions, catering to a niche market of drivers who appreciated the art of shifting gears. Their popularity endures among enthusiasts seeking a more immersive driving experience.

Features and Specifications

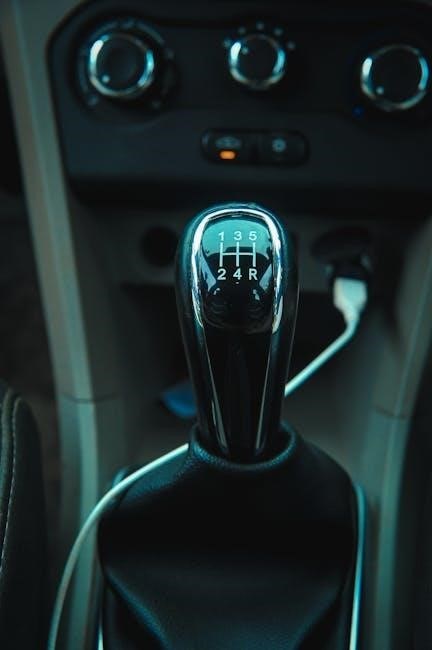
The 2015 manual transmission cars boasted impressive features, blending performance with efficiency. Models like the Mazda 3 iTouring featured a 2.5L inline-4 engine, producing 184 horsepower, paired with a 6-speed manual gearbox. The Ford Mustang GT offered a robust 5.0L V8 engine, delivering 435 horsepower, complemented by a Tremec 6-speed manual transmission. Subaru’s BRZ came with a 2.0L boxer engine, producing 205 horsepower, and a 6-speed manual option. These cars often included features like precise gear shifts, sport-tuned suspensions, and lightweight designs. Advanced technologies such as Mazda’s SKYACTIV system enhanced fuel efficiency without compromising performance. Many models also offered rear-wheel drive, contributing to a more engaging driving experience. These specifications made 2015 manual transmission cars appealing to enthusiasts seeking a balance of power, control, and driving satisfaction.

Driving Techniques and Best Practices

Mastering manual transmission requires smooth clutch engagement and timely gear shifts. Avoid common mistakes like riding the clutch or using it to hold the car on hills. Always shift at the right RPM range and use the correct gear for the driving condition to ensure optimal performance and longevity of the transmission.

Basic Driving Tips

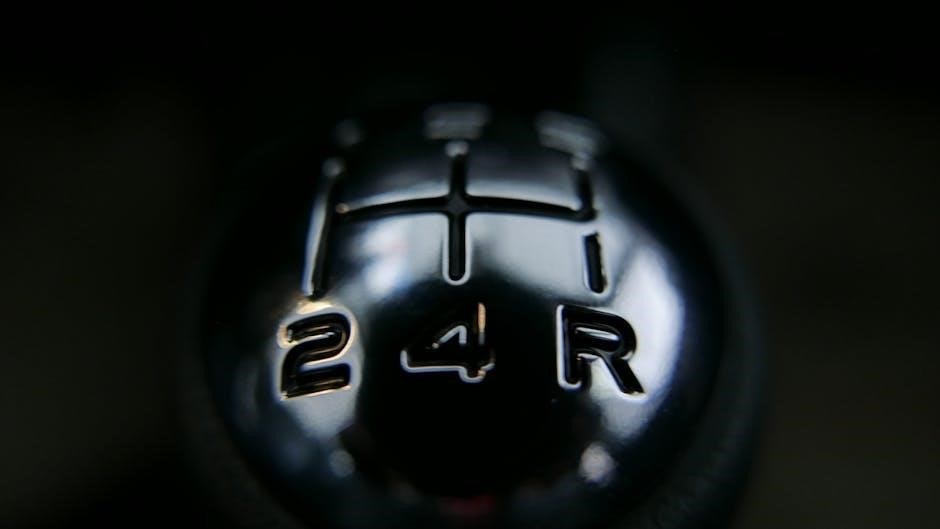
Mastering a manual transmission starts with smooth clutch engagement. Begin by fully pressing the clutch and shifting into first gear. Slowly release the clutch while accelerating gently to avoid stalling. When shifting gears, press the clutch fully, move the gearshift smoothly, and release the clutch gradually. Always shift at appropriate RPM levels to maintain control and avoid wear on the transmission. Use the parking brake on inclines to prevent rolling. Practice in a flat, open area before driving in traffic. Avoid riding the clutch, as this can cause unnecessary wear. Listen to engine RPMs to gauge when to shift. Keep your foot off the accelerator while pressing the clutch to reduce strain; Shift into neutral at red lights to relax the clutch and transmission. These basic techniques ensure a smoother, more controlled driving experience.

Advanced Techniques for Better Control

Once comfortable with basic driving, advanced techniques can enhance control and performance. Heel-and-toe shifting is a pro technique, allowing seamless downshifts by braking and accelerating simultaneously. Rev-matching during downshifts ensures smooth gear transitions, reducing wear on the transmission. Blind shifting, or shifting without the clutch, is useful in emergencies but should be done sparingly. Feathering the clutch helps in low-speed maneuvers or uphill starts, preventing stalling. Using the clutch and accelerator in harmony maintains traction, especially on slippery surfaces. Practicing on varied terrain builds adaptability. These techniques, mastered over time, elevate driving precision and enjoyment, making manual transmission cars a joy for experienced drivers seeking greater connection and control behind the wheel.

Maintenance and Care for Manual Cars

Regular maintenance is crucial for extending the life of manual cars. Checking clutch fluid levels, inspecting the clutch cable, and replacing worn clutch plates are essential tasks. Ensuring the transmission fluid is clean prevents damage and enhances shifting smoothness. Drivers should also monitor the gearshift linkage and pedals for any signs of wear. Proper care and timely repairs help maintain optimal performance and prevent costly breakdowns, ensuring a smooth and responsive driving experience.

Regular Maintenance Schedule

A well-structured maintenance schedule is vital for 2015 manual transmission cars to ensure longevity and performance. Owners should change the transmission fluid every 30,000 to 60,000 miles to prevent wear and tear. Inspecting the clutch cable and linkage every 15,000 miles helps identify potential issues early. Lubricating the gearshift and pedal mechanisms annually prevents stiffness and ensures smooth operation. Additionally, monitoring the clutch pedal’s free play and adjusting it as needed can prevent premature wear on the clutch disc. Regularly checking for leaks around the transmission pan and clutch master cylinder is also recommended. Adhering to these routines helps maintain the manual transmission’s health and avoids costly repairs down the road.

DIY Tips and Tricks

For 2015 manual transmission cars, regular DIY checks can enhance performance and prevent issues. Start by inspecting the transmission fluid level and condition, topping it off if necessary. Adjusting the clutch pedal free play is another simple task to ensure proper engagement. Bleeding the clutch system can resolve spongy pedal feel, improving control. Always use the correct gear for inclines to avoid excessive wear. Inspect the transmission mounts for cracks or damage, as they are crucial for stability. Avoid “riding the clutch,” as it can lead to premature wear. Additionally, cleaning the gearshift linkage and lubricating moving parts ensures smooth shifting. These DIY practices not only save money but also foster a deeper connection with your vehicle, helping you identify potential problems before they escalate.

Fuel Efficiency and Performance

Manual transmissions in 2015 models often deliver better fuel efficiency and performance compared to automatics. Cars like the Mazda 3 and Ford Mustang achieved up to 30 MPG, while precise gear control enhanced acceleration and responsiveness, making them popular for both economy and driving enthusiasts.

How Manual Transmissions Affect MPG

Manual transmissions in 2015 cars typically offered better fuel efficiency than their automatic counterparts. For example, the 2015 Mazda 3 with a manual transmission achieved an estimated 29 MPG in the city and 41 MPG on the highway, while the automatic version offered 28 MPG city and 39 MPG highway. This difference is due to the direct control a driver has over gear shifts, allowing for more precise acceleration and less fuel waste; Additionally, manual transmissions generally have fewer parasitic losses compared to automatics, which further contributes to improved MPG. However, real-world fuel efficiency can vary based on driving habits and conditions, emphasizing the importance of proper driving techniques to maximize mileage.

Performance Comparison with Automatic

Manual transmissions in 2015 cars often delivered superior performance compared to automatics, with quicker acceleration and more precise control. For instance, the 2015 Ford Mustang with a manual transmission could go from 0-60 MPH in 5.1 seconds, while the automatic version took slightly longer. Similarly, the Subaru BRZ and Mazda MX-5 Miata, both known for their manual-only configurations, offered sharp, responsive handling that automatics couldn’t match. However, advancements in automatic transmissions began narrowing this gap, with some high-performance automatics offering faster shifts than manuals. Despite this, manual transmissions remained the choice for purists seeking maximum driver engagement and a more connected driving experience, even as automatics gained ground in smoothness and convenience.

Cost Considerations: Purchase and Ownership

Manual transmission cars often have lower purchase prices and maintenance costs compared to automatics, making them a cost-effective choice. However, improper use can lead to higher repair expenses.

Price Comparison: Manual vs Automatic

In 2015, manual transmission cars were generally priced lower than their automatic counterparts, offering a cost-effective option for budget-conscious buyers. For example, the 2015 Honda Civic LX with a manual transmission was priced around $18,900, while the automatic version started at $19,900. Similarly, the Ford Mustang EcoBoost with a manual gearbox cost approximately $25,300, compared to $26,300 for the automatic model. The price difference, typically ranging between $1,000 to $1,500, reflects the lower production costs of manual transmissions. However, prices varied depending on the make and model, with some luxury brands offering minimal price differences. This made manual cars an attractive choice for those seeking affordability without sacrificing performance or fuel efficiency.

Long-Term Maintenance Costs

Manual transmission cars typically have lower long-term maintenance costs compared to automatics. The simplicity of manual systems reduces the likelihood of expensive repairs, as there are fewer complex components prone to failure. For 2015 models, parts like the clutch may need replacement every 50,000 to 100,000 miles, costing around $500 to $1,000. However, this expense is offset by the absence of costly repairs associated with automatic transmissions, such as torque converters or solenoid packs. Additionally, manual transmissions generally require less frequent fluid changes and have fewer electronic components to fail. Overall, while some maintenance is necessary, the longevity and simplicity of manual transmissions make them a cost-effective choice for drivers over the long term.

Reliability and Common Issues

2015 manual transmission cars are generally reliable, but issues like clutch wear and synchronizer problems can arise with high mileage or improper use. Regular maintenance helps mitigate these concerns.

Reliability of 2015 Models

2015 manual transmission cars are known for their reliability, with many models like the Mazda 3 and Ford Mustang receiving praise for durability. Proper maintenance, such as regular clutch and gearbox checks, ensures longevity. However, high-mileage vehicles may experience issues like worn synchronizers or gear grinding. Owners often report smooth shifting and consistent performance, especially in well-maintained vehicles. The Mazda 3, for instance, is celebrated for its robust manual gearbox, while the Ford Mustang’s Tremec transmission is noted for its strength. Overall, 2015 models with manual transmissions remain dependable choices, provided owners adhere to recommended maintenance schedules and avoid aggressive driving habits that can strain components.

Common Problems and Solutions

Common issues with 2015 manual transmission cars include clutch wear and gear grinding. Clutch wear can be addressed by adjusting driving habits, such as avoiding riding the clutch. Gear grinding often results from improper shifting techniques and can be mitigated with practice. Additionally, some models may experience bearing noise or synchronizer issues, which typically require professional attention. Regular fluid changes and inspections can prevent these problems. Owners should also be mindful of driver error, as excessive wear on components can lead to costly repairs. By maintaining proper driving practices and staying proactive with maintenance, many of these issues can be avoided or resolved effectively.

Resale Value and Market Trends

Manual transmission cars, especially 2015 models, retain strong resale value due to enthusiast demand. Well-maintained vehicles like the Mazda 3 and Ford Mustang oftencommand higher prices.

Factors Influencing Resale

Several factors influence the resale value of 2015 manual transmission cars. Condition and mileage are paramount, with well-maintained vehicles commanding higher prices. Rarity and demand also play a role, as certain models like the Mazda 3 and Ford Mustang are sought after by enthusiasts. Additionally, the availability of manual transmissions in specific trims or editions can enhance resale value. Regional preferences also impact demand, with urban areas often seeing higher interest in manual cars. Finally, the overall market trends, including the shift towards automatics, can affect how these cars are perceived and valued by potential buyers. Proper maintenance and a clean history further boost resale appeal, making these cars desirable investments for many drivers.

How to Maintain High Resale Value

Maintaining high resale value for 2015 manual transmission cars requires diligent care and attention to detail. Regular servicing, including oil changes and transmission fluid checks, is essential to ensure optimal performance. Keeping the interior and exterior clean and free from damage preserves the car’s aesthetic appeal. Avoiding aggressive driving habits, such as riding the clutch, can prevent wear on the transmission. Documenting all maintenance records provides transparency for potential buyers. Additionally, addressing any issues promptly, such as creaking noises or gear grind, can prevent more costly repairs down the line. By following these practices, owners can retain their car’s value and attract enthusiastic buyers when it’s time to sell.

Manual transmission cars from 2015 remain popular for their driving engagement and cost efficiency. Proper maintenance and care ensure lasting performance and strong resale value, making them a timeless choice for enthusiasts.

The 2015 manual transmission cars, such as the Mazda 3 and Ford Mustang, are celebrated for their precise gear shifts and driver engagement. These vehicles offer better fuel efficiency and performance compared to automatics, making them a preferred choice among driving enthusiasts. Regular maintenance, including clutch and gearbox care, is essential to ensure longevity and reliability. The resale value of these cars remains strong due to their popularity and timeless appeal. Enthusiasts often highlight the joy of driving and the control manual transmissions provide. Overall, 2015 manual cars represent a blend of performance, efficiency, and driving satisfaction, making them a standout choice for those who value the art of driving.

Future Outlook for Manual Transmissions

Manual transmissions face a declining market share due to rising popularity of automatics and SUVs. However, enthusiasts remain loyal, ensuring manuals stay relevant in niche markets. Automakers continue to innovate, offering hybrid and electric models with manual options. The future likely holds limited but dedicated production, catering to driving purists. As technology advances, manuals may integrate with hybrid systems, blending efficiency and driver engagement. Despite trends favoring automation, the emotional connection to manual driving persists, securing their place in automotive culture, albeit in smaller numbers. The market will likely stabilize, with manuals becoming a specialty choice for performance and classic car enthusiasts.

Continue Reading

pei waste watch schedule 2024 pdf

Welcome to the 2024 PEI Waste Watch Schedule, your guide to efficient waste management; This program, managed by the Island Waste Management Corporation, provides essential tools like the online search feature and downloadable PDF to help residents stay organized and compliant with collection dates for waste, compost, and recycling, supporting PEI’s environmental goals.

Overview of the Waste Watch Program

The PEI Waste Watch Program is a mandatory waste management system designed to help residents effectively sort and dispose of waste. Managed by the Island Waste Management Corporation, the program emphasizes proper sorting into three streams: recycling, compost, and general waste. It also includes special disposal options for bulky items and hazardous materials. The program provides tools like the online search tool and downloadable PDF schedules to help residents stay informed about collection dates. By participating, Islanders contribute to reducing waste and promoting sustainability. The program’s user-friendly resources ensure compliance and make waste management easier for all participants. Community involvement is key to achieving PEI’s environmental goals through this initiative.

Importance of Proper Waste Management in PEI

Proper waste management in Prince Edward Island is crucial for maintaining the province’s natural beauty and environmental health. The Waste Watch Program plays a vital role in reducing landfill use and promoting sustainability through effective sorting and disposal practices. By adhering to the program’s guidelines, residents help conserve resources, reduce greenhouse gas emissions, and protect wildlife. Proper waste management also supports public health by minimizing odors and pests. PEI’s commitment to waste reduction aligns with its environmental goals, making it a leader in sustainable practices. Community participation in the Waste Watch Program ensures a cleaner, greener future for Islanders and future generations. Every household’s efforts contribute to achieving these important environmental objectives.

Accessing the 2024 PEI Waste Watch Schedule

Access the 2024 PEI Waste Watch Schedule online or via a downloadable PDF. Use the address search tool to find collection dates and guidelines, or download the PDF for offline use.

How to Use the Online Search Tool

To use the PEI Waste Watch Schedule online search tool, enter your street number and name (e.g., 575 Main) in the search box. Select your address from the dropdown list that appears. Once selected, click the Search button to view your personalized collection calendar. This tool provides specific dates for waste, compost, and recycling pickup, ensuring you never miss a collection day. Additionally, you can download the schedule or set reminders for added convenience. The online tool is user-friendly and accessible, making it easy for residents to stay informed and compliant with waste management practices in PEI.

Downloading the 2024 Waste Watch Schedule PDF

Downloading the 2024 PEI Waste Watch Schedule PDF allows you to access your collection calendar offline. Visit the official website and use the online search tool to find your schedule. After entering your address and retrieving your collection details, a download option will be available. Save the PDF to your device for quick reference. This document includes dates for waste, compost, and recycling pickup, ensuring you stay organized. The PDF is a convenient resource for planning and setting reminders, helping you adhere to PEI’s waste management guidelines efficiently. By downloading, you can easily access your schedule anytime, anywhere, without needing an internet connection.

Understanding Your Collection Zone

Your collection zone determines the specific dates for waste, compost, and recycling pickup in your area. The Island Waste Management Corporation (IWMC) divides PEI into zones to organize collection services efficiently. To confirm your zone, visit the IWMC website and use the address search tool or refer to the 2024 PEI Waste Watch Schedule PDF. Understanding your zone is crucial for ensuring materials are placed curbside on the correct day. Residents in areas with seasonal road restrictions may need to place carts at the nearest accessible road by 7 a.m. on collection day. For more details, visit IWMC’s website and explore the interactive map or collection calendar.

Key Features of the Waste Watch Schedule

The Waste Watch Schedule highlights collection days for waste, compost, and recycling, allowing residents to set reminders and prepare materials efficiently for pickup, ensuring compliance with PEI’s waste management standards.

Collection Days for Waste, Compost, and Recycling

The 2024 PEI Waste Watch Schedule provides detailed collection days for waste, compost, and recycling. Residents can access their personalized schedule by entering their address online or via the PDF. Waste and compost are typically collected weekly, while recyclables are picked up once a month. Blue Bag 1 (paper products) and Blue Bag 2 (plastics, metals, and glass) must be sorted correctly for collection. Bulk items and special disposals have specific guidelines and may require dismantling. Seasonal cleanup services are also available, with materials sorted into compost and waste. Ensure carts and bags are placed curbside by 7:00 a.m. on the designated day for efficient pickup. Proper sorting and preparation are essential for smooth collection processes.

Setting Reminders for Pickup Days

Stay organized with the 2024 PEI Waste Watch Schedule by setting reminders for pickup days. The Recycle Coach App offers a convenient feature to notify residents of upcoming collections. Additionally, the online platform allows users to download and print their personalized schedule. Residents can also use digital calendars or set alarms on their devices to ensure they never miss a pickup. Proper preparation, including sorting waste, compost, and recyclables, ensures efficient collection. By staying informed and organized, Islanders can contribute to PEI’s environmental goals while maintaining a clean and sustainable community. Regular reminders help residents place their carts and bags curbside on time, avoiding missed collections and keeping the neighborhood tidy.

Preparation Guidelines for Efficient Collection

Ensure efficient waste collection by following proper preparation guidelines. Residents must sort materials into designated streams: waste, compost, and recycling (Blue Bag 1 and Blue Bag 2). Use approved containers and secure lids tightly to prevent spills. Avoid overfilling carts, as excess material may not be collected. Place bins and bags curbside by 7:00 a.m. on collection day, ensuring they are visible and accessible. Keep carts clean and maintain proper weight limits (220 lbs for waste carts, 50 lbs for additional bags). Regularly wash and maintain bins to minimize odors and pests. Proper preparation ensures smooth collection and helps maintain a clean, sustainable community. Adhering to these guidelines supports PEI’s environmental goals and keeps neighborhoods tidy.

Waste Sorting Guidelines

The PEI Waste Watch Schedule 2024 emphasizes proper sorting into waste, compost, and recycling streams. Blue Bag 1 is for paper products, while Blue Bag 2 handles plastics, metals, and glass. Proper sorting reduces environmental impact and supports community sustainability.

Recycling Streams: Blue Bag 1 and Blue Bag 2

The PEI Waste Watch Schedule 2024 organizes recyclables into two streams: Blue Bag 1 and Blue Bag 2. Blue Bag 1 is designated for paper products such as newspapers, cardboard, and office paper. Blue Bag 2 is for plastics, metals, glass, and cartons. Items must be clean, dry, and properly sorted to ensure they are collected. Corrugated cardboard should be flattened and bundled, while bulky items like appliances must be dismantled. Residents are encouraged to use transparent bags for visibility and adhere to weight limits (50 lbs) and size restrictions (4 ft). Proper sorting helps maximize recycling efficiency and supports PEI’s environmental goals.

Compost Sorting Tips

Proper compost sorting is essential for effective waste management in PEI. Residents are encouraged to use compost carts for organic materials like food scraps, yard waste, and paper products. To minimize odors and pests, wrap meat, fish, and pet waste in paper before adding them to the compost cart. Sprinkle baking soda, coffee grounds, or hydrated lime to absorb moisture and reduce odors. Regularly cleaning the cart with water and detergent is also recommended. Store the cart in a shady area to slow decomposition and reduce pests. Proper sorting ensures materials are processed efficiently, contributing to PEI’s environmental goals and maintaining a clean community.

Proper Handling of Waste Materials

Proper handling of waste materials is crucial for efficient collection and environmental compliance; Ensure waste carts are used correctly, with lids secured to prevent spilling. Place compost, recyclables, and waste in their designated streams to avoid contamination. Keep materials clean and dry, as moisture can attract pests and cause odors. For bulky items, dismantle them into manageable pieces under 50 lbs and 4 ft in length. Avoid overfilling carts, as this can hinder collection. Always follow PEI’s sorting guidelines to ensure drivers can collect materials without issues. Proper handling not only aids in efficient pickup but also supports PEI’s goal of reducing landfill waste and promoting sustainable practices. Compliance helps maintain a cleaner, greener community for all residents.

Special Disposal Options

Special disposal options in PEI include bulky item collection, hazardous waste drop-off, and seasonal cleanup services. Ensure items like furniture and appliances are properly dismantled for collection, and hazardous materials are handled safely through designated facilities. Seasonal cleanups allow for additional waste disposal, with guidelines ensuring proper sorting and compliance with environmental regulations. These services help manage non-routine waste efficiently while promoting sustainability across the province. Always refer to the Waste Watch Schedule for specific dates and requirements to ensure correct disposal practices.

Bulky Item Collection and Dismantling Requirements

Bulky items, such as furniture and appliances, require special handling for collection. Residents must dismantle large items into smaller pieces, ensuring each part weighs less than 50 lbs and measures under 4 ft in length. Items like barbecues or bicycles should be disassembled, with components bundled together if possible. These materials must be placed curbside on your designated collection day. Additional containers or bags for bulky items must not exceed weight or size limits. Clear, rigid containers are preferred for manual handling by collection crews. Proper sorting and dismantling ensure safe and efficient pickup. Always refer to the Waste Watch Schedule for specific guidelines to avoid missed collections or additional fees.

Hazardous Waste Disposal Guidelines

Hazardous waste, such as batteries, tires, and electronics, must not be disposed of through regular curbside collection. These items require special handling to prevent environmental harm. Residents are encouraged to take hazardous materials to designated Waste Watch Drop-Off Centres across PEI. Ensure items are properly sorted and packaged to meet acceptance criteria. For example, boat shrink wrap is accepted free of charge if clean and dry, while contaminated materials are rejected. Proper disposal of hazardous waste is crucial to protect the environment and public health. Always check the Waste Watch Schedule or the IWMC website for a full list of accepted materials and guidelines to ensure compliance with provincial regulations.

Seasonal Cleanup Services and Rules

PEI offers seasonal cleanup services twice a year, allowing residents to dispose of items not collected during regular waste pickup. These services are divided into spring and fall cleanups, with specific rules to ensure proper disposal. Materials must be sorted into compost and waste categories, and items like bulky furniture or appliances must be dismantled. The 2024 Waste Watch Schedule provides exact dates and guidelines for these cleanups. Residents can also refer to the IWMC website for detailed instructions on preparing materials. Proper participation in these programs helps maintain community cleanliness and supports PEI’s environmental goals by ensuring waste is managed responsibly.

Tools and Resources for Waste Management

The Recycle Coach App and Interactive Sorting Guide help residents navigate waste management effortlessly. Additionally, the Address Information Tool provides personalized collection details, ensuring compliance and efficiency for all Islanders.

Recycle Coach App: Features and Benefits

The Recycle Coach App is a powerful tool designed to simplify waste management for PEI residents. It offers personalized collection schedules, allowing users to input their address and receive tailored pickup dates for waste, compost, and recycling. The app also features a waste sorting guide, providing clear instructions on how to properly sort materials. Users can set reminders for collection days, ensuring they never miss a pickup. Additionally, the app includes a searchable database of recyclable and compostable items, helping residents make informed decisions. By downloading the Recycle Coach App, Islanders can efficiently manage their waste, reduce contamination, and contribute to PEI’s environmental goals. This user-friendly resource is available for both iOS and Android devices, making it accessible to all residents.

Interactive Sorting Guide for Recyclables

The Interactive Sorting Guide is a valuable resource for PEI residents to ensure proper waste sorting. This tool helps users determine which materials belong in Blue Bag 1, Blue Bag 2, compost carts, or regular waste. By searching for specific items, residents can quickly identify appropriate disposal methods. For example, Blue Bag 1 is designated for paper products like newspapers and cardboard, while Blue Bag 2 accepts plastics, metals, and glass. The guide also provides tips on preparing materials, such as rinsing containers and flattening cardboard. This resource reduces contamination rates and ensures recyclables are processed correctly. Regular updates keep the guide aligned with the latest waste management policies, making it an essential tool for Islanders aiming to contribute to PEI’s environmental sustainability goals.

Address Information Tool for Collection Details

The Address Information Tool is a convenient feature on the IWMC website that provides residents with personalized collection details. By entering your street number and name, you can quickly access your specific waste, compost, and recycling schedule. The tool also helps confirm your collection zone and offers a detailed collection calendar. This resource ensures that Islanders can stay informed about their pickup days and prepare materials accordingly. The tool is easily accessible online and is updated regularly to reflect any changes in the Waste Watch Program. By using this tool, residents can avoid missed collections and stay compliant with PEI’s waste management requirements, contributing to a cleaner and more sustainable environment for everyone.

Frequently Asked Questions (FAQs)

Explore the FAQs section for answers to common questions about the PEI Waste Watch Schedule 2024. Learn about missed collections, excess waste options, and cart maintenance procedures to ensure smooth waste management practices.

Missed Collection: What to Do Next

If your waste, compost, or recycling is missed, contact the Island Waste Management Corporation (IWMC) Customer Service within two business days. Provide your name, address, and a daytime phone number. If reporting via email or after hours, ensure all details are included. Missed collections are typically addressed promptly. If materials were not out by 7:00 a.m., hold them until the next scheduled collection or self-haul to a Waste Watch Drop-Off Centre, where a fee may apply. Properly sorted materials are essential for collection, so check sorting guidelines before the next pickup. Visit the IWMC website or refer to the 2024 PEI Waste Watch Schedule PDF for more details.

Excess Waste Management Options

For households generating excess waste, the IWMC offers flexible solutions. Residents can place up to two additional containers or small bulky items beside their carts, ensuring they are properly sorted and within weight and size limits (50 lbs and 4 ft). Use open, rigid containers with handles for easy manual dumping. Paper bags are recommended for compostables, while clear bags should be used for waste. Materials must be sorted according to Waste Watch guidelines. During seasonal cleanups, the two-container limit is waived, but items must still meet size and weight requirements. Always check the 2024 PEI Waste Watch Schedule PDF for specific details on excess waste management and sorting criteria to ensure compliance and efficient collection.

Cart Maintenance and Replacement Process

The Island Waste Management Corporation (IWMC) owns and assigns waste carts to properties based on serial numbers. Residents must leave assigned carts at the property when moving. For new homes, allow two weeks for cart delivery. Carts are under warranty; contact IWMC for repairs or replacements. Do not paint, drill holes, or alter carts, as this voids the warranty. Securing carts with bungee cords is prohibited, as they pose safety risks and interfere with collection. Ensure lids close properly to prevent pests and odors. Regularly clean carts with water and detergent or vinegar. For damaged or missing carts, contact IWMC promptly to maintain efficient waste collection services and adhere to program guidelines.

Additional Tips for Effective Waste Management

Secure carts with rocks or bricks to prevent animal interference. Sprinkle repellents like cayenne pepper or baking soda to deter pests. Store carts in shady areas to reduce odors and maintain cleanliness for efficient collection.

Minimizing Odors and Pests in Compost Carts

To minimize odors and pests in compost carts, use boxboard or paper towels to line kitchen bins and contain scraps. Sprinkle baking soda, coffee grounds, or hydrated lime to absorb moisture and reduce odors. Wrap meat, fish, and pet waste in paper before adding to the cart. Store carts in shady areas to reduce heat and moisture buildup. Regularly wash carts with a garden hose and detergent or vinegar to maintain cleanliness. Keep lids closed tightly and avoid overfilling to prevent pests like raccoons and insects. These practices help ensure efficient collection and contribute to a cleaner, greener PEI.

Securing Carts to Prevent Animal Interference

Securing your waste and compost carts is essential to prevent animal interference. Use heavy objects like rocks or bricks to hold lids down, deterring raccoons and pests. Avoid using bungee cords, as they can injure workers or damage equipment. Keep carts in a visible location, such as the right side of your driveway, especially during snowy conditions. Ensure lids are tightly closed and avoid overfilling to prevent attractants. Regularly cleaning carts with detergent or vinegar and storing them in shady areas can also reduce odors and pests. Proper securing helps maintain neighborhood cleanliness and supports effective waste collection in PEI, aligning with the Waste Watch Program’s goals. Regular maintenance ensures your carts remain animal-proof and collection-ready.

Preparing for Collection Day: Best Practices

To ensure smooth collection, place carts and blue bags curbside by 7:00 a.m. on your designated day. Keep them visible, especially during snowy conditions, by positioning them on the right side of your driveway. Avoid placing materials on top of or behind snowbanks. Secure lids tightly to prevent animals from accessing contents. For windy days, stack heavier items like compost cart contents or bundled cardboard at the bottom. Properly sort waste, compost, and recyclables according to PEI Waste Watch guidelines. Handle excess materials by using approved containers or bags, ensuring they are sorted and within weight limits. Regularly cleaning carts and storing them in shaded areas can reduce odors and pests, ensuring efficient collection and maintaining neighborhood cleanliness. Proper preparation supports PEI’s environmental goals and keeps the community clean.

The 2024 PEI Waste Watch Schedule is a vital tool for organized and sustainable waste management. By adhering to its guidelines, residents contribute to PEI’s environmental goals and maintain a cleaner, greener community.

Staying Compliant with Waste Watch Regulations

Compliance with the PEI Waste Watch Schedule 2024 is essential for maintaining efficient waste management. Residents must adhere to the mandatory sorting system, separating waste into recyclables, compost, and landfill materials. Proper use of Blue Bag 1 and Blue Bag 2 is crucial, with clean, dry materials only. Collection days must be respected, and carts placed curbside by 7 a.m. Excess waste should follow guidelines, with no mixed materials. Failure to comply may result in missed collections or penalties. Understanding and following these regulations ensures a smoother process for both residents and collection crews, contributing to PEI’s environmental sustainability goals. Refer to the 2024 Waste Watch Schedule for detailed guidelines.

Contributing to PEI’s Environmental Goals

The PEI Waste Watch Schedule 2024 plays a vital role in supporting the province’s environmental objectives. By adhering to the program’s guidelines, residents help reduce landfill use, promote recycling, and enhance composting efforts. Proper sorting of materials ensures resources are efficiently reused, aligning with PEI’s commitment to sustainability. The program encourages community-wide participation, fostering a culture of environmental stewardship. Through initiatives like the Recycle Coach App and educational resources, Islanders gain the tools needed to make eco-friendly choices. By staying compliant and engaged, residents contribute to PEI’s vision of a greener future, preserving the province’s natural beauty for future generations.

Continue Reading

new york travel guide book

New York City is a vibrant metropolis known for its iconic landmarks, diverse neighborhoods, and endless cultural experiences; A must-visit destination for travelers worldwide, NYC offers unparalleled energy, world-class dining, and unforgettable entertainment, making it a city that never sleeps.

Why New York is a Must-Visit Destination

New York City captivates visitors with its iconic landmarks, vibrant culture, and diverse neighborhoods. From the bright lights of Times Square to the tranquility of Central Park, NYC offers unforgettable experiences. Explore world-class museums like the Met and MoMA, or stroll across the Brooklyn Bridge for stunning skyline views. The city’s dynamic energy, multicultural cuisine, and 24/7 lifestyle make it a destination unlike any other, ensuring endless adventure and inspiration for every traveler.

A Brief History of New York City

New York City’s rich history began as a colonial settlement in 1624, founded by the Dutch as New Amsterdam. In 1664, it was renamed New York after the Duke of York. The city grew rapidly, becoming a hub for trade and immigration. By the 19th century, NYC emerged as a global center for finance, culture, and innovation. Its iconic skyline and diverse neighborhoods reflect its evolution into the vibrant, cosmopolitan metropolis it is today, shaping America’s history and identity.

When to Visit New York

The best time to visit New York is autumn (September to November) and spring (April to June), offering mild weather and vibrant city experiences. Summers are warm, winters cool.

Best Time to Travel to New York

The ideal time to visit New York is during spring (April–June) and autumn (September–November), when mild temperatures and vibrant city life make exploration enjoyable. Summer offers warm weather, perfect for outdoor activities, while winter brings festive energy, especially around the holidays. Each season provides unique experiences, from blooming Central Park in spring to ice skating in winter. Plan your trip according to your preferences for weather, events, and crowd levels to maximize your NYC adventure.

Seasonal Events and Festivals

New York City hosts vibrant seasonal events year-round, offering unforgettable experiences. Spring brings the iconic Tribeca Film Festival and blooming cherry blossoms in Brooklyn. Summer highlights include the Macy’s Fourth of July Fireworks and outdoor concerts in Central Park. Autumn is marked by the Macy’s Thanksgiving Day Parade and the US Open Tennis Championships. Winter dazzles with the Rockefeller Center Christmas tree lighting and festive holiday markets. Each season offers unique cultural, artistic, and celebratory events that showcase the city’s diverse spirit.

Getting Around New York

New York’s transportation network includes the 24/7 subway system, iconic yellow taxis, ride-hailing apps, and walkable neighborhoods like Midtown, making navigation convenient and accessible for all visitors.

Navigating the NYC Subway System

The NYC subway operates 24/7, making it the most convenient way to explore the city. Use MetroCards or OMNY for payment, and download apps like Citymapper for route planning. Peak hours (7-9 AM, 4-7 PM) are busiest, so plan accordingly. Trains run frequently, but delays can occur. Local trains stop at every station, while express trains skip some, saving time. Maps are available at stations, and digital signs show real-time updates. Avoid rush hour for a smoother ride, and stay alert in crowded cars. The subway is efficient, but patience is key during busy times.

Taxi, Ride-Sharing, and Walking Tips

Taxis are iconic in NYC, with yellow cabs available on most corners. Ride-sharing apps like Uber and Lyft are equally popular and often more affordable. Tipping is customary for both services. For shorter trips, walking is a great way to explore neighborhoods like SoHo or Greenwich Village. Be mindful of pedestrian rules and avoid jaywalking. Comfortable shoes are essential for navigating the city’s sidewalks. During rush hours, taxis may be harder to hail, so plan accordingly. Using apps or hailings wisely can save time and money, especially in heavy traffic.

Where to Stay in New York

From iconic neighborhoods like Manhattan to budget-friendly options in Queens, NYC offers diverse accommodations. Choose luxury hotels, cozy boutiques, or affordable hostels based on your preferences.

Best Neighborhoods for Tourists

Midtown Manhattan is perfect for first-time visitors, offering proximity to iconic landmarks like Times Square and Central Park. SoHo and Greenwich Village provide a mix of trendy shops, art galleries, and charming eateries. Williamsburg, Brooklyn, is ideal for nightlife enthusiasts, with vibrant bars and stunning city views. The Upper East Side offers a quieter, residential feel with access to top museums. Each neighborhood caters to different preferences, ensuring a memorable stay in NYC.

Budget-Friendly Accommodation Options

Exploring affordable stays in NYC is possible with hostels and budget hotels. Jazz Hostel and Central Park Hostel offer dorms and private rooms at lower rates. Hotels like Pod Hotel Brooklyn and YOTEL New York provide compact, stylish rooms. Consider staying in outer boroughs like Queens or Brooklyn for cheaper options. Booking in advance and using travel guides can help find the best deals, ensuring a cost-effective yet comfortable experience in the city.

Luxury Hotels in NYC

New York City’s luxury hotels offer opulent accommodations and exceptional service. The Ritz-Carlton, The Plaza, and The Peninsula are top choices, featuring world-class amenities like rooftop bars, spas, and fine dining. These hotels provide stunning views of Central Park or the Manhattan skyline. With elegant interiors and unparalleled service, they cater to travelers seeking a luxurious experience. Booking through reputable travel guides ensures access to exclusive deals and insights into NYC’s high-end hospitality.

Iconic New York Landmarks

New York City is home to world-renowned landmarks like the Statue of Liberty, Central Park, and Times Square. These iconic spots symbolize the city’s rich history and vibrant culture, attracting millions of visitors annually.

Top Skyscrapers and Observation Decks

New York City’s skyline is dominated by iconic skyscrapers like the Empire State Building, One World Trade Center, and Rockefeller Center. These towering structures offer breathtaking views of the city from their observation decks, such as the Edge in Hudson Yards and the One World Observatory. Visitors flock to these heights to experience panoramic vistas, making them must-visit attractions for any traveler. Whether day or night, these spots provide unforgettable perspectives on the city’s bustling streets and majestic skyline.

Famous Museums and Galleries

New York City is home to some of the world’s most renowned museums and galleries. The Metropolitan Museum of Art, known as “The Met,” showcases a vast collection of art and artifacts spanning 5,000 years of history. The Museum of Modern Art (MoMA) is a haven for modern and contemporary masterpieces, while the Guggenheim Museum, designed by Frank Lloyd Wright, offers unique architectural and artistic experiences. These institutions, along with others like the American Museum of Natural History, are must-visit destinations for art and history enthusiasts.

Central Park and Other Green Spaces

Central Park, an 843-acre oasis in Manhattan, offers a tranquil escape from the city’s hustle. Visitors can stroll through landscaped gardens, rent a boat at Loeb Boathouse, or explore the Bethesda Terrace. Beyond Central Park, the High Line, built on an elevated rail line, provides a unique green space with city views. The Brooklyn Botanic Garden, featuring the iconic Cherry Watch and Shakespeare Garden, is another must-visit. These green spaces offer relaxation, nature, and cultural experiences, making them essential stops for any NYC traveler.

Dining in New York

New York City offers unparalleled culinary diversity, with iconic eateries, Michelin-starred restaurants, and global cuisines. From classic pizza joints to upscale dining, NYC is a food lover’s paradise.

Restaurant Recommendations by Cuisine

New York City offers a diverse culinary scene, catering to every palate. For Italian cuisine, try Carbone or L’Artusi. Craving Chinese? Jing Fong in Chinatown is a must. Sushi lovers will adore Sushi Yasu or Blue Ribbon Sushi. Mexican enthusiasts can explore Tacos El Gordo. Indian food fans should visit Dhaba or

Best Pizza Places in NYC

New York City is a pizza lover’s paradise, with iconic spots serving classic slices and gourmet pies. Lombardi’s, America’s first pizzeria, offers historic coal-fired Neapolitan-style pizza. For a classic New York slice, Joe’s Pizza is a must-visit. Prince Street Pizza is famed for its thick, cheesy squares; Lucali in Brooklyn offers an upscale Italian-inspired experience, while Roberta’s in Bushwick serves wood-fired pizzas with creative toppings. Don’t miss Di Fara Pizza for handcrafted, artisanal pies with fresh ingredients. Explore these legendary spots to taste NYC’s pizza excellence.

Famous New York Bagels and Delis

New York City is famous for its bagels and delis, offering authentic tastes of tradition. Katz’s Delicatessen, a historic spot, serves classic pastrami sandwiches and knishes. Carnegie Deli is another iconic eatery with hearty portions. For bagel lovers, Russ & Daughters Cafe offers creative bagel-centric dishes, while Ess-a-Bagel provides hand-rolled, chewy perfection. Don’t miss H&H Bagels, a traditional favorite. These spots capture the essence of NYC’s culinary heritage, offering a delicious journey through the city’s iconic food scene.

New York Nightlife

New York City offers a vibrant nightlife scene, featuring top bars, rooftop lounges, and exclusive clubs. Explore hidden speakeasies or dance the night away in trendy venues.

Top Bars and Rooftop Lounges

New York City is renowned for its dynamic nightlife, with top bars and rooftop lounges offering stunning views and crafted cocktails. 230 Fifth and The Roof at PUBLIC Hotel are favorites for their skyline vistas, while Westlight in Williamsburg and The Skylark in Midtown provide trendy, upscale environments. These spots blend innovative mixology with vibrant atmospheres, making them must-visit destinations for both locals and travelers. Explore the city’s best rooftop bars for unforgettable evenings with friends or a romantic setting to toast the night away in style.

Best Clubs for Dancing

New York City’s vibrant club scene offers unforgettable dancing experiences. Clubs like Marquee, Lavo, and Haus host world-class DJs, while places like Le Bain and Good Room feature cutting-edge music. These venues blend high-energy beats with stylish settings, attracting diverse crowds. From electronic dance music to hip-hop, NYC’s clubs cater to all tastes. Check entry requirements and arrive early to secure a spot in these iconic destinations, where the party lasts until dawn and the atmosphere is electric year-round.

Hidden Speakeasies in the City

New York City is home to a variety of hidden speakeasies that offer a unique and exclusive experience. Many of these secret bars are tucked away in unexpected locations, such as behind unmarked doors or inside restaurants. To gain entry, visitors often need a password or must find a discreet entrance. Once inside, these speakeasies provide an intimate atmosphere with expertly crafted cocktails and a vibe reminiscent of the Prohibition era. Popular spots like Please Don’t Tell and The Back Room are must-visits for those seeking a sophisticated, off-the-radar night out in NYC.

Arts and Culture in NYC

NYC is a global hub for arts and culture, featuring world-class museums, theaters, and galleries. From iconic institutions like MoMA to vibrant street art scenes, the city offers endless opportunities to explore creativity and history, ensuring a rich cultural experience for every visitor.

Broadway Shows and Theaters

New York City is renowned for its iconic Broadway shows, offering a diverse range of world-class musicals and plays. From classic productions like The Lion King to modern hits like Hamilton, Broadway theaters provide unforgettable entertainment. Theaters such as the Gershwin and Al Hirschfeld are landmarks in themselves, showcasing stunning architecture and history. Whether you’re a fan of drama, comedy, or musicals, NYC’s theater scene promises an extraordinary experience. Booking tickets in advance is highly recommended to secure seats for popular shows.

Live Music Venues

New York City pulses with live music, offering an array of legendary venues that cater to every genre. From the iconic Madison Square Garden and Radio City Music Hall to intimate spots like The Blue Note in Greenwich Village, there’s a stage for every sound. Rock, jazz, blues, and indie fans can explore historic sites like Carnegie Hall or discover emerging artists at Bowery Ballroom. The city’s dynamic music scene ensures that every night brings a new melody, making it a paradise for music lovers seeking unforgettable performances.

Art Districts and Street Art

New York City is a haven for art enthusiasts, with vibrant districts and street art that reflect its dynamic culture. The Bushwick Collective in Brooklyn showcases stunning murals by global artists, while the High Line features an elevated park with public art installations. Explore the diverse street art scene in SoHo and Harlem, where murals and graffiti tell stories of identity and creativity. Galleries in Chelsea and DUMBO offer a mix of contemporary and avant-garde works, making NYC a living canvas of artistic expression and inspiration for visitors.

Shopping in New York

New York offers iconic department stores like Macy’s and Bloomingdale’s, exclusive boutiques in SoHo, and vibrant markets like Smorgasburg for unique shopping experiences.

Top Department Stores

New York’s iconic department stores offer unparalleled shopping experiences. Macy’s, Bloomingdale’s, and Saks Fifth Avenue are landmarks, featuring everything from designer fashion to home goods. Nordstrom and Tiffany & Co. cater to luxury seekers, while smaller boutiques provide unique finds. These stores are perfect for both budget-friendly souvenirs and high-end purchases, making them must-visit destinations for any shopper in NYC. Their central locations and diverse offerings ensure there’s something for everyone.

Boutique Shopping in SoHo

SoHo, short for “South of Houston,” is a chic neighborhood renowned for its boutique shopping. Known for its cast-iron architecture and vibrant arts scene, SoHo offers a mix of high-end fashion, unique designs, and trendy stores. Shoppers can discover emerging designers, artisanal goods, and luxury brands in an intimate setting. The area is perfect for finding one-of-a-kind pieces and experiencing a personalized shopping experience. Its eclectic mix of styles and curated collections make it a must-visit for fashion enthusiasts and those seeking exclusive finds.

Best Markets for Souvenirs

New York City offers a variety of vibrant markets perfect for finding unique souvenirs. Smorgasburg in Brooklyn showcases local artisans with handmade goods, while the Union Square Greenmarket highlights crafts and regional products. Chelsea Market offers a mix of specialty shops and food stalls, and Hell’s Kitchen Flea Market features vintage finds. These markets provide a great way to discover authentic NYC culture and take home memorable keepsakes, from artwork to artisanal foods, reflecting the city’s diverse spirit and creativity.

Sports and Outdoor Activities

New York City offers exciting sports experiences, from Yankees and Mets games to outdoor activities like biking in Central Park or kayaking on the Hudson River.

Watching a Yankees or Mets Game

Catching a Yankees or Mets game is a quintessential NYC experience. Yankee Stadium in the Bronx and Citi Field in Queens offer electric atmospheres for baseball fans. Plan ahead to secure tickets, as games are popular. Arrive early to soak in the pre-game excitement and explore the stadiums’ amenities. Enjoy classic ballpark eats like hot dogs and Cracker Jack while cheering on the home team. Whether you’re a die-hard fan or a casual visitor, a baseball game in New York is an unforgettable experience.

Outdoor Activities in NYC Parks

New York City’s parks offer a variety of outdoor activities for all seasons. Central Park, Prospect Park, and High Line are top destinations for walking, jogging, and picnicking. Rent a bike to explore trails or enjoy a relaxing boat ride on Central Park’s lake. In winter, ice skating at Wollman Rink is a must. Green spaces like Brooklyn Bridge Park and Hudson River Park provide stunning city views and opportunities for kayaking or yoga. These parks are perfect for escaping the urban hustle and connecting with nature.

Day Trips from New York

Escape the city with day trips to the Hamptons for beaches and luxury or the Hudson Valley for historic sites and scenic natural beauty. Perfect getaways await.

Exploring the Hamptons

The Hamptons, a luxurious escape from NYC, offer stunning beaches, chic villages, and celebrity sightings. Visit Southampton for upscale shops, East Hampton for historic charm, and Montauk for breathtaking coastal views. Enjoy fine dining, art galleries, and outdoor activities like hiking and biking. Relax at iconic beaches or explore the vibrant nightlife. A perfect day trip for both relaxation and adventure, the Hamptons provide a unique blend of natural beauty and sophistication.

  • Must-see spots: Southampton, East Hampton, Montauk, and Sag Harbor.
  • Activities: Beach relaxation, village strolls, fine dining, and outdoor adventures.

Visiting the Hudson Valley

The Hudson Valley, just north of NYC, is a haven for nature lovers and history enthusiasts. Explore the scenic Hudson River, charming towns like Sleepy Hollow, and historic sites like the Vanderbilt Mansion. Enjoy fall foliage, farm-to-table dining, and outdoor activities like hiking and kayaking. Discover art at Storm King Sculpture Garden or visit wineries for a taste of local culture. The Hudson Valley offers a peaceful retreat with rich history and natural beauty, perfect for a day trip or weekend getaway.

  • Must-visit spots: Sleepy Hollow, Vanderbilt Mansion, and Storm King Art Center.
  • Activities: Hiking, kayaking, wine tasting, and exploring historic sites.

Safety Tips for Travelers

New York City is generally safe, but stay alert in crowded areas. Keep valuables secure, avoid walking alone late at night, and use licensed taxis or rideshares.

Staying Safe in NYC Neighborhoods

While New York City is generally safe, awareness of your surroundings is key. Popular areas like Times Square and Central Park are heavily patrolled, but petty crimes can occur. Avoid displaying valuables and keep belongings secure in crowded spots. Be cautious in less touristy neighborhoods at night and use reputable transportation services. Trust your instincts and avoid walking alone in poorly lit areas. Follow local advice and stay informed about current conditions to ensure a safe and enjoyable visit.

  • Avoid carrying large amounts of cash.
  • Use licensed taxis or rideshares.
  • Stay alert in crowded subway cars.

Emergency Contacts and Services

In case of an emergency, dial 911 for immediate assistance. For non-urgent situations, contact the NYPD at 311. NYC offers comprehensive emergency services, including fire, police, and ambulance. Hospitals like Bellevue and NYU Langone provide 24/7 care. Additionally, the city has a poison control hotline at 1-800-222-1222. Carry a list of important contacts and know the nearest medical facilities. Stay prepared with a travel insurance plan that covers emergencies.

  • 911: Emergency services
  • 311: Non-emergency city services
  • Poison control: 1-800-222-1222

Budget Travel in NYC

Explore iconic attractions like Central Park and The High Line for free. Enjoy affordable eats at classic pizzerias and delis. Plan ahead to save on tickets and transport.

  • Free attractions: Central Park, Brooklyn Bridge, museums on select days
  • Affordable dining: Slice pizza, hot dogs, and bagels

Free Attractions and Activities

New York City offers a wealth of free attractions and activities for budget-conscious travelers. Explore iconic spots like Central Park, the High Line, and the Brooklyn Bridge without spending a dime. Visit the Metropolitan Museum of Art, the American Museum of Natural History, and other major museums on designated free admission days. Stroll through vibrant neighborhoods like Greenwich Village, Chinatown, and Williamsburg to soak in the city’s diverse culture. Don’t miss the stunning views of the Manhattan skyline from Brooklyn’s DUMBO district or the East River waterfront.

  • Central Park
  • Brooklyn Bridge
  • High Line
  • Museum free days

Saving Money on Food and Transport

Exploring New York City doesn’t have to break the bank. Opt for affordable dining options like classic New York pizza slices, bagels, or deli sandwiches. Use the NYC Subway System for cost-effective travel—buy a MetroCard for discounted fares. Walking is also a great way to save money while discovering neighborhoods. Consider eating at local eateries or food trucks instead of pricey restaurants. Plan meals during happy hours or look for early bird specials to save even more.

  • Affordable eats: pizza, bagels, delis
  • Subway and MetroCard savings
  • Walking tours
  • Happy hour deals

Best Travel Guidebooks for NYC

Top-rated guidebooks like Lonely Planet, Rough Guides, and Not For Tourists offer detailed itineraries, insider tips, and maps, available on Amazon for a perfect NYC planning experience.

Top-Rated Guidebooks for New York

Discover the best guidebooks for NYC, including Lonely Planet New York City, Rough Guides New York City, and Not For Tourists (NFT). These books offer detailed itineraries, insider tips, and maps. Available on Amazon, they provide expert recommendations for dining, attractions, and hidden gems. The New York Times and CNN endorse these guides for their comprehensive coverage. Perfect for first-time visitors or locals, they ensure an unforgettable NYC experience with up-to-date information and practical advice.

Recommended Maps and Pocket Guides

For navigating NYC efficiently, consider the Lonely Planet New York City Pocket Guide or Rizzoli Bookstore’s NYC Maps. These compact resources offer detailed neighborhood layouts, transit routes, and key attractions. The Official I LOVE NY Travel Guide is another excellent option, providing insights into hidden gems and local favorites. Available at Daunt Books or online, these maps and guides are perfect for short trips, ensuring you explore the city like a pro with up-to-date information and practical tips for every traveler.

With the right guidebook, your NYC adventure will be unforgettable. From Lonely Planet to the Official I LOVE NY Guide, these resources ensure a seamless and enriching experience in the city that never sleeps.

Final Tips for an Unforgettable Trip

Plan ahead with an NYC travel guidebook to uncover insider tips and itineraries. Explore iconic landmarks, Broadway shows, and hidden gems for a unique experience. Navigate the subway efficiently, stay flexible, and embrace spontaneity. Prioritize safety by staying informed and aware of surroundings. Lastly, download the official I LOVE NY Guide for inspiration and local insights to make your trip truly unforgettable in the city that never sleeps.

Continue Reading

preschool lesson plans pdf

Discover the convenience of structured learning with preschool lesson plans in PDF format. These downloadable templates offer organized schedules‚ engaging activities‚ and creative ideas for early childhood education. Perfect for teachers and homeschoolers‚ they provide a flexible framework to foster young learners’ cognitive‚ social‚ and emotional growth effectively.

Overview of Preschool Lesson Plans

Preschool lesson plans are structured guides that outline daily or weekly activities for young learners. They typically include themes‚ learning objectives‚ and engaging tasks tailored to promote cognitive‚ social‚ and emotional development. These plans often feature interactive games‚ crafts‚ storytelling‚ and hands-on experiences to captivate children’s curiosity. Many lesson plans are designed to be flexible‚ accommodating different age groups and learning styles. They also incorporate play-based learning‚ recognizing the importance of fun in early education. Whether focused on math‚ art‚ or science‚ preschool lesson plans aim to create a balanced and enriching learning environment. Teachers can customize these plans to meet specific classroom needs‚ ensuring each child’s unique abilities and interests are addressed. Assessment methods are also included to track progress and adapt instruction effectively.

Importance of Structured Lesson Plans for Preschoolers

Structured lesson plans are essential for preschoolers‚ providing a clear framework for learning and development. They ensure consistency and organization‚ helping teachers deliver engaging and age-appropriate activities. These plans promote skill development across various domains‚ including literacy‚ numeracy‚ and social skills. By setting specific goals‚ structured lesson plans guide children toward achieving foundational knowledge and abilities. They also support teachers in managing classroom time effectively‚ ensuring a balance of play and instruction. Additionally‚ structured plans help identify individual progress‚ allowing for tailored support and enrichment. This organized approach fosters a nurturing environment where children can thrive academically and socially‚ laying a strong foundation for future success. Effective lesson plans are key to maximizing preschoolers’ potential and preparing them for lifelong learning.

Benefits of Using PDF Formats for Lesson Plans

Using PDF formats for preschool lesson plans offers numerous advantages. PDFs are universally compatible‚ ensuring accessibility across all devices and platforms. They maintain consistent formatting‚ preserving the structure and layout of lesson plans. PDFs are also easily downloadable and printable‚ making them convenient for teachers to use in the classroom. Additionally‚ they can be shared effortlessly via email or cloud storage‚ facilitating collaboration among educators. PDF lesson plans often include interactive elements like fillable fields‚ allowing for personalization. Their compact file size ensures quick downloads‚ and they remain unchanged when shared‚ preventing accidental edits. Overall‚ PDFs provide a reliable‚ efficient‚ and visually consistent way to organize and distribute preschool lesson plans‚ enhancing teaching preparation and delivery.

Key Components of a Preschool Lesson Plan

A well-structured preschool lesson plan includes learning objectives‚ materials‚ activity timelines‚ assessment methods‚ and engaging activities. It ensures a balanced approach to cognitive‚ social‚ and emotional development.

Learning Objectives and Goals

Learning objectives and goals form the foundation of an effective preschool lesson plan. They define what children should achieve‚ ensuring activities are purposeful and aligned with developmental milestones. Clear objectives guide teachers in preparing engaging tasks that promote cognitive‚ social‚ and emotional growth. For example‚ a math objective might focus on number recognition‚ while a social goal could emphasize cooperation. These targets help measure progress and ensure a balanced curriculum. By setting specific‚ achievable goals‚ educators create a structured yet flexible learning environment that fosters a love for discovery and prepares children for future academic success. Well-defined objectives also enable parents to understand and support their child’s development;

Materials and Resources Needed

Preschool lesson plans require a variety of materials to ensure engaging and effective learning experiences. Essential resources include age-appropriate toys‚ educational tools‚ and activity-specific supplies. For example‚ art projects may need crayons‚ paints‚ and paper‚ while math activities might require counting blocks or number charts. Storytime often involves picture books‚ puppets‚ or audiovisual aids. Additionally‚ printable worksheets and activity guides from PDF lesson plans provide structured tasks for skill development. Organizing these materials in advance ensures smooth execution of the lesson. Access to digital tools‚ like educational apps or interactive whiteboards‚ can also enhance learning. Having all necessary resources readily available helps create a productive and enjoyable environment for young learners to explore and grow.

Activity Timeline and Schedule

A well-structured activity timeline and schedule are crucial for effective preschool lesson plans. These plans typically outline daily or weekly routines‚ breaking down activities into manageable time blocks. For example‚ a morning schedule might include circle time‚ snack breaks‚ outdoor play‚ and themed activities. PDF lesson plans often provide detailed timelines‚ ensuring a smooth transition between tasks. This structure helps maintain focus and engagement among young learners. Additionally‚ flexible scheduling allows for adjustments based on the class’s pace and interests. Including visual timers or activity charts can also support children in understanding the flow of the day. A clear timeline ensures that all learning objectives are met while fostering a sense of predictability and routine.

Assessment and Evaluation Methods

Effective preschool lesson plans incorporate assessment and evaluation methods to track children’s progress. These may include observations‚ checklists‚ and portfolios to document developmental milestones. PDF lesson plans often provide templates for recording notes on social‚ emotional‚ and cognitive growth. Interactive activities and group participation are also assessed to gauge understanding. Teachers use these tools to identify areas where children may need additional support. Assessments are shared with parents to ensure a collaborative approach to learning. By integrating evaluation into daily routines‚ educators can refine their teaching strategies and ensure alignment with learning objectives. These methods help create a comprehensive understanding of each child’s development‚ fostering a supportive and inclusive learning environment. Regular assessments guide future lesson planning and enrichment activities.

Popular Types of Preschool Lesson Plans

Thematic‚ alphabet‚ math‚ science‚ and art-based lesson plans are widely used‚ offering engaging and structured activities tailored to young learners’ developmental needs and interests.

Thematic Lesson Plans

Thematic lesson plans are a popular choice for preschool educators‚ offering a cohesive and engaging approach to learning. These plans revolve around a central theme‚ such as colors‚ animals‚ or seasons‚ allowing children to explore related concepts across multiple subjects. Activities are carefully designed to align with learning objectives‚ fostering curiosity and creativity. For example‚ a “Farm Animals” theme might include storytelling‚ art projects‚ and sensory play‚ all tied to developmental goals. Many free PDF templates and resources are available online‚ providing structured yet flexible frameworks for teachers. Thematic plans also encourage cross-curricular connections‚ making learning fun and meaningful for young students. They are adaptable to different age groups and learning styles‚ ensuring inclusivity and engagement in the classroom.

Alphabet and Phonics Lesson Plans

Alphabet and phonics lesson plans are essential for introducing young learners to the foundations of reading and language. These plans typically include activities such as letter tracing‚ sound recognition‚ and word building‚ designed to make learning engaging and interactive. Many free PDF templates are available online‚ offering structured yet adaptable frameworks for teaching the alphabet. Activities often incorporate games‚ songs‚ and hands-on exercises to cater to different learning styles. These lesson plans are tailored to help preschoolers recognize and memorize letters‚ understand phonetic sounds‚ and develop early reading skills. They also include printable worksheets‚ flashcards‚ and rhymes to reinforce learning. By using these resources‚ educators can create a fun and effective pathway for children to master the basics of literacy. These plans are a valuable tool for fostering a strong foundation in reading and vocabulary development.

Math and Number Recognition Lesson Plans

Math and number recognition lesson plans are designed to introduce preschoolers to basic numerical concepts through playful and engaging activities. These plans often include counting exercises‚ shape recognition‚ and simple arithmetic games. Activities like sorting objects‚ matching numbers‚ and using manipulatives help children develop foundational math skills. Many free PDF templates offer structured yet adaptable frameworks for teaching numbers and basic math. These plans also incorporate real-world applications‚ such as counting fruits or vegetables‚ to make learning relatable. Interactive worksheets‚ number tracing exercises‚ and group activities are common features. By focusing on hands-on learning‚ these lesson plans help preschoolers build problem-solving skills and a strong understanding of numbers and math concepts from an early age.

Science and Nature-Based Lesson Plans

Science and nature-based lesson plans for preschoolers foster curiosity and exploration through hands-on activities. These plans often include themes like gardening‚ seasons‚ and animal habitats‚ encouraging children to interact with their environment. Activities such as planting seeds‚ observing insects‚ and creating nature-themed crafts help develop scientific inquiry skills. Many PDF templates offer structured yet flexible frameworks for teaching science concepts in an engaging way. These plans also incorporate sensory experiences‚ such as sorting natural materials or conducting simple experiments‚ to make learning interactive. By connecting classroom activities to the outdoors‚ these lesson plans help preschoolers build a foundation for understanding the natural world while promoting creativity and critical thinking skills at an early age.

Art and Craft Lesson Plans

Art and craft lesson plans are essential for fostering creativity and fine motor skills in preschoolers. These plans typically include activities like painting‚ drawing‚ collage-making‚ and crafting with various materials. Many PDF templates offer step-by-step guides for projects aligned with themes or learning objectives. For example‚ seasonal crafts or projects tied to alphabet letters can reinforce other areas of learning. These plans also encourage self-expression and imagination‚ allowing children to explore different textures‚ colors‚ and techniques. With easy-to-follow instructions and material lists‚ teachers can prepare engaging art sessions that cater to diverse skill levels. Art and craft activities not only develop creativity but also build confidence and patience in young learners‚ making them a valuable part of preschool education.

Where to Find Free Preschool Lesson Plan Templates

Find free preschool lesson plan templates on educational websites‚ teacher blogs‚ and platforms offering downloadable PDFs. Many sites provide editable templates for customization and ease of use.

Websites Offering Free PDF Downloads

Several websites provide free preschool lesson plan templates in PDF format‚ making it easy for educators to access and print them. Popular platforms like LessonPlans.com‚ Education.com‚ and Teachers Pay Teachers offer a wide variety of downloadable templates. These websites cater to different teaching styles and include daily‚ thematic‚ and subject-specific plans. Many templates are customizable‚ allowing teachers to adapt activities to their classroom needs. Additionally‚ some sites offer bonus resources like activity calendars‚ printable worksheets‚ and professional development tools. These PDF downloads are ideal for organizing lessons‚ saving time‚ and ensuring engaging learning experiences for young students. They are easily accessible and often free of charge‚ making them a valuable resource for preschool educators.

Editable Lesson Plan Templates

Editable preschool lesson plan templates offer flexibility for teachers to customize activities according to their classroom needs. Available on platforms like Teachers Pay Teachers and Education.com‚ these templates allow educators to personalize learning objectives‚ timelines‚ and materials. Many are designed in Word or Google Docs format‚ enabling easy modifications. Teachers can tailor activities to suit different age groups or learning styles‚ ensuring engaging and developmentally appropriate experiences. These templates often include placeholders for adding specific themes‚ assessments‚ and extensions. By providing a structured yet adaptable framework‚ editable lesson plans save time and help educators deliver effective‚ organized instruction. They are a valuable tool for creating dynamic and impactful preschool curricula.

Subscription-Based Resources

Subscription-based platforms like Education.com and Teachers Pay Teachers provide premium access to a wide range of preschool lesson plans in PDF format. These resources often include customizable templates‚ thematic units‚ and detailed activity guides tailored for various age groups. Subscribers benefit from exclusive content‚ such as interactive worksheets‚ assessment tools‚ and educational games. Many platforms update their libraries regularly‚ ensuring fresh and relevant materials. While free templates are available‚ subscription services offer enhanced convenience and quality‚ making them a popular choice for busy educators seeking comprehensive and organized lesson planning solutions. These resources are ideal for teachers aiming to deliver engaging and structured learning experiences.

How to Create Effective Preschool Lesson Plans

Design engaging lesson plans with structured schedules‚ interactive activities‚ and hands-on learning. Incorporate visual aids and flexibility to adapt to diverse learning paces and developmental stages effectively.

Aligning Activities with Learning Goals

Aligning activities with learning goals ensures a purposeful and focused approach to preschool education. Begin by defining clear‚ age-appropriate objectives that address cognitive‚ social‚ and emotional development. Match activities to these goals‚ ensuring they are engaging and relevant. For example‚ alphabet recognition can be taught through storytelling and crafts‚ while number sense can be developed using counting games. Use thematic lesson plans to integrate multiple skills‚ such as combining art and math in a shape-sorting activity. Regularly assess progress to refine activities and maintain alignment with learning targets. This intentional planning fosters meaningful learning experiences‚ helping children achieve foundational skills and build a strong educational base. Consistency and clarity in goal alignment are key to effective preschool instruction.

Incorporating Play-Based Learning

Incorporating play-based learning into preschool lesson plans enhances children’s natural curiosity and creativity. Play serves as a powerful tool for skill development‚ allowing kids to explore‚ experiment‚ and learn at their own pace. Activities like role-playing‚ puzzles‚ and art projects encourage problem-solving‚ critical thinking‚ and collaboration. Thematic lesson plans often integrate play seamlessly‚ such as using pretend stores to teach math or outdoor games to promote physical fitness. By embedding learning objectives within playful experiences‚ educators create engaging and meaningful opportunities for growth. Play-based learning fosters a love for exploration and discovery‚ making it an essential component of effective preschool instruction. It also helps children develop social skills‚ emotional resilience‚ and a strong foundation for future academic success. Adapting play to suit different learning styles ensures inclusivity and fun for all learners.

Adapting Plans for Different Age Groups

Preschool lesson plans must be tailored to meet the unique needs of different age groups‚ ensuring activities are developmentally appropriate. For infants‚ plans focus on sensory exploration and motor skills‚ while toddlers benefit from play-based learning with simple‚ repetitive tasks. Preschoolers (3-4 years) engage in more structured activities that introduce basic concepts like colors‚ shapes‚ and numbers. Pre-kindergarten plans (4-5 years) build on these skills‚ preparing children for formal education. By adapting lesson plans to each age group‚ educators can foster individual growth and curiosity. Flexible PDF templates allow teachers to customize activities‚ ensuring each child is challenged and supported according to their developmental stage. This approach promotes a nurturing and inclusive learning environment for all ages.

Tips for Implementing Preschool Lesson Plans

Stay organized by preparing materials in advance and using interactive activities to keep children engaged. Be flexible and ready to adapt plans based on class needs.

Organizing Materials and Supplies

Effective organization of materials and supplies is crucial for smooth lesson execution. Use labeled storage bins and shelves to categorize toys‚ art supplies‚ and educational tools.
Place frequently used items within easy reach to save time during activities. Create a checklist to ensure all necessary materials are prepared in advance;
For themed lessons‚ organize supplies into designated kits or baskets to streamline setup. Digital tools like PDF templates can help track inventory and plan supply needs efficiently.
A well-organized classroom environment not only enhances productivity but also encourages a calm and focused learning atmosphere for young students.

Engaging Children with Interactive Activities

Interactive activities are essential for capturing young learners’ attention and fostering their development. Incorporate hands-on tasks like art projects‚ science experiments‚ and role-playing to encourage participation.
Use music‚ movement‚ and storytelling to create dynamic learning experiences. Group games and collaborative puzzles promote teamwork and problem-solving skills.
Integrate sensory play‚ such as finger painting or sorting objects‚ to stimulate creativity and fine motor skills. Digital tools‚ like interactive PDFs‚ can also offer engaging content.
By incorporating these activities‚ preschool lesson plans become more enjoyable and effective‚ ensuring children stay motivated and curious throughout the day.

  • Art projects to express creativity
  • Science experiments for hands-on learning
  • Music and movement activities
  • Group games and puzzles
  • Sensory play for exploration

Flexibility in Lesson Plan Execution

Flexibility is crucial when executing preschool lesson plans‚ as it allows teachers to adapt activities based on children’s responses and needs.
Be prepared to adjust timelines‚ modify tasks‚ or introduce new ideas to keep the learning process engaging.
Editable PDF templates enable easy customization‚ ensuring plans remain relevant and effective.
Encourage spontaneous discussions or hands-on explorations if they align with learning goals.
Remaining adaptable helps create a dynamic and responsive learning environment‚ fostering children’s natural curiosity and enthusiasm.

  • Adjust activities based on student engagement
  • Modify timelines to accommodate learning pace
  • Use editable templates for customization
  • Encourage spontaneous learning moments

Additional Resources for Preschool Teachers

Enhance your teaching with free printable worksheets‚ theme-based curriculum guides‚ and professional development tools. These resources support creative lesson planning and provide engaging activities for young learners.

  • Free printable worksheets for math and English
  • Theme-based curriculum guides for structured planning
  • Professional development tools for educators

Free Printable Worksheets and Activities

Engage your preschoolers with a variety of free printable worksheets and activities designed to promote learning and creativity. These resources cover essential skills like alphabet recognition‚ number tracing‚ and fine motor development. Themes such as colors‚ shapes‚ and nature are incorporated to make learning fun. Many websites offer downloadable PDFs that can be easily printed and used in the classroom or at home. These activities are perfect for reinforcing lesson plans and provide a hands-on approach to education. With a wide range of topics available‚ teachers and parents can find the perfect materials to suit their teaching needs and keep young minds actively learning.

Theme-Based Curriculum Guides

Theme-based curriculum guides provide a structured approach to preschool education‚ organizing activities and lessons around engaging topics. These guides often cover themes like seasons‚ animals‚ or community helpers‚ offering a cohesive learning experience. They include activity suggestions‚ learning objectives‚ and practical tips for implementation. Many guides are available in downloadable PDF formats‚ making them easily accessible. Teachers can customize these resources to fit their classroom needs‚ ensuring a balanced approach to learning. By focusing on specific themes‚ these guides help preschoolers connect new skills and knowledge‚ fostering a deeper understanding of the world around them while keeping lessons fun and interactive.

Professional Development Tools

Professional development tools are essential resources for preschool teachers aiming to enhance their teaching skills and create effective lesson plans. These tools often include workshops‚ webinars‚ and downloadable guides that focus on early childhood education strategies. Many websites offer free PDF resources‚ such as training manuals and curriculum-aligned templates‚ to help teachers design engaging and developmentally appropriate activities. These tools also provide tips on classroom management‚ play-based learning‚ and incorporating diverse learning styles. By utilizing these resources‚ educators can refine their approach to teaching‚ ensuring they meet the needs of their students while staying updated on best practices in preschool education. Such tools are invaluable for both new and experienced teachers seeking to improve their instructional methods and classroom effectiveness;

Continue Reading

red baron french bread pizza oven instructions

Welcome to the guide for cooking Red Baron French Bread Pizza! This easy-to-follow instructions ensure a crispy crust and flavorful toppings every time using your conventional oven.

Overview of Red Baron French Bread Pizza

Red Baron French Bread Pizza is a convenient and delicious meal option that combines the crispy texture of French bread with the savory flavors of traditional pizza. Made with high-quality ingredients, it offers a satisfying snack or light meal. The pizza features a sturdy French bread base topped with rich sauce, melted cheese, and various toppings such as pepperoni or sausage. Its compact size makes it ideal for individual servings, and it’s easy to customize with additional toppings. Perfect for busy households, Red Baron French Bread Pizza is a crowd-pleaser that blends simplicity with flavor.

Importance of Proper Cooking Instructions

Proper cooking instructions are crucial for achieving the best results when preparing Red Baron French Bread Pizza. Following the recommended oven temperature and baking time ensures the crust is crispy, the cheese is melted to perfection, and the toppings are heated through evenly. Deviating from the instructions can lead to undercooked or overcooked pizza, affecting both texture and flavor. Additionally, adhering to the guidelines helps maintain food safety by ensuring the pizza reaches a safe internal temperature. By following the steps carefully, you can enjoy a delicious, restaurant-quality meal right at home with minimal effort and maximum satisfaction.

Essential Components for Cooking Red Baron French Bread Pizza

The key components include a preheated oven, a baking sheet, and the pizza itself, removed from packaging. Ensure proper tools and temperature for optimal results.

Ingredients and Tools Needed

To prepare Red Baron French Bread Pizza, you’ll need the frozen pizza, a conventional oven, and a baking sheet. The pizza comes pre-topped, so no additional ingredients are required unless you prefer extra toppings. Essential tools include an oven preheated to 375°F (or 400°F for a toaster oven) and a microwave for optional combination cooking. Ensure you have a baking sheet for placement and a timer for accurate cooking. No extra utensils are needed beyond standard kitchen items. Keep the pizza frozen until cooking to maintain quality and texture.

Oven Requirements and Preheating

Preheat your conventional oven to 375°F (or 400°F for a toaster oven) before cooking Red Baron French Bread Pizza. Proper preheating ensures even cooking and a crispy crust. Place the pizza on a baking sheet to prevent sticking and promote airflow. For toaster ovens, adjust the temperature slightly higher due to their smaller size. Always preheat the oven fully before placing the pizza inside. This step is crucial for achieving the best results. A preheated oven guarantees the pizza cooks evenly and reaches the desired internal temperature of 160°F for food safety.

Detailed Oven Instructions

Preheat the oven to 375°F. Place the pizza on a baking sheet, bake for 20-23 minutes, and let it stand for 2-3 minutes before serving.

Preheating the Oven to the Correct Temperature

Preheat your conventional oven to 375°F (or 400°F for a toaster oven) before baking. Ensure the oven reaches the desired temperature for even cooking. This step is crucial for achieving a crispy crust and properly melting the cheese. Proper preheating guarantees the pizza cooks consistently and avoids undercooking or burning. Always allow the oven to preheat for at least 10-15 minutes before placing the pizza inside. This ensures accurate temperature control and optimal results when baking Red Baron French Bread Pizza.

Removing Pizza from Packaging

Carefully remove the Red Baron French Bread Pizza from its packaging to ensure proper cooking. Start by taking the pizza out of the outer carton or box. Next, remove the plastic wrap or packaging material covering the pizza. This step is essential to allow the pizza to cook evenly and prevent any packaging materials from melting or interfering with the cooking process. Once the pizza is free from packaging, it is ready to be placed on a baking sheet for oven cooking. Properly removing the packaging ensures a safe and effective cooking experience.

Placing Pizza on a Baking Sheet

After removing the pizza from its packaging, place it on a baking sheet lined with parchment paper for easy cleanup. Ensure the pizza is centered and spaced evenly to allow proper air circulation. For multiple pizzas, leave at least 2 inches between them to prevent overcrowding. This step ensures even cooking and helps achieve a crispy crust. Gently flatten the pizza if necessary to maintain its shape. Proper placement on the baking sheet is crucial for consistent cooking results. Always follow the recommended arrangement to avoid uneven heating and ensure the best flavor.

Baking Time and Temperature Guidelines

Preheat your oven to 375°F and bake the Red Baron French Bread Pizza for 20-23 minutes, or until the cheese is melted and bubbly. For a toaster oven, set the temperature to 400°F and bake for 15-18 minutes. Ensure the pizza is placed on the middle rack to avoid burning. The crust should be golden brown, and the toppings should be heated through. Keep an eye on the pizza during the last few minutes to prevent overcooking. Let it stand for a few minutes before serving to allow the cheese to set. Always follow the recommended times for the best results.

Microwave and Oven Combination Method

For a quick method, microwave the pizza for 30 seconds to 1 minute, then transfer to a preheated 375°F oven for an additional 3-4 minutes to crisp the crust.

Microwave Cooking Step

Start by microwaving the Red Baron French Bread Pizza for 30 seconds to 1 minute at 1100 Watts. This step helps soften the bread and melt the cheese slightly. Ensure the pizza is placed on a microwave-safe plate to avoid damage. After microwaving, carefully remove the pizza and check its condition. If needed, adjust the time to prevent overheating. For food safety, verify the internal temperature reaches 160°F before proceeding. Let it stand for 1-2 minutes to allow even heating. This method is ideal for a quick start before finishing in the oven for a crisper crust.

Transferring to the Oven for Final Cooking

After microwaving, carefully transfer the Red Baron French Bread Pizza to a preheated conventional oven at 425°F. Place the pizza on a baking sheet to ensure even cooking. Position it in the middle rack for optimal results. Bake for an additional 7-9 minutes to achieve a crispy crust and fully melted cheese. Keep an eye on the pizza to avoid overcooking. Once the crust is golden brown and the cheese is bubbly, remove it from the oven. Let it stand for 2-3 minutes before slicing. For extra crispiness, consider using a convection oven if available.

Timing Adjustments for Combination Cooking

When using the microwave and oven combination method, adjust cooking times based on personal preference and pizza quantity. Microwave the pizza for 30 seconds to 1 minute for one pizza or 1-2 minutes for two pizzas. Then, transfer to a preheated oven at 425°F and bake for 7-10 minutes, or until the crust is golden and cheese is bubbly. For crisper results, extend oven time by 1-2 minutes. Monitor closely to avoid overcooking; Adjust timings slightly if using a convection oven, as cooking may be faster. Let the pizza stand for 2-3 minutes before serving.

Toaster Oven Instructions

Preheat the toaster oven to 400°F. Place the pizza directly on the oven rack. Cook for 15-18 minutes, or until the crust is golden and cheese is bubbly.

Temperature Adjustments for Toaster Ovens

For Red Baron French Bread Pizza, preheat your toaster oven to 400°F, which is slightly higher than a conventional oven. This ensures a crispy crust and well-cooked toppings. Place the pizza directly on the oven rack and bake for 15-18 minutes, or until the crust is golden and the cheese is bubbly. Keep an eye on the pizza during the last few minutes to avoid overcooking. The higher temperature in a toaster oven helps achieve the perfect texture faster, making it ideal for this smaller cooking space. Always preheat before placing the pizza inside for even cooking.

Cooking Time in a Toaster Oven

When using a toaster oven for Red Baron French Bread Pizza, preheat to 400°F. Place the pizza directly on the oven rack and bake for 15-18 minutes. The crust will be golden, and the cheese will be bubbly. Keep an eye on the pizza during the last few minutes to prevent overcooking. The smaller size of a toaster oven allows for faster cooking, so monitor closely. Ensure the pizza is heated through and the crust is crispy before removing. This method delivers a perfectly cooked pizza with a crispy crust and flavorful toppings in less time than a conventional oven.

Advanced Cooking Tips

For a crisper crust, use a convection oven or broil for the last few minutes. Customize toppings before baking for added flavor and texture.

Using a Convection Oven for Crispier Crust

For a crisper crust, preheat your convection oven to 400°F (200°C). Place the pizza on a baking sheet lined with parchment paper. Bake for 10-12 minutes, or until the crust is golden and the cheese is bubbly. The convection setting enhances air circulation, ensuring a crunchier texture. Position the pizza on the middle rack to avoid uneven cooking. After baking, let it cool for 2-3 minutes before slicing. This method delivers a crispy crust and perfectly melted toppings for an elevated pizza experience.

Broiling for Extra Crispiness

To achieve an extra crispy crust, preheat your oven to 400°F (200°C) and set the broiler to high. Place the pizza on a baking sheet lined with parchment paper. Broil for 2-3 minutes, watching closely to prevent burning. The direct heat caramelizes the cheese and crisps the crust. After broiling, remove the pizza and let it cool for 1-2 minutes. This method adds a smoky flavor and texture, making it ideal for those who prefer a crunchier crust. Always keep an eye on the pizza while broiling to ensure perfect results.

Customizing Toppings Before Baking

Enhance your Red Baron French Bread Pizza by adding your favorite toppings before baking. Sprinkle extra cheese, pepperoni, or fresh herbs like basil or oregano for added flavor. For a gourmet touch, drizzle with olive oil or balsamic glaze. Keep toppings evenly distributed to ensure proper melting and cooking. Avoid overloading to maintain the crust’s crispiness. Customize based on your preferences, then bake in the oven at 375°F for 20-23 minutes. This step allows you to personalize the pizza to your taste, making each bite uniquely delicious.

Food Safety and Quality

Ensure your Red Baron French Bread Pizza reaches an internal temperature of 160°F for food safety. Always cook before eating and let it stand 2-3 minutes before serving.

Internal Temperature Requirements

For optimal food safety and quality, ensure your Red Baron French Bread Pizza reaches an internal temperature of 160°F. This guarantees the pizza is fully cooked and safe to eat. Always use a food thermometer to check the center of the pizza, as this is the coolest part. Proper heating prevents undercooked areas and potential foodborne illness. Remember, the internal temperature should never be compromised for cooking time. Letting the pizza stand for a few minutes after cooking also helps even out the heat distribution.

Standing Time Before Serving

After baking, allow the Red Baron French Bread Pizza to stand for 2 to 3 minutes before serving. This brief resting period ensures the cheese sets properly and prevents the crust from becoming soggy. Standing time also allows the internal heat to distribute evenly, enhancing the overall texture and flavor. It’s a crucial step to achieve the perfect balance of crispiness and gooeyness in your pizza. Always let it rest on a wire rack or baking sheet to avoid steam buildup. This simple step elevates your pizza experience and ensures a satisfying bite every time.

Troubleshooting Common Issues

Common issues like overcooking or uneven cooking can be resolved by monitoring baking time and ensuring even oven heat distribution. Adjustments may be needed for optimal results.

Preventing Overcooking

To prevent overcooking, monitor the pizza closely during the final minutes of baking. Set a timer and check for golden-brown crust and melted cheese. Rotate the pizza halfway through cooking if necessary. Keep an eye on temperature variations, as some ovens may run hotter. Using a lower rack can also help avoid burning. Always refer to the recommended baking time of 20-23 minutes at 375°F. If using a toaster oven, reduce time by a few minutes. Proper monitoring ensures a perfectly cooked crust without burning, delivering the best flavor and texture for your Red Baron French Bread Pizza.

Ensuring Even Cooking

For even cooking, preheat the oven to the recommended temperature of 375°F (or 400°F for toaster ovens). Place the pizza on the middle rack to ensure consistent heat distribution. Use a baking sheet lined with parchment paper to prevent sticking and promote even browning. Rotate the pizza halfway through the cooking time to avoid hot spots. Avoid overcrowding the oven, as this can disrupt airflow. Cook for 20-23 minutes for a conventional oven or 13-16 minutes for a toaster oven. Check for a golden crust and bubbly cheese to confirm it’s cooked evenly.

Serving Suggestions

Serve Red Baron French Bread Pizza with a fresh green salad or garlic knots for a complete meal. Add a side of marinara or ranch for dipping.

Recommended Side Dishes

A fresh green salad or garlic knots complement Red Baron French Bread Pizza perfectly. For a hearty meal, pair it with roasted vegetables or a side of chips. Additionally, a bowl of tomato soup or onion rings can enhance the dining experience. Consider serving with a dipping sauce like marinara or ranch for added flavor. These options create a well-rounded and satisfying meal that pairs beautifully with the crispy, cheesy pizza.

Garnishing and Presentation Tips

Enhance your Red Baron French Bread Pizza with fresh garnishes like parsley, basil, or oregano for a vibrant finish. Sprinkle Parmesan cheese for extra flavor and texture. For a rustic look, drizzle with olive oil or balsamic glaze. Serve on a decorative plate or platter to elevate the presentation. Consider adding a side of marinara sauce for dipping. Fresh vegetables like cherry tomatoes or a simple green salad can accompany the pizza for a balanced meal. These small touches make the dish visually appealing and satisfying.

Nutritional Information

Red Baron French Bread Pizza offers approximately 350 calories per serving, with 12g total fat, 3.5g saturated fat, and 700mg sodium. Each serving (one pizza) provides 18% of daily fat and 25% of sodium.

Caloric Content and Serving Size

Each Red Baron French Bread Pizza serving (one pizza) contains approximately 350 calories. This includes 12g of total fat, with 3.5g being saturated fat, and 700mg of sodium. The pizza also provides 18% of the daily recommended intake of fat and 25% of the daily sodium allowance. The serving size is one French bread pizza, making it a convenient option for a quick meal or snack. For precise nutritional information, always refer to the packaging, as values may vary slightly depending on the specific product variation.

Dietary Considerations

Red Baron French Bread Pizza is made with ingredients like enriched wheat flour, cheese, and pepperoni, making it unsuitable for those with gluten intolerance or dairy allergies. The pizza contains soy and milk, which are common allergens. It is not vegan due to the presence of cheese and meat. For vegetarians, options without pepperoni or with plant-based alternatives may be considered. Always check the ingredient list for specific dietary needs. This product does not cater to gluten-free diets, as it contains wheat. Moderation is key due to its sodium and saturated fat content.

Continue Reading

ninja woodfire grill manual pdf free download

Welcome to the Ninja Woodfire Grill Manual, your comprehensive guide to unlocking the full potential of your grill. This manual provides essential information on features, safety, and cooking techniques to ensure optimal performance and delicious results every time. Download the PDF version for free to access detailed instructions and tips for mastering your grilling experience.

Overview of the Ninja Woodfire Grill

The Ninja Woodfire Grill is a versatile outdoor cooking appliance designed to deliver smoky, flavorful results. It combines grilling, smoking, and air frying capabilities, making it a multi-functional tool for outdoor chefs. Built with durable, high-quality materials, it ensures long-lasting performance and reliability. The grill features advanced woodfire technology, allowing users to achieve authentic, charcoal-like flavors without the hassle. With its sleek design and user-friendly interface, it’s perfect for both beginners and experienced cooks. The manual provides detailed guidance to help users maximize its potential and enjoy seamless cooking experiences.

Importance of the Manual for Optimal Use

The Ninja Woodfire Grill manual is essential for ensuring safe, effective, and enjoyable cooking experiences. It provides detailed instructions on assembly, operation, and maintenance, helping users avoid potential hazards. The manual outlines safety precautions, such as handling hot surfaces and protecting children, to prevent accidents. Additionally, it offers troubleshooting tips for common issues like ignition problems or temperature control. By following the manual, users can maximize their grill’s performance, extend its lifespan, and explore its full range of features. Downloading the free PDF version ensures easy access to these critical guidelines anytime.

Key Features of the Ninja Woodfire Grill

The Ninja Woodfire Grill features advanced woodfire technology for authentic smoky flavors, multifunctional cooking modes (grill, smoke, air fry), and durable, high-quality materials for long-lasting performance and easy cleaning.

Woodfire Technology for Smoky Flavor

The Ninja Woodfire Grill incorporates innovative woodfire technology, utilizing wood pellets to deliver an authentic smoky flavor to your dishes. Designed for outdoor use, this feature ensures even heat distribution and a rich, aromatic taste. The grill’s woodfire system is compatible with specific pellets, which are ignited to create a traditional wood-fired cooking experience. This technology allows for precise temperature control, enabling you to achieve perfectly smoked or grilled results. The manual provides detailed guidance on how to use and maintain this feature, ensuring optimal performance and flavor in every meal.

Multifunctional Cooking Modes

The Ninja Woodfire Grill offers versatile cooking modes, including grill, smoke, and air fry, allowing you to achieve a variety of flavors and textures. The grill mode provides direct heat for searing, while the smoke mode infuses dishes with a rich, smoky flavor. Air fry mode enables healthier frying with minimal oil. These modes are designed to cater to different cooking preferences, ensuring flexibility and creativity. The manual details how to switch between modes, adjust settings, and optimize results, making it easy to explore diverse recipes and cooking techniques with precision and ease.

Durable and High-Quality Materials

The Ninja Woodfire Grill is constructed with durable, high-quality materials to ensure longevity and performance. The grill features a robust design with premium components that withstand outdoor conditions and frequent use. The body is made from heavy-duty steel, while the cooking grates are crafted for optimal heat distribution and durability. The manual emphasizes proper maintenance to preserve the grill’s condition, ensuring it remains a reliable cooking companion for years. This build quality guarantees consistent results and enhances your grilling experience with its sturdy and reliable construction.

Safety Instructions and Precautions

Always follow safety instructions to ensure safe operation. Keep children away from hot surfaces, use protective gear, and ensure the grill is used outdoors only to prevent accidents.

General Safety Guidelines

For safe operation, always read the Ninja Woodfire Grill Manual before use. Keep children and pets away from hot surfaces. Use heat-resistant gloves and ensure the grill is placed on a stable, heat-resistant surface outdoors. Never leave the grill unattended while in use. Avoid using the grill in adverse weather conditions. Regularly inspect the grill for damage and ensure all connections are secure. Only use Ninja Woodfire Pellets for optimal performance and safety. Follow all precautions to prevent accidents and ensure a enjoyable grilling experience. Always refer to the manual for detailed safety measures.

Handling Hot Surfaces and Children Safety

Always handle hot surfaces with heat-resistant gloves to avoid burns. Keep children at a safe distance from the grill to prevent accidents. Ensure the grill is placed out of reach of kids to avoid unintended contact with hot surfaces. Never leave the grill unattended while it is in operation. Use a grill cover when not in use to protect children from accidental burns. Regularly inspect the grill for any sharp edges or loose parts that could pose a hazard. Ensure proper supervision when cooking to maintain a safe environment for everyone. Refer to the Ninja Woodfire Grill Manual for additional safety tips.

Proper Storage and Maintenance Tips

For optimal performance and longevity, store your Ninja Woodfire Grill in a dry, protected area using a grill cover. Regularly clean the grill surfaces and burn pots after each use to prevent residue buildup. Check for wear and tear on components like pellets augers and heat shields. Lubricate moving parts as recommended in the manual. Avoid using harsh chemicals that could damage the finish. Store pellets in a cool, dry place to maintain their quality. Always follow the manufacturer’s guidelines for maintenance to ensure safety and efficiency. Consult the manual for detailed care instructions.

Installation and Assembly

Begin by carefully unboxing and inventorying all parts to ensure nothing is missing. Follow the step-by-step assembly instructions in the manual, starting with the base and working upward. Level the grill to ensure even cooking performance. Use the provided tools and hardware, and refer to the official guide for clarity. Proper assembly is crucial for safety and functionality, so take your time and double-check each step.

Unboxing and Inventory of Parts

Welcome your Ninja Woodfire Grill by carefully unboxing and verifying all components. Ensure the package includes the grill unit, stand, pellet hopper, cooking grates, power cord, and accessory tools. Check for any damage or missing items. Refer to the manual’s inventory list to confirm all parts are accounted for. This step is crucial to ensure proper assembly and functionality. For detailed guidance, download the free PDF manual, which provides a comprehensive checklist and visual aids to help you identify each component accurately.

Step-by-Step Assembly Process

Begin by unboxing and organizing all components. Attach the grill stand to the main unit using the provided hardware, ensuring all bolts are securely tightened. Next, install the pellet hopper by aligning it with the designated mounting points and fastening it in place. Secure the cooking grates and heat deflector according to the manual’s instructions. Finally, connect the power cord and test the ignition system. Refer to the free PDF manual for detailed diagrams and torque specifications to ensure a safe and proper assembly. This step-by-step guide helps you set up your grill efficiently and correctly.

Leveling the Grill for Even Cooking

Proper leveling ensures even heat distribution and prevents food from cooking unevenly. Locate the adjustable legs on the grill stand and turn them clockwise or counterclockwise to stabilize the unit. Use a spirit level to confirm the grill is perfectly horizontal. Once leveled, tighten the leg locks firmly to maintain stability. For added support on uneven surfaces, place sturdy, heat-resistant pads under the legs. Regularly check and adjust the leveling after moving the grill. This step ensures consistent cooking performance and prevents damage to the grill’s internal components. Refer to the PDF manual for detailed leveling instructions.

Operating the Ninja Woodfire Grill

Master the ignition process and explore versatile cooking modes, including grill, smoke, and air fry. Use Ninja Woodfire pellets for authentic smoky flavor. Refer to the manual for detailed guidance.

Preheating and Ignition Process

Begin by ensuring the grill is on a flat, stable surface and plug it in. Load the recommended Ninja Woodfire pellets into the hopper. Turn on the grill, select your desired cooking mode, and initiate the ignition process. The grill will automatically start the preheating cycle, which may take 10-15 minutes. You’ll hear the pellets feeding into the fire pot and igniting. Once preheated, the grill is ready for cooking. Always follow the manual’s guidance for safe and efficient operation. Keep children away during preheating and ignition due to high temperatures.

Cooking Modes: Grill, Smoke, and Air Fry

The Ninja Woodfire Grill offers three versatile cooking modes to suit every culinary need. Grill mode delivers high-heat searing for steaks, burgers, and vegetables. Smoke mode provides low-and-slow cooking, perfect for tenderizing brisket or ribs with rich, smoky flavor. Air Fry mode allows for crispy, oil-free frying of snacks like fries or chicken wings. Each mode is easily selectable via the control panel, ensuring precise temperature control. Refer to the manual for specific temperature settings and cooking times to achieve the best results. Always monitor cooking progress and adjust settings as needed for optimal flavor and texture. Ensure safety by keeping a safe distance from hot surfaces during operation.

Using Ninja Woodfire Pellets

Ninja Woodfire Pellets are specifically designed to enhance the smoky flavor of your dishes. These high-quality pellets are made from real wood and are optimized for use in the Ninja Woodfire Grill. For best results, always use Ninja-recommended pellets to ensure proper ignition and consistent performance. Simply load the pellets into the hopper, select your desired mode, and let the grill handle the rest. The pellets ignite automatically, providing a perfect balance of heat and smoke. Available in various flavors, they offer versatility for different cooking styles. Always store pellets in a dry place to maintain their quality and performance.

Troubleshooting Common Issues

Address common issues like thermometer malfunctions, uneven heating, or pellet ignition problems. Refer to the manual for detailed solutions and maintenance tips to ensure optimal grill performance.

Thermometer Not Working

If your Ninja Woodfire Grill’s thermometer is not working, ensure proper probe connection and calibration. Check for damage or wear. Replace batteries if applicable. For digital models, reset the device or refer to the manual for recalibration steps. Ensure the thermometer is clean and free from food residue. If issues persist, contact customer support or replace the thermometer. Always follow safety guidelines when troubleshooting to avoid further malfunctions. Refer to the manual for detailed instructions and warranty information. Regular maintenance can prevent such issues and ensure accurate temperature readings for perfect grilling results.

Grill Not Heating Properly

If your Ninja Woodfire Grill isn’t heating properly, first ensure the power supply is stable and the grill is properly assembled. Check for blockages in the pellet hopper or auger. Verify that the correct wood pellets are used and the ignition cycle is complete. Preheat the grill as instructed in the manual. Clean the grill regularly to prevent debris buildup. If issues persist, refer to the troubleshooting section of the manual or contact customer support. Proper maintenance and adherence to guidelines can resolve heating problems and ensure consistent performance. Download the manual for detailed instructions.

Pellet Ignition Problems

If you encounter pellet ignition issues with your Ninja Woodfire Grill, ensure you’re using only Ninja Woodfire Pellets for optimal performance. Check the pellet hopper for blockages and confirm the igniter is functioning properly. Clean the fire pot and ignition area regularly to prevent debris buildup. Verify the grill is preheated correctly and the lid is closed during the ignition cycle. If problems persist, reset the grill or consult the troubleshooting section in the manual. Proper maintenance and adherence to guidelines can resolve pellet ignition issues effectively. Download the manual for detailed troubleshooting steps.

Ninja Woodfire Grill Manual PDF Download

Access the Ninja Woodfire Grill Manual for free as a downloadable PDF. Visit the official website or trusted online sources to get comprehensive guides, troubleshooting tips, and detailed instructions for your grill. Ensure you’re using the correct model-specific manual for optimal performance and safety. Download now and explore features, maintenance tips, and recipes to enhance your grilling experience. Download the PDF today for a seamless setup and operation.

How to Download the Manual

To download the Ninja Woodfire Grill Manual, visit the official Ninja website or trusted online sources. Search for your specific grill model, such as OG701EU or OG700 Series, and locate the corresponding PDF manual. Ensure the source is verified to avoid unauthorized downloads. Once found, click the download link to access the manual instantly. This guide provides detailed instructions, safety tips, and troubleshooting advice to help you make the most of your grill. Always refer to the official manual for accurate and model-specific information.

Official Sources for the Manual

The Ninja Woodfire Grill Manual is available for free download from the official Ninja website and authorized retailers. Visit the Ninja support page, enter your grill model (e.g., OG700 Series or OG701EU), and download the PDF directly. Additionally, trusted platforms like ManualsLib or ManualsOnline host verified copies of the manual. Ensure you only use official sources to avoid unauthorized downloads and maintain compliance with safety guidelines. These sources provide accurate, model-specific instructions and troubleshooting tips for your Ninja Woodfire Grill.

Free Access to the PDF Version

The Ninja Woodfire Grill Manual is available for free download in PDF format, ensuring easy access to essential instructions and guidelines. Visit the official Ninja website or trusted platforms like ManualsLib or ManualsOnline to find your specific model (e.g., OG700 Series or OG701EU). No registration or payment is required; simply search for your grill model and download the PDF directly. This ensures you have a reliable, model-specific guide to help you master your Ninja Woodfire Grill and enjoy optimal performance.

Cooking Techniques and Recipes

Explore expert techniques for grilling, smoking, and air frying. Discover recipes and tips to elevate your cooking skills and master dishes effortlessly with the Ninja Woodfire Grill.

Mastering Brisket on the Ninja Woodfire

Perfecting brisket on the Ninja Woodfire Grill is an art. Start by preheating the grill to 225°F and seasoning generously. Use smoke mode for rich flavor. Opt for a 4-5 lb brisket, fat cap up. Wrap after 4 hours and cook until tender. Rest 30 minutes before slicing. For best results, follow the manual’s detailed guide and experiment with Ninja Woodfire Pellets for authentic smoky taste. Achieve mouthwatering, fall-apart brisket every time with precise temperature control and expert techniques from the manual.

Quick Start Guide and Recipe Book

The Quick Start Guide offers a straightforward approach to setting up and operating your Ninja Woodfire Grill. It covers basic functions, cooking modes, and essential techniques to get you grilling immediately. The included Recipe Book provides inspiration with mouthwatering dishes, from classic smoked brisket to innovative air-fried meals. Discover how to pair flavors with Ninja Woodfire Pellets for authentic smoky taste. This guide is perfect for both novices and experienced cooks, ensuring you make the most of your grill’s versatile features. Download the free PDF manual to unlock these resources and elevate your outdoor cooking experience.

Advanced Tips for Smoking and Grilling

Take your grilling and smoking skills to the next level with expert techniques from the Ninja Woodfire Grill Manual. Learn how to perfectly balance smoky flavors using premium wood pellets and master temperature control for consistent results. Discover advanced methods for tenderizing meats, achieving crispy textures, and infusing deep flavors. The manual also shares pro tips for managing pellet consumption, optimizing grill space, and maintaining ideal humidity levels. Experiment with unique pellet blends and explore low-and-slow cooking for fall-apart brisket or ribs. Elevate your outdoor cooking with these insider strategies to create mouthwatering, professional-grade dishes every time. Download the free PDF guide to unlock these advanced secrets.

Warranty and Support

The Ninja Woodfire Grill comes with a comprehensive warranty program, ensuring protection and peace of mind. For details, contact customer support or refer to the manual.

Understanding the Warranty Terms

The Ninja Woodfire Grill is backed by a comprehensive warranty program designed to protect your investment. The warranty covers defects in materials and workmanship for a specified period, ensuring peace of mind. Details regarding the warranty duration, coverage, and exclusions can be found in the official manual. It’s important to review these terms carefully to understand what is included and any conditions that may void the warranty. For further clarification, contact Ninja’s customer support team or refer to the PDF manual available for free download.

Contacting Customer Support

For any questions or concerns about your Ninja Woodfire Grill, customer support is readily available to assist. You can reach the support team through phone, email, or live chat, depending on your preference. The official website provides detailed contact information and support resources. Additionally, the PDF manual includes a section dedicated to troubleshooting and common issues, which may resolve many queries without needing direct support. If further assistance is required, the support team is equipped to help with troubleshooting, warranty claims, or general inquiries about your grill’s operation and maintenance.

Replacement Parts and Accessories

Replacement parts and accessories for the Ninja Woodfire Grill are widely available through official sources and authorized retailers. These include grill covers, woodfire pellets, cleaning tools, and additional cooking racks. The PDF manual provides a list of recommended accessories to enhance your grilling experience. For authenticity and safety, ensure to purchase genuine Ninja products. Accessories like grill stands and covers are designed to protect and extend the life of your grill. Visit the official Ninja website or authorized dealers to explore the full range of compatible parts and accessories tailored for your Ninja Woodfire Grill model.

The Ninja Woodfire Grill Manual offers a complete guide to maximizing your grilling experience. With detailed instructions and tips, it empowers you to achieve perfect results every time.

Final Thoughts on the Ninja Woodfire Grill

The Ninja Woodfire Grill stands out as a versatile and innovative cooking solution, combining smoky flavors with modern convenience. Its ability to grill, smoke, and air fry makes it a must-have for outdoor enthusiasts. The durable design ensures long-lasting performance, while the user-friendly interface simplifies the cooking process. Whether you’re a novice or an experienced griller, this appliance delivers consistent results. The availability of the manual in PDF format further enhances the user experience, providing clear guidance for optimal use. With its robust features and easy maintenance, the Ninja Woodfire Grill is a valuable addition to any outdoor kitchen.

Encouragement to Explore Full Potential

With the Ninja Woodfire Grill, the possibilities for outdoor cooking are endless. By exploring its full potential, you can achieve perfectly smoked brisket, crispy air-fried dishes, and mouthwatering grilled meals. The free downloadable PDF manual offers expert tips and recipes to inspire your culinary creativity. Don’t hesitate to experiment with new techniques and flavors—your grill is designed to deliver exceptional results every time. Embrace the versatility of this appliance and make every cooking session a memorable experience for you and your loved ones.

Continue Reading

hakko fx 888d instruction manual

The Hakko FX-888D is a digital soldering station designed for precision and reliability, offering advanced temperature control, thermal recovery, and safety features for professional and hobbyist use.

1.1 Overview of the Hakko FX-888D

The Hakko FX-888D is a digital soldering station offering precise temperature control, quick thermal recovery, and a user-friendly interface. It features a temperature range of 120-899°F, password-protected settings, and electrostatic protection for sensitive components. The station includes a ceramic heater and supports T18 series tips for versatility. Its compact design and durable construction make it ideal for both professionals and hobbyists, ensuring safe and efficient soldering experiences.

1.2 Key Features and Benefits

The Hakko FX-888D features a digital temperature control system, adjustable preset modes, and a password function for setting restrictions. It includes a ceramic heater for rapid heating and stable temperatures, electrostatic discharge protection, and a ground wire for enhanced safety. The station supports T18 series tips and offers a maintenance-friendly design with replaceable tips and heaters, ensuring durability and optimal performance for various soldering tasks.

Unpacking and Inventory

Ensure all components are included: FX-888D station, soldering iron, iron holder, power cord, and instruction manual. Verify each item for proper condition and functionality.

2.1 Packing List and Included Items

The Hakko FX-888D package includes the main soldering station, a soldering iron (FX-8801), an iron holder with a cleaning sponge, a power cord, and an instruction manual. Additional items like alternative tips are available separately. Ensure all components are accounted for upon unboxing to guarantee proper functionality and safety.

2.2 Part Names and Components

The Hakko FX-888D soldering station consists of the main unit, FX-8801 soldering iron, iron holder with a cleaning sponge, and a power cord. The FX-8801 iron uses T18 series tips, which are available in various shapes for different soldering tasks. Familiarize yourself with these components to ensure proper operation and maintenance, as detailed in the instruction manual.

Safety Precautions and Warnings

Always ground the unit and avoid high temperatures. Never use the iron for non-soldering tasks. Ensure proper ventilation and handle the iron carefully to prevent accidents;

3;1 General Safety Guidelines

Always ground the unit and ensure proper ventilation. Avoid high temperatures and handle the iron carefully. Keep the work area well-ventilated to prevent inhaling solder fumes. Never use the iron for non-soldering tasks or strike it against hard objects. Disconnect the power cord when not in use or before maintenance. Use genuine Hakko parts to maintain safety and performance. Follow all precautions to avoid accidents and ensure reliable operation.

3.2 Electrostatic Protection Measures

The Hakko FX-888D incorporates conductive plastic parts and grounding features to protect devices from static electricity. Ensure the unit is properly grounded during use. Avoid touching sensitive components without proper ESD protection. Use anti-static wrist straps and mats to prevent static discharge, which can damage electronic components. Regularly inspect grounding connections to maintain electrostatic protection and ensure safe soldering operations.

3.4 Proper Handling and Storage

Always handle the Hakko FX-888D with care to prevent damage. Store the soldering iron in its holder when not in use to avoid accidents. Keep the unit in a dry, cool place away from direct sunlight. Regularly clean the iron tip and apply a thin layer of solder to prevent oxidation. Disconnect the power cord and allow the unit to cool before storing or transporting it.

Initial Setup and Installation

Begin by unpacking and inventorying all components. Connect the soldering iron to the station, place the iron holder securely, and ensure proper power cord installation before powering on the unit.

4.1 Connecting the Soldering Iron

Connect the soldering iron to the Hakko FX-888D station by aligning the connector properly. Ensure a secure fit to maintain optimal performance and safety. Always handle the iron by the insulated grip to avoid direct contact with heated elements. After connection, test the iron by turning on the station and allowing it to reach the set temperature. Proper connection is essential for consistent operation. Follow the manual’s guidelines for a secure and safe setup.

4.2 Placing the Iron Holder

Position the iron holder on a stable, heat-resistant surface near the soldering station. Ensure it is securely placed to prevent accidental tipping. Always return the soldering iron to the holder when not in use to avoid burns or damage. The holder also includes a cleaning sponge for convenient tip maintenance. Proper placement enhances safety and organization during soldering tasks. Follow the manual’s guidelines for optimal setup and usage.

4.3 Powering On the Unit

Plug the Hakko FX-888D into a grounded electrical outlet. Ensure the voltage matches your region’s standard. Press the power button to turn it on; the digital display will activate, indicating the unit is ready for operation. Allow the soldering iron to reach the set temperature before use. Always follow safety precautions and ensure proper ventilation when operating the station.

Operating the Hakko FX-888D

The FX-888D features digital temperature control, preset modes, and a password function for secure settings. Use the intuitive interface to adjust temperatures, toggle modes, and maintain optimal soldering conditions. Regularly clean and tin the tip to ensure efficiency and longevity of the soldering iron. Always follow safety guidelines during operation.

5.1 Temperature Adjustment and Control

The Hakko FX-888D allows precise temperature adjustment between 120°F to 899°F (50°C to 480°C) using its digital interface. The temperature stabilizes quickly, ensuring consistent soldering performance. The station features a temperature lock function to prevent accidental changes and maintains stability within ±1.8°F for optimal results. Use the Up/Down arrows to adjust settings, and refer to the manual for calibration procedures to maintain accuracy over time. Regular monitoring ensures reliable operation.

5.2 Using Preset Temperature Modes

The Hakko FX-888D offers a preset mode allowing users to store up to 5 frequently used temperatures. Access preset mode via the menu, select a preset slot, and adjust the temperature using the Up/Down buttons. Save the setting to use it instantly in future sessions. The password function can restrict changes to presets, ensuring consistency across users. This feature enhances efficiency for repetitive soldering tasks.

5.3 Password Function and Settings

The Hakko FX-888D features a password function to protect settings. Choose from Open, Partial, or Restricted modes. Open allows full access, Partial restricts some settings, and Restricted locks all changes. Enter the password in Parameter Setting mode by pressing the button and navigating through options. This ensures operational consistency and prevents unauthorized adjustments, ideal for shared workspaces or maintaining factory settings.

Maintenance and Care

Regular maintenance ensures optimal performance. Clean the soldering iron tip with a damp sponge and apply fresh solder. Store the unit in a dry, cool place to prevent damage and extend lifespan.

6.1 Cleaning the Soldering Iron

Clean the soldering iron tip regularly by wiping it with a damp sponge. This removes oxidation and debris, ensuring efficient heat transfer and solder flow. After cleaning, apply a small amount of fresh solder to the tip to prevent rust and maintain performance. Proper cleaning extends the life of the tip and improves soldering results.

6.2 Replacing Tips and Heaters

To replace the tip or heater, first disconnect the power and iron cord. Use only genuine Hakko T18 series tips for compatibility. Remove the old tip by loosening the screw, then install the new one securely. For the heater, refer to the manual for specific disassembly steps. Always ensure proper alignment and tightening to maintain performance and safety. Replace damaged parts promptly to avoid further issues.

6.3 Checking for Wear and Tear

Regularly inspect the soldering iron and station for wear. Check the iron cord for frays or damage, and ensure the tip is free from oxidation. Examine the heater for signs of degradation and replace if necessary. Clean or replace the iron holder and sponge as needed. Promptly address any wear to maintain optimal performance and prevent potential hazards. Always follow safety guidelines during inspections.

Troubleshooting Common Issues

Identify and address issues like faulty heaters, damaged cords, or temperature malfunctions. Refer to the manual for diagnostic steps and solutions to ensure optimal performance and safety.

7.1 Identifying and Solving Common Problems

Common issues with the Hakko FX-888D include faulty temperature sensors, damaged heating elements, or malfunctioning cords. To troubleshoot, disconnect power, check for physical damage, and verify connections. For temperature errors, ensure the tip is clean and calibrated. Refer to the manual for detailed diagnostic steps and replacement procedures to restore functionality and safety.

7.2 Replacing Damaged Parts

Replace damaged parts like cords or heating elements by disconnecting power first. Use genuine Hakko components for compatibility and safety. Refer to the manual for specific replacement procedures, ensuring proper installation to maintain performance and prevent further issues; Always follow safety guidelines to avoid injury or equipment damage during the process.

7.3 Resetting the Unit

Resetting the Hakko FX-888D restores default settings. Power off, press and hold the button while turning on. Release after the display resets. This clears custom presets and returns to factory settings, ensuring stability and proper function. Use this feature cautiously and only when necessary to avoid losing personalized configurations.

Compatible Tips and Accessories

The Hakko FX-888D supports T18 series tips, offering various shapes and sizes for different soldering tasks. Additional tips can be purchased separately for enhanced versatility and performance.

8.1 T18 Series Tips Overview

The T18 series tips are specifically designed for the Hakko FX-888D, offering a wide range of shapes and sizes to suit various soldering needs. These tips are made from high-quality materials to ensure durability and optimal heat transfer. They are available in different styles such as conical, chisel, and needle types, allowing users to choose the most suitable tip for their specific tasks. Additionally, the T18 tips are easy to replace and maintain, ensuring consistent performance over time. Proper care and cleaning of these tips extend their lifespan and maintain soldering efficiency. Always use genuine Hakko tips to ensure compatibility and reliability.

8.2 Selecting the Right Tip for the Job

Selecting the right T18 series tip for the FX-888D is crucial for optimal soldering performance. Tips vary in shape and size, catering to different soldering tasks. For precision work, fine conical tips are ideal, while larger, flat chisel tips suit heavy-duty soldering. Consider the size of the soldering area, component type, and desired solder flow when choosing a tip. Always select genuine Hakko tips for compatibility and reliability.

8.3 Purchasing Additional Tips

Additional T18 series tips for the Hakko FX-888D can be purchased separately, offering flexibility for various soldering tasks. Tips are available in different shapes and sizes, ensuring optimal performance for specific applications. To maintain quality and compatibility, always buy genuine Hakko tips from authorized distributors or the Hakko Document Portal. This ensures reliability and extends the life of your soldering station.

Technical Specifications

The Hakko FX-888D features a temperature range of 120-899°F, ceramic heater, and 70W power consumption. It supports the N system, ensuring high performance and reliability in soldering tasks.

9.1 Power Consumption and Output

The Hakko FX-888D has a power consumption of 70W, ensuring efficient operation while maintaining high performance. The soldering iron, model FX-8801, delivers consistent power output, supporting precise temperature control and rapid thermal recovery, making it ideal for both light and heavy-duty soldering tasks. This balance of power and efficiency ensures optimal performance across various soldering applications.

9.2 Temperature Range and Stability

The Hakko FX-888D offers a wide temperature range of 120°F to 899°F (50°C to 480°C), ensuring versatility for various soldering tasks. Its advanced digital PID control system provides exceptional temperature stability, maintaining a consistent output within ±1.8°F (1°C) of the set temperature. This precision ensures reliable soldering performance and minimizes thermal fluctuations, making it suitable for sensitive electronic components and high-precision work.

9.3 Design and Build Quality

The Hakko FX-888D features a robust and ergonomic design with a durable construction, ensuring long-lasting performance. Its compact station base and intuitive interface provide easy access to controls, while the high-quality soldering iron and precision-crafted tips deliver consistent results. The unit’s build quality is backed by Hakko’s reputation for reliability, making it a trusted tool for professionals and hobbyists alike in demanding soldering applications.

Advanced Features

The Hakko FX-888D offers digital temperature control, preset modes, and a password function, enhancing precision and customization. These features ensure consistent soldering performance and user convenience.

10.1 Digital Temperature Control

The Hakko FX-888D features precise digital temperature control, allowing users to set and maintain temperatures between 120°F to 899°F. This ensures consistent soldering performance and reduces thermal damage to components. The system provides real-time temperature monitoring and rapid heating, making it ideal for both delicate and high-demand soldering tasks. This feature is essential for achieving professional-grade results efficiently.

10.2 Adjustable Preset Modes

The Hakko FX-888D offers adjustable preset modes, allowing users to store up to five custom temperature settings. This feature enhances productivity by enabling quick switching between frequently used temperatures. The password function ensures these presets remain secure, preventing unauthorized changes. Preset modes are ideal for users requiring consistent settings across multiple projects, making the FX-888D highly versatile and user-friendly for professional and hobbyist applications.

10.3 Enhanced Safety Features

The Hakko FX-888D includes enhanced safety features such as grounding and electrostatic discharge protection. These measures safeguard both the user and the device from static electricity, ensuring safe operation. Proper handling and storage guidelines are also provided to prevent accidents and maintain the unit’s performance. These features make the FX-888D a reliable and secure tool for soldering tasks.

Environmental and Safety Compliance

The Hakko FX-888D adheres to international safety and environmental standards, ensuring responsible manufacturing and operation while minimizing its ecological footprint for a sustainable future.

11.1 Electrostatic Discharge Protection

The Hakko FX-888D incorporates advanced electrostatic discharge protection to safeguard sensitive electronic components. Conductive plastic parts and proper grounding ensure static electricity is safely dissipated, preventing damage during soldering. This feature is crucial for maintaining the integrity of delicate circuits and components, ensuring reliable operation and protecting against ESD-related failures.

11.2 Grounding and Electrical Safety

Proper grounding is essential for the Hakko FX-888D to ensure electrical safety. The unit is designed with grounding features to protect against electrical shocks and static discharge. Users must ensure the station is correctly grounded during operation to maintain safety standards and prevent potential hazards, adhering to international electrical safety guidelines for reliable and secure soldering operations.

11.3 Compliance with International Standards

The Hakko FX-888D adheres to international safety and environmental standards, ensuring reliability and compliance across global markets. It meets rigorous regulations for electrostatic discharge protection, electrical safety, and environmental sustainability, making it a trusted tool for professionals and industries worldwide while maintaining high performance and durability in various soldering applications and conditions.

User Manual and Additional Resources

The Hakko FX-888D instruction manual is available in multiple languages, providing detailed guidance for operation, maintenance, and troubleshooting. Additional resources, including the Hakko Document Portal, offer comprehensive support for users.

12.1 Accessing the Full Instruction Manual

The full instruction manual for the Hakko FX-888D can be accessed online through the Hakko Document Portal or downloaded as a PDF from authorized sources. It is available in multiple languages, including English, Spanish, Japanese, Chinese, French, and German. The manual provides detailed instructions for setup, operation, and maintenance, ensuring users can maximize the functionality of their soldering station effectively.

12.2 Downloading Manuals in Multiple Languages

Users can download the Hakko FX-888D manual in multiple languages from the Hakko Document Portal. Languages include English, Spanish, Japanese, Chinese, French, and German. This ensures global accessibility and ease of understanding. The manuals are available in PDF format, making them easy to access and print for reference during operation and maintenance of the soldering station.

12.3 Hakko Document Portal and Support

The Hakko Document Portal offers comprehensive support, including the FX-888D manual, technical specifications, and troubleshooting guides. Users can access resources, submit inquiries, and download updates. This centralized platform ensures easy retrieval of information, enhancing user experience and product utilization. It serves as a one-stop solution for all FX-888D-related documentation and support needs.

Continue Reading

ophthalmic scribe study guide pdf

This comprehensive guide is designed to prepare aspiring ophthalmic scribes for certification and real-world challenges. It covers essential skills, terminology, and best practices in ophthalmology, ensuring excellence in patient documentation and care.

Overview of the Ophthalmic Scribe Role

An ophthalmic scribe assists ophthalmologists by accurately documenting patient medical records, enabling doctors to focus on care. Key responsibilities include recording medical histories, examination findings, and treatment plans. Scribes also manage Electronic Health Records (EHR), ensuring data accuracy and compliance with regulations. Their role enhances clinical efficiency and patient outcomes by streamlining documentation processes. The demand for skilled scribes is growing, driven by the need for precise and detailed documentation in ophthalmology. Certification emphasizes expertise, making scribes invaluable in modern eye care settings.

Importance of Certification in Ophthalmic Scribing

Certification in ophthalmic scribing is crucial for demonstrating expertise and commitment to high standards in medical documentation. A certified ophthalmic scribe gains credibility, enhancing job prospects and career advancement opportunities. Employers prioritize certified professionals, as it ensures proficiency in ophthalmology-specific terminology, documentation practices, and compliance with regulations. Certification also validates the ability to accurately capture patient histories, examination findings, and treatment plans, which are critical for effective patient care. By obtaining certification, scribes not only elevate their professional standing but also contribute to improved clinical efficiency and patient outcomes in ophthalmology practices.

Structure and Content of the Study Guide

The ophthalmic scribe study guide is a comprehensive resource designed to equip aspiring scribes with the knowledge and skills needed for success. It covers essential topics such as ophthalmic anatomy, terminology, and instrumentation, as well as practical skills like documentation and EHR management. The guide also includes detailed sections on history taking, physical examination findings, and diagnostic procedures. Additionally, it provides insights into specialized fields like retina, cornea, and glaucoma scribing. Complete with practice tests and real-world scenarios, the guide ensures a well-rounded preparation for the Ophthalmic Scribe Certification (OSC) exam and beyond.

The Role and Responsibilities of an Ophthalmic Scribe

An ophthalmic scribe assists physicians by accurately documenting patient histories, exam findings, and treatment plans. They manage EHR, track medications, and ensure compliance with regulations, enhancing patient care efficiency.

Key Responsibilities in Ophthalmology Clinics

Ophthalmic scribes play a vital role in clinics by documenting patient histories, exam findings, and treatment plans in real-time. They ensure accurate and detailed records, manage EHR systems, and assist with tracking medications, follow-ups, and lab results. Scribes also support compliance with billing and coding standards, allowing physicians to focus on patient care. Their work enhances clinical efficiency and ensures seamless communication between healthcare providers. Effective scribes must possess strong understanding of ophthalmic terminology and procedures to deliver precise documentation, making them indispensable in modern eye care settings.

Documenting Patient Medical Records

Accurate and detailed documentation of patient medical records is a cornerstone of an ophthalmic scribe’s role. Scribes record comprehensive patient histories, physical examination findings, diagnoses, and treatment plans in real-time. This includes noting visual acuity, intraocular pressure, and other critical metrics. The use of precise ophthalmic terminology, such as IOP and VA, ensures clarity and professionalism. Scribes also document medications, lab results, and follow-up instructions, maintaining organized and legible records. Their work supports continuity of care, legal compliance, and effective communication among healthcare providers, making them integral to ophthalmology practices.

Assisting with Electronic Health Records (EHR)

Ophthalmic scribes play a vital role in managing Electronic Health Records (EHR), ensuring accurate and efficient data entry. They input patient histories, exam findings, diagnoses, and treatment plans into EHR systems, maintaining up-to-date records. Scribes also assist with organizing test results, medications, and follow-up appointments, streamlining clinical workflows. Their attention to detail ensures compliance with regulatory standards, such as HIPAA, while safeguarding patient data. By optimizing EHR management, scribes enable ophthalmologists to focus on patient care, improving overall practice efficiency and enhancing the quality of documentation.

Enhancing Patient Care and Clinical Efficiency

Ophthalmic scribes significantly enhance patient care and clinical efficiency by allowing ophthalmologists to focus on diagnostics and treatments rather than documentation. By capturing real-time patient interactions, scribes ensure accurate and detailed records, enabling better-informed treatment decisions. This streamlined process reduces wait times and improves patient satisfaction. Scribes also assist in tracking treatment plans, follow-ups, and medications, ensuring continuity of care. Their role in maintaining precise documentation supports timely interventions and enhances overall practice workflow, ultimately leading to improved patient outcomes and more efficient clinical operations.

Ophthalmic Scribe Certification (OSC)

The OSC exam consists of 125 questions, assessing knowledge in ophthalmic scribing, including history taking, documentation, and patient services. The study guide prepares scribes for real-world challenges and future trends in ophthalmology.

Eligibility Requirements for the OSC Exam

To qualify for the Ophthalmic Scribe Certification (OSC) exam, candidates must complete an approved training program or demonstrate equivalent experience. Hands-on scribing experience is highly recommended. The exam is administered by the Joint Commission on Allied Health Personnel in Ophthalmology (JCAHPO). Candidates must also possess strong knowledge of ophthalmic terminology, anatomy, and documentation practices. Proficiency in electronic health records (EHR) and understanding of regulatory standards are essential. Meeting these requirements ensures candidates are well-prepared to excel in the exam and succeed as certified ophthalmic scribes.

Exam Format and Content

The OSC exam consists of 125 multiple-choice questions assessing knowledge in ophthalmic scribing. Topics include patient history documentation, ophthalmic terminology, and EHR management. The exam evaluates understanding of clinical procedures and regulatory standards, ensuring scribes can accurately document patient encounters and support ophthalmologists effectively.

Benefits of Obtaining the OSC Certification

Obtaining the OSC certification validates your expertise in ophthalmic scribing, enhancing career opportunities and earning potential. It demonstrates a commitment to professional growth and adherence to industry standards. Certified scribes are preferred by employers, as they ensure accurate and efficient documentation, allowing ophthalmologists to focus on patient care. The certification also opens doors to advanced roles and specialized fields within ophthalmology, such as retina or glaucoma scribing. By achieving OSC certification, you position yourself as a skilled professional dedicated to improving patient outcomes and streamlining clinical operations in eye care settings.

Essential Knowledge Areas for Ophthalmic Scribes

This section covers foundational topics like ophthalmic anatomy, terminology, instruments, pharmacology, and documentation skills, ensuring scribes are well-prepared to support ophthalmologists effectively in clinical settings.

Ophthalmic Anatomy and Physiology

Mastery of ophthalmic anatomy is crucial for accurate documentation. Key structures include the eyelid, which protects and maintains eye moisture, and the cornea, the transparent front layer focusing light. The retina, lining the eye’s back, contains photoreceptors (rods and cones) that convert light into signals. The optic nerve transmits these signals to the brain, enabling vision. Understanding these components and their functions is vital for scribes to document patient conditions and treatments effectively, ensuring precise communication between clinicians and patients.

Ophthalmic Terminology and Abbreviations

Mastering ophthalmic terminology and abbreviations is essential for accurate documentation. Common terms include IOP (intraocular pressure), VA (visual acuity), and ARMD (age-related macular degeneration). Understanding these terms ensures precise communication between clinicians and patients. Key abbreviations like OD (right eye), OS (left eye), and OU (both eyes) are frequently used in patient records. Familiarity with this specialized language enables scribes to document efficiently and maintain clarity in medical records, which is critical for effective patient care and clinical decision-making in ophthalmology settings.

Ophthalmic Instruments and Their Uses

Ophthalmic instruments are crucial for diagnosing and managing eye conditions. The slit-lamp provides detailed views of the anterior segment, while the tonometer measures intraocular pressure to detect glaucoma. The ophthalmoscope allows examination of the retina and optic nerve. A autorefractor measures lens power for prescriptions, and keratometers assess corneal curvature. These tools enable accurate assessments, ensuring precise diagnoses and effective treatment plans. Understanding their functions is vital for scribes to document findings accurately and support clinicians in delivering high-quality patient care.

Ophthalmic Pharmacology and Medications

Ophthalmic pharmacology involves medications used to treat eye conditions, such as glaucoma, infections, and inflammation. Common drugs include prostaglandin analogs for intraocular pressure reduction and antibiotics for infections. Anti-inflammatory agents like steroids and NSAIDs are used for conditions like uveitis. Understanding drug mechanisms, side effects, and interactions is crucial for accurate documentation. Scribes must recognize medications, dosages, and administration routes, ensuring precise recording in patient records. This knowledge aids in maintaining treatment consistency and preventing adverse events, ultimately supporting effective patient care and clinical decision-making in ophthalmology settings.

Medical Documentation and Scribing Skills

Mastering medical documentation and scribing skills is essential for accurately recording patient histories, examination findings, and treatment plans. Precision and clarity ensure compliance with legal and medical standards, enhancing patient care and streamlining clinical workflows.

History Taking and Patient Assessment

Accurate history taking and patient assessment are critical skills for ophthalmic scribes. This involves documenting detailed medical histories, including chief complaints, symptoms, medications, and family history. Scribes must capture the patient’s visual acuity, intraocular pressure, and any history of eye conditions or surgeries. They also record lifestyle factors and allergies, ensuring all information is precise and relevant. Reviewing previous records and lab results is essential to provide a comprehensive overview. By maintaining clarity and organization, scribes enable ophthalmologists to make informed decisions. This process requires strong listening skills, attention to detail, and the ability to use ophthalmic terminology accurately. It ensures compliance with medical standards and supports effective diagnosis and treatment planning.

Physical Examination Findings Documentation

Documenting physical examination findings is a critical task for ophthalmic scribes. This includes accurately recording visual acuity, intraocular pressure, and findings from slit-lamp exams. Scribes must detail observations of the cornea, iris, lens, and retina, noting any abnormalities or signs of disease. They also document pupil reactions, extraocular muscle function, and eyelid health. Ensuring clarity and precision in describing findings, such as corneal edema or retinal hemorrhages, is essential. Accurate documentation supports ophthalmologists in diagnosis and treatment planning. It also ensures continuity of care and compliance with medical standards, making it a cornerstone of effective patient management and communication.

Recording Diagnoses and Treatment Plans

Accurately recording diagnoses and treatment plans is vital for ophthalmic scribes. This involves documenting specific diagnoses, such as glaucoma or macular degeneration, and detailing treatment strategies like medications, surgeries, or lifestyle modifications. Scribes must ensure all information is clear, concise, and properly organized for easy reference by healthcare providers. They also document follow-up instructions and patient education provided by ophthalmologists. Accurate recording of these elements ensures continuity of care and compliance with medical standards. It also supports effective communication among healthcare team members and enhances patient outcomes by providing a clear roadmap for ongoing management and treatment.

Compliance with Billing and Coding Standards

Ophthalmic scribes must ensure accurate documentation to comply with billing and coding standards. This includes using correct ICD-10 and CPT codes for diagnoses and procedures. Scribes should verify coding accuracy to prevent errors that could lead to reimbursement issues or legal problems. Adherence to HIPAA guidelines is essential to protect patient confidentiality. Proper documentation also ensures compliance with regulatory requirements, maintaining trust and integrity in patient care. Scribes play a critical role in maintaining precise records that align with billing standards, supporting efficient and ethical healthcare operations. Their attention to detail directly impacts the financial and legal aspects of ophthalmology practices.

Ophthalmic Patient Services and Care

Ophthalmic scribes ensure seamless patient services, from pre- and post-exam preparation to assisting with diagnostic tests and educating patients on treatment plans, enhancing care efficiency and compliance.

Pre- and Post-Exam Patient Preparation

Effective pre-exam preparation involves gathering patient history, medications, and test results, while ensuring equipment is ready. Scribes explain exam procedures, address anxieties, and provide clear instructions. Post-exam, they review findings, discuss care plans, and educate on medications or follow-ups, ensuring patient understanding and compliance. This role enhances care continuity, reduces errors, and improves patient satisfaction, making scribes invaluable in streamlining ophthalmology workflows.

Assisting with Diagnostic Tests and Procedures

Ophthalmic scribes play a crucial role in supporting diagnostic tests and procedures by preparing patients, documenting findings, and ensuring accurate data entry. They assist with setting up equipment, positioning patients, and maintaining asepsis during procedures. Scribes record test results, such as visual acuity, intraocular pressure, and imaging findings, in electronic health records. Their attention to detail ensures precise documentation of abnormalities or conditions identified during exams. By efficiently managing these tasks, scribes enable ophthalmologists to focus on complex diagnostics, enhancing overall patient care and clinical efficiency.

Education on Treatment Plans and Follow-Up

Ophthalmic scribes play a vital role in educating patients about their treatment plans and the importance of follow-up care; They ensure patients understand their diagnoses, medications, and recommended procedures. Scribes provide clear instructions on how to use eye drops, wear protective eyewear, or prepare for future appointments. They also document patient education efforts in electronic health records, ensuring continuity of care. By communicating effectively with patients and reinforcing physician instructions, scribes help improve adherence to treatment plans and promote better health outcomes. This role enhances patient satisfaction and supports long-term vision health management.

Electronic Health Records (EHR) Management

EHR management is crucial for ophthalmic scribes, involving efficient data entry, ensuring accuracy, and maintaining patient record security in fast-paced ophthalmology settings.

Overview of EHR Systems in Ophthalmology

EHR systems in ophthalmology are specialized platforms designed to manage detailed patient records, including visual acuity, intraocular pressure, and imaging results. These systems streamline clinical documentation, enabling efficient data entry and retrieval; Ophthalmic scribes rely on EHRs to accurately record patient histories, diagnoses, and treatment plans. Key features include integration with diagnostic tools and secure sharing of patient data. Understanding EHR systems is essential for effective ophthalmic scribing, as they enhance patient care and practice efficiency while ensuring compliance with healthcare standards. Mastery of these systems is a cornerstone of modern ophthalmology workflows;

Efficient Data Entry and Record Maintenance

Efficient data entry is crucial for ophthalmic scribes to maintain accurate and up-to-date patient records. This involves quickly capturing detailed information such as visual acuity readings, intraocular pressure measurements, and diagnostic test results. Scribes must ensure that all data is entered correctly and promptly, minimizing errors that could impact patient care. Regularly reviewing and updating records helps maintain their integrity. Proper organization of EHRs also facilitates easy access for healthcare providers, improving clinical decision-making. By mastering efficient data entry techniques, ophthalmic scribes play a vital role in enhancing both patient care and practice efficiency, ensuring seamless communication across the healthcare team.

Ensuring Accuracy and Security in EHR

Ensuring accuracy and security in Electronic Health Records (EHR) is a critical responsibility for ophthalmic scribes. This involves verifying the correctness of all entered data, such as patient histories, diagnoses, and treatment plans. Scribes must adhere to strict confidentiality protocols to protect sensitive patient information. Implementing secure login procedures and regularly updating passwords helps safeguard EHR systems from unauthorized access. Additionally, staying compliant with regulations like HIPAA ensures patient data remains confidential. By maintaining high standards of accuracy and security, ophthalmic scribes contribute to reliable patient records and uphold trust in healthcare delivery.

Ophthalmic Scribing in Specialized Fields

Ophthalmic scribing in specialized fields like retina, cornea, and glaucoma requires tailored documentation skills. Scribes must adapt to unique terminology and procedures, ensuring precise and efficient patient records across diverse ophthalmic subspecialties.

Scribing in Retina, Cornea, and Glaucoma Specialties

Scribing in specialized fields like retina, cornea, and glaucoma demands precise documentation of complex procedures and diagnoses. Scribes must master specific terminology and protocols for each subspecialty. In retina care, they document procedures like injections or laser treatments, while in cornea specialties, they focus on surgeries and transplant follow-ups. Glaucoma scribing involves accurately recording intraocular pressure measurements and treatment plans. These roles require a deep understanding of diagnostic tools and therapies unique to each field, ensuring accurate and efficient patient records that support optimal care and clinical decision-making.

Documentation in Oculoplastics and Comprehensive Ophthalmology

Documentation in oculoplastics and comprehensive ophthalmology requires meticulous attention to detail, as these fields involve complex surgical and medical interventions. Scribes must accurately record procedures like eyelid reconstructions, orbital surgeries, and cosmetic eye procedures in oculoplastics. In comprehensive ophthalmology, they document routine exams, chronic conditions, and treatment plans for diseases like cataracts or diabetes-related eye issues. The ability to integrate diagnostic results, surgical notes, and follow-up care into clear, concise records is essential. This ensures seamless communication between healthcare providers and supports high-quality patient outcomes in both specialized and general ophthalmic care settings.

Study Tips and Exam Preparation

Utilize practice tests and mock exams to assess readiness. Create a structured study schedule and review flashcards for key terms. Focus on weak areas and practice past papers to build confidence.

Effective Study Strategies for the OSC Exam

Mastering the Ophthalmic Scribe Study Guide requires a structured approach. Begin by creating a detailed study schedule to cover all topics systematically. Focus on understanding ophthalmology-specific terminology and practicing documentation scenarios. Utilize flashcards to memorize key terms and concepts. Dedicate time to reviewing practice tests and analyzing areas of weakness. Simulate real exam conditions by timing yourself during practice sessions. Prioritize active learning techniques, such as summarizing notes or teaching concepts to others. Stay organized and review materials consistently to build confidence and competence for the OSC exam.

Practice Tests and Mock Exams

Practice tests and mock exams are indispensable tools for OSC exam preparation. They simulate real exam conditions, helping candidates familiarize themselves with the format, timing, and types of questions. Regularly taking practice tests identifies weak areas, allowing focused study. Mock exams also improve time management and reduce exam-day anxiety. By replicating the actual test environment, these resources enhance problem-solving skills and ensure a thorough understanding of ophthalmic scribing concepts. Consistent practice with these tools significantly boosts confidence and readiness for the certification exam, ensuring aspiring scribes are well-prepared to succeed.

Utilizing Study Guides and Resources

Ophthalmic scribe study guides are essential for mastering the skills and knowledge needed for certification. These resources provide comprehensive coverage of ophthalmic terminology, anatomy, and documentation practices. They include detailed sections on Electronic Health Records (EHR), patient history-taking, and diagnostic procedures. Additionally, many guides offer interactive tools, such as flashcards and quizzes, to reinforce learning. By leveraging these resources, aspiring scribes can systematically review and practice key concepts, ensuring a thorough understanding of the material. Structured study plans and expert tips within these guides further enhance preparation, making them invaluable for achieving success on the OSC exam and in real-world applications.

Advanced Topics and Future Trends

Explore emerging technologies like virtual scribing and AI-driven documentation tools transforming ophthalmic scribing. Discover how these innovations enhance efficiency and patient care in modern eye care practices.

Emerging Technologies in Ophthalmic Scribing

The integration of AI-driven tools and virtual scribing platforms is revolutionizing ophthalmic documentation. These technologies enhance accuracy, streamline workflows, and enable real-time data capture, improving patient care outcomes. Advances in electronic health records (EHR) systems further support efficient documentation, while automation reduces administrative burdens. Additionally, emerging tools like speech-to-text software and predictive analytics are transforming how ophthalmic scribes manage patient records, diagnose conditions, and track treatment progress. These innovations not only improve clinical efficiency but also ensure compliance with evolving healthcare standards, making certified scribes indispensable in modern ophthalmology practices.

The Role of Virtual Scribing in Modern Ophthalmology

Virtual scribing has transformed ophthalmology by enabling remote documentation, increasing flexibility for scribes, and improving clinic efficiency. By allowing scribes to work remotely, virtual scribing addresses staffing shortages while maintaining high documentation standards. This approach enhances patient care by reducing distractions during exams and ensuring accurate, real-time records. Clinics benefit from cost savings on physical space and gain access to a broader talent pool. Virtual scribing also supports specialized documentation needs, such as retina or glaucoma cases, ensuring precise and detailed records. This innovative practice is reshaping how ophthalmology clinics operate, making it a cornerstone of modern healthcare delivery.

Future Demand for Certified Ophthalmic Scribes

The demand for certified ophthalmic scribes is expected to grow significantly as healthcare evolves. With advancements in technology and an aging population, the need for skilled professionals to manage detailed documentation increases. Certified scribes are better positioned to meet the challenges of modern ophthalmology, making them highly sought after. The rise of EHR systems and specialized eye care further fuels this demand. As clinics strive to improve efficiency and patient outcomes, the role of certified ophthalmic scribes becomes indispensable. This growing demand presents a promising career path for those interested in healthcare documentation and eye care.

Thank you for your dedication to becoming a certified ophthalmic scribe. This guide provides essential knowledge to excel in your role, preparing you for certification and real-world challenges. Continuous learning and professionalism are key to success. Best of luck on your exams and future endeavors!

Summarizing Key Concepts

This guide provides a thorough overview of the ophthalmic scribe role, emphasizing the importance of accurate documentation, EHR management, and patient care. It highlights essential skills like history taking, physical exam documentation, and compliance with billing standards. The certification process, exam preparation, and the benefits of obtaining the OSC credential are also covered. Key topics include ophthalmic anatomy, terminology, instruments, and pharmacology, ensuring a well-rounded understanding of the field. By mastering these concepts, aspiring scribes can enhance clinical efficiency and deliver high-quality patient care in ophthalmology settings.

Encouragement for Aspiring Ophthalmic Scribes

Becoming an ophthalmic scribe is a rewarding career choice for those passionate about healthcare and detail-oriented work. This role not only enhances patient care but also offers opportunities for professional growth. Aspiring scribes should embrace this journey, as the demand for certified professionals continues to rise. With dedication and the right resources, such as this study guide, you can master the skills needed to excel in ophthalmology. Remember, your work will directly impact patient outcomes and clinical efficiency. Stay motivated, leverage available tools, and take the first step toward a fulfilling career in this vital field.

Continuous Learning and Professional Growth

Continuous learning is essential for ophthalmic scribes to stay updated on advancements in ophthalmology and medical documentation. Pursuing additional certifications or specialized training can enhance career prospects and deepen expertise. Staying informed about new technologies, medications, and diagnostic techniques ensures scribes remain valuable assets to their teams. Leveraging resources like study guides and professional courses fosters growth and adaptability in this evolving field. By committing to lifelong learning, ophthalmic scribes can advance their careers, explore specialized roles, and contribute meaningfully to patient care and clinical efficiency, ensuring they remain integral to the healthcare landscape.

Continue Reading

motorola walkie talkie user guide

Motorola walkie talkies are trusted communication tools known for reliability and durability. Popular models like the T42 and T62 offer features such as private calls, group calls, and emergency alerts.

1.1 Overview of Motorola Walkie Talkies

Motorola walkie talkies are reliable, portable communication devices designed for both personal and professional use. Popular models like the T42, T62, and XT180 offer advanced features such as private calls, group calls, and emergency alerts. These radios support multiple channels, allowing users to communicate efficiently in various environments. They operate on rechargeable NiMH batteries or alkaline batteries, ensuring long-lasting performance. Motorola walkie talkies are known for their durability, clear audio quality, and user-friendly interfaces. Whether for outdoor adventures, workplace coordination, or family trips, Motorola walkie talkies provide a robust solution for instant communication. Their versatile design and ease of use make them a favorite among consumers and professionals alike.

1.2 Importance of the User Guide

The user guide is essential for maximizing the functionality of your Motorola walkie talkie. It provides step-by-step instructions for setting up the device, programming channels, and adjusting settings like volume levels. By following the guide, users can learn how to make private calls, group calls, and use emergency alert features effectively. The manual also includes safety information, such as RF exposure guidelines and general precautions, to ensure safe and efficient operation. Additionally, it covers troubleshooting common issues like no power, poor reception, and distorted audio. Understanding the user guide helps users maintain their device properly, including cleaning and storing the radio. This ensures optimal performance and longevity of the walkie talkie.

Getting Started

Getting started with your Motorola walkie talkie involves unboxing, inventory, understanding controls, inserting batteries, and referring to the user guide for setup and operation.

2.1 Unboxing and Inventory

When you unbox your Motorola walkie talkie, ensure all components are included. Typically, the package contains the radio unit, antenna, charger, batteries, belt clip, and user manual. Check for any damage or missing items. Inventory the accessories, such as NiMH rechargeable battery packs or AA alkaline batteries, and verify the charger type (e.g., micro-USB). Familiarize yourself with the contents to ensure proper setup and operation. If any items are missing or damaged, contact Motorola support immediately. Proper inventory ensures you have everything needed to start using your device effectively.

  • Radio unit
  • Antenna
  • Charger
  • Batteries
  • Belt clip
  • User manual

2.2 Understanding Controls and Buttons

The Motorola walkie talkie features intuitive controls designed for easy operation. The On/Off and Volume Control button is typically located on the top or side, allowing you to power the device and adjust sound levels. The Menu button enables navigation through settings, while the Push-to-Talk (PTT) button on the side is used for transmitting voice messages. Additional buttons may include channel selection and emergency alert activation. Familiarize yourself with the layout to ensure smooth functionality; Refer to the user manual for model-specific details, as button placements may vary slightly between devices like the T42 or T62. Proper understanding of the controls enhances communication efficiency.

  • On/Off and Volume Control
  • Menu Navigation Button
  • Push-to-Talk (PTT) Button
  • Channel Selection Buttons
  • Emergency Alert Button

2.3 Inserting Batteries

Motorola walkie talkies typically support either a rechargeable NiMH battery pack or 3 AA alkaline batteries. To insert batteries, first ensure the device is powered off. For the NiMH pack, align it with the charging dock or plug in the Micro-USB charger. When using AA batteries, open the battery compartment, usually located at the base or rear of the radio, and insert the batteries according to the polarity markings. Secure the compartment tightly. The radio will beep when battery levels are low, indicating it’s time to recharge or replace them. Always turn off the device before removing or replacing batteries to avoid power surges.

  • Use NiMH rechargeable or 3 AA alkaline batteries
  • Align battery pack with charging dock or use Micro-USB
  • Open battery compartment and insert AA batteries correctly
  • Secure compartment tightly
  • Low battery alert via beep
  • Power off before removing or replacing batteries

Basic Operations

Mastering basic operations is essential for effective communication. This section covers turning the radio on/off, adjusting volume, and making calls, all detailed in the user manual.

  • Power management
  • Volume adjustment
  • Call initiation

3.1 Turning the Radio On/Off

Turning your Motorola walkie talkie on and off is straightforward. Locate the power button, typically on the top or side, and press it to power on.

A confirmation tone or light may indicate the device is operational. To turn off, press the same button until the radio shuts down completely.

Ensure the battery is installed correctly before attempting to power on. Refer to the user manual for specific instructions if needed.

3.2 Adjusting Volume

Adjusting the volume on your Motorola walkie talkie ensures clear communication. Locate the volume control button, typically labeled with a ‘+’ and ‘-‘ symbol.

Press the ‘+’ button to increase the volume and the ‘-‘ button to decrease it. Some models may require pressing and holding the button for continuous adjustment.

A confirmation tone or LED indicator may signal when the volume reaches maximum or minimum levels. For optimal performance, adjust the volume in a quiet environment to ensure clarity.

Refer to your user manual for specific instructions, as button placements may vary slightly between models.

3.3 Making Calls

To make a call on your Motorola walkie talkie, start by selecting the desired channel using the channel selector button or menu.

Press and hold the Push-to-Talk (PTT) button located on the side of the device to initiate the call.

Speak clearly into the microphone, ensuring your voice is audible. Release the PTT button to listen for a response.

For private calls, enter the recipient’s Private ID using the keypad and press the call button.

For group calls, select the group ID from the menu and press the PTT button to connect with all members in that group.

In case of emergencies, use the emergency alert feature to send a distress signal to all connected radios.

Ensure the radio is set to the correct channel and that the volume is adjusted for clear communication before making a call.

Advanced Features

Motorola walkie talkies offer advanced features like channel programming, private and group calls, and emergency alerts. These features enhance communication efficiency and safety in various environments.

4.1 Channels and Channel Programming

Motorola walkie talkies allow users to program multiple channels for organized communication. Each channel can be set with specific frequencies and privacy codes to minimize interference. Using the user guide, users can easily add or delete channels, ensuring efficient group communication. The process typically involves selecting the desired channel number and configuring the frequency settings through the device’s menu. Proper channel programming ensures seamless connectivity and reduces static, making it ideal for both personal and professional use. The manuals provide step-by-step instructions to help users manage channels effectively, ensuring optimal performance in various environments.

4.2 Private Calls and Group Calls

Motorola walkie talkies support both private and group calls, enhancing communication flexibility. Private calls allow one-to-one conversations using unique Private IDs, ensuring confidentiality. Group calls enable one-to-many communications, ideal for team coordination. The user guide details how to initiate these call types, providing clear instructions for setting up Private IDs and joining group channels. This feature is particularly useful in busy environments, helping to minimize interruptions. By following the guide, users can efficiently manage their communications, ensuring clear and private interactions. This functionality makes Motorola devices versatile for both personal and professional use, offering reliable connectivity in various settings.

4.3 Emergency Alerts

Motorola walkie talkies are equipped with emergency alert features to ensure user safety. The device includes an emergency alert button that, when activated, sends a distress signal to other radios in the group. This feature is designed to quickly alert team members or contacts in critical situations. Additionally, some models include a built-in siren or LED light to enhance visibility and urgency. The user guide provides step-by-step instructions on how to enable and use these emergency functions. Users can also customize alert tones and ensure their radio is set up to receive emergency signals. This feature is invaluable for outdoor adventures, workplace safety, or any situation requiring rapid communication. Always review the user guide to understand how to use emergency alerts effectively.

Battery and Charging

Motorola walkie talkies support NiMH rechargeable batteries and AA alkaline batteries. Use the micro-USB charger to charge the NiMH pack efficiently. Ensure the radio is powered off before charging for optimal performance.

5.1 Types of Batteries

Motorola walkie talkies are compatible with two primary battery types: rechargeable NiMH (Nickel-Metal Hydride) battery packs and disposable AA alkaline batteries. NiMH batteries are eco-friendly and cost-effective, offering long-lasting performance when properly maintained. Alkaline batteries provide a reliable power source for situations where recharging isn’t feasible. Both options ensure uninterrupted communication, with the device alerting users when battery levels are low. For optimal performance, use high-quality batteries and follow the manufacturer’s guidelines for charging and storage. This versatility in battery options makes Motorola walkie talkies adaptable to various environments and user needs.

5.2 Charging the Battery

Charging your Motorola walkie talkie battery is a straightforward process. For NiMH rechargeable batteries, use the provided micro-USB charger. Ensure the radio is powered off before charging to prevent damage. Plug the charger into a power source and connect it to the battery pack or the radio directly, depending on the model. The charging time typically ranges from 8 to 12 hours for a full charge. Avoid overcharging, as it may reduce battery lifespan. Always use Motorola-approved chargers to maintain compatibility and safety. For alkaline batteries, no charging is required; simply replace them when low. Proper charging practices help extend the battery’s performance and overall device reliability.

Troubleshooting Common Issues

Troubleshooting common issues with Motorola walkie talkies involves addressing no power, poor reception, and distorted audio. These problems can often be resolved with simple adjustments or maintenance steps.

6.1 No Power Issues

No power issues can occur due to drained or incorrectly inserted batteries. Ensure the battery pack is fully charged and properly seated. If using alkaline batteries, check their expiration dates. Power off the radio before charging to avoid damage. Verify the charger is functioning and the micro-USB connection is secure. If problems persist, try resetting the device or replacing the battery pack. Always refer to the user guide for specific troubleshooting steps to resolve power-related issues effectively.

6.2 Poor Reception

Poor reception can result from physical obstructions, distance limits, or interference from other devices. Ensure the antenna is fully extended and free from damage. Move to a higher location or open area to improve signal strength. Check for nearby electronic devices that may cause interference. Verify that all users are on the same channel and frequency. If issues persist, reset the radio or re-program the channels. Refer to the user guide for specific troubleshooting steps to enhance reception and maintain clear communication.

6.3 Distorted Audio

Distorted audio can occur due to low battery levels, interference from nearby electronic devices, or physical obstructions blocking the signal. Ensure the radio is fully charged and try moving to an open area. Check for interference from devices like televisions or microwaves and switch them off temporarily. Clean the antenna to remove dirt or debris that might affect signal quality. Adjust the volume to an optimal level, as extreme settings can cause distortion. If issues persist, reset the radio by turning it off and on again. Refer to the user guide for additional troubleshooting steps to resolve audio distortion and restore clear communication.

Maintenance Tips

Regularly clean the device with a soft cloth to remove dirt and debris. Store the radio in a dry, cool place away from direct sunlight exposure.

7.1 Cleaning the Device

Regular cleaning ensures optimal performance and longevity of your Motorola walkie talkie. Use a soft, dry cloth to gently wipe away dirt, dust, or moisture from the exterior; Avoid harsh chemicals or abrasive materials that could damage the finish or harm internal components. For stubborn stains, lightly dampen the cloth with water, but ensure no moisture enters the device. Pay special attention to the antenna, speaker, and screen areas, as these are prone to dust accumulation. After cleaning, allow the device to air dry before turning it on. Cleaning should be done every 1-2 months or as needed, especially after exposure to harsh environments. This simple maintenance step helps maintain clear communication and device reliability.

7.2 Storing the Radio

Proper storage is crucial for maintaining the performance and longevity of your Motorola walkie talkie. Always store the radio in its original packaging or a protective case to prevent scratches and damage. Keep it in a cool, dry place, away from direct sunlight and moisture. Avoid extreme temperatures, as they can affect battery life and electronic components. Do not store the radio with a completely discharged battery; ensure it has at least a partial charge. If storing for an extended period, check the battery level periodically and recharge as needed. These steps will help preserve your device’s functionality and ensure it remains reliable when you need it next. Regular storage maintenance is essential for optimal performance.

Safety Information

Always read the RF Energy Exposure and Product Safety Guide before using your Motorola walkie talkie. Ensure compliance with safety standards to avoid health risks and device damage.

8.1 RF Exposure Guidelines

Motorola walkie talkies comply with RF exposure standards to ensure safe usage. Always follow guidelines to maintain compliance with FCC regulations in the U.S. and other applicable standards globally. Avoid modifications that could compromise safety. Use the provided antennas as specified; never operate without one. Keep the device at least 2.5 cm away from your body during use. Read the RF Energy Exposure and Product Safety Guide included with your radio for detailed instructions. Proper handling ensures safe operation and adherence to health regulations. Misuse may violate safety standards and pose risks. Always prioritize safe usage practices to maintain compliance and protect your well-being. Refer to the user manual for specific guidance.

8.2 General Safety Precautions

Always read and follow the safety guidelines provided in the user manual before using your Motorola walkie talkie. Avoid exposing the device to water or extreme temperatures, as this may damage the unit. Do not modify the radio or use unauthorized accessories, as this can lead to malfunctions. Keep the device away from flammable materials and avoid using it near gas stations or explosive environments. Ensure proper ventilation when charging to prevent overheating. Never touch the antenna during charging or while the radio is in use. Handle batteries with care to avoid leakage or explosion risks; Misuse can result in serious injury or device damage. Always adhere to these precautions for safe and reliable operation. Failure to comply may void the warranty or pose safety risks.

Popular Motorola Walkie Talkie Models

Motorola offers a variety of walkie talkie models, including the T42, T62, and XT180. These models are known for their durability and advanced features like private calls and emergency alerts.

9.1 Overview of Key Models

Motorola offers a range of walkie-talkie models to suit different needs. The T42 and T62 are popular for casual use, featuring simple designs and essential functions like private and group calls. The XT180 model is designed for more demanding environments, offering advanced features such as weather resistance and extended range. These models are known for their durability, clear audio, and user-friendly interfaces. The T42 is ideal for personal or small-group use, while the T62 and XT180 cater to outdoor enthusiasts and professionals requiring reliable communication. Each model comes with a detailed user guide, ensuring easy setup and operation. Motorola’s walkie-talkies are trusted for their performance and versatility in various settings.

9.2 Model-Specific Features

Motorola walkie-talkies offer model-specific features tailored to different user needs. The T42 model includes a built-in LED flashlight for low-light conditions, while the T62 boasts an IP67 rating for dust and water resistance. The XT180 stands out with its high-capacity battery and advanced emergency alert system. These models also support private and group calls, enabling efficient communication. The T42 and T62 are lightweight and compact, making them ideal for casual use, whereas the XT180 is designed for rugged environments. Each model’s features are detailed in the user guide, ensuring users can fully utilize their devices. Motorola’s attention to detail in each model highlights its commitment to meeting diverse communication requirements.

Appendix

The appendix provides additional resources, including user manual downloads and Motorola support contact information, ensuring comprehensive assistance for all walkie-talkie models and operational queries.

10.1 User Manual Resources

Motorola provides comprehensive user manuals for various walkie-talkie models, including the T42, T62, and XT180. These manuals are available for download on Motorola’s official website or through their support portal. They include detailed instructions for setup, channel programming, volume adjustment, and advanced features like private and group calls. Users can also find troubleshooting guides and safety information within these resources. Additionally, specific models may have dedicated sections, such as the Talkabout series, which offers manuals tailored to their unique features. These resources ensure users can maximize their device’s functionality and resolve common issues efficiently. By referring to these guides, users can enhance their communication experience and maintain optimal performance of their Motorola walkie talkies.

10.2 Motorola Support Contact Information

For assistance with Motorola walkie talkies, users can contact Motorola Solutions support directly. Visit their official website to access contact details, including phone numbers and email addresses. The support team is available to address inquiries, troubleshooting, and repair services. Additionally, regional support centers provide localized assistance, ensuring prompt resolution of issues. Users can also refer to the provided RF Energy Exposure and Product Safety Guide for safe usage instructions. By utilizing these resources, users can ensure their Motorola walkie talkies operate efficiently and safely, adhering to all necessary guidelines and regulations. This comprehensive support network underscores Motorola’s commitment to user satisfaction and product reliability.

Continue Reading

marco polo the travels pdf

1.1. Overview of Marco Polo’s Life and Expeditions

Marco Polo‚ a Venetian explorer‚ chronicled his 13th-century journeys across Asia in The Travels of Marco Polo‚ offering insights into Kublai Khan’s empire and Asian cultures‚ now available as free PDF downloads.

Marco Polo‚ born in 1254‚ was a Venetian merchant and explorer renowned for his extensive travels across Asia in the late 13th century. His journey‚ which began in 1271 alongside his father and uncle‚ took him through the Middle East‚ Central Asia‚ and ultimately to the court of Kublai Khan in China. During his time in Asia‚ Polo gained significant influence and gathered invaluable insights into the cultures and traditions of the regions he visited. His experiences were later documented in The Travels of Marco Polo‚ a book that significantly shaped European perceptions of Asia and remains a crucial historical text‚ available today as a free PDF.

1.2. Historical Significance of “The Travels of Marco Polo”

The Travels of Marco Polo is one of the most influential books in history‚ offering Europeans unprecedented insights into Asia. It became a bestseller and was widely translated‚ shaping perceptions of the East. Polo’s detailed accounts of Kublai Khan’s empire‚ trade routes‚ and Asian cultures sparked curiosity and inspired later explorers‚ including Christopher Columbus. The book remains a vital historical text‚ now accessible as a free PDF‚ allowing modern readers to explore Polo’s extraordinary journey and its lasting impact on global understanding.

The Journey to Asia

Marco Polo embarked on his epic journey to Asia in 1271 with his father and uncle‚ beginning a 24-year adventure that would open the East to Europeans.

2.1. Marco Polo’s Departure from Venice in 1271

In 1271‚ Marco Polo‚ then 17 years old‚ departed Venice with his father Niccolò and uncle Maffeo‚ beginning a 24-year journey to Asia. This expedition‚ driven by trade ambitions‚ marked the start of his historic travels. The Polos aimed to reach Kublai Khan’s court‚ setting the stage for Marco’s eventual role as a trusted emissary. Their route through the Middle East and Central Asia laid the foundation for the detailed accounts later chronicled in The Travels of Marco Polo‚ which would captivate Europe and inspire future explorers.

2.2. The Route Through the Middle East and Central Asia

Marco Polo’s journey from Venice led him through the Middle East and Central Asia‚ following the storied Silk Road. He traversed modern-day Israel‚ Iran‚ and Afghanistan‚ enduring harsh deserts and mountain passes. The Polos faced numerous challenges‚ including political instability and natural obstacles‚ yet persevered with resilience. Their route exposed Marco to diverse cultures‚ languages‚ and traditions‚ which he later documented in vivid detail. This arduous journey ultimately brought them closer to Kublai Khan’s court‚ setting the stage for Marco’s remarkable experiences in the Mongol Empire.

2.3. The Arrival at Kublai Khan’s Court

Marco Polo’s arrival at Kublai Khan’s court marked a pivotal moment in his journey. At just 17‚ he had traveled thousands of miles‚ enduring immense hardships. The Khan‚ impressed by Marco’s intelligence and curiosity‚ welcomed him warmly. Marco quickly gained favor‚ learning the Mongol language and customs‚ which enabled him to serve as a trusted emissary. His detailed observations of the empire’s wealth‚ culture‚ and governance were later immortalized in his writings‚ providing invaluable insights into the Mongol Empire’s grandeur and complexity.

Experiences in Kublai Khan’s Empire

Marco Polo gained favor at Kublai Khan’s court‚ learning Mongol languages and customs. He served as a trusted emissary‚ witnessing the empire’s vast wealth and cultural richness firsthand.

3.1. Marco Polo’s Role at the Mongol Court

Marco Polo served as a trusted emissary and advisor to Kublai Khan‚ immersing himself in Mongol culture and learning local languages. His detailed observations of the empire’s administration‚ trade‚ and societal norms were recorded in his book‚ offering a unique European perspective on Asia. His experiences at the court‚ as detailed in The Travels of Marco Polo‚ remain a vital historical resource‚ now accessible in free PDF formats for modern readers.

3.2. Observations of Asian Cultures and Traditions

Marco Polo meticulously documented the diverse cultures and traditions of Asia‚ from China’s advanced civilization to India’s vibrant religious practices. He described local customs‚ religions‚ and social structures‚ providing Europeans with their first detailed glimpse of the East. His accounts of exotic lands‚ such as the wealth of Kublai Khan’s court and the bustling trade routes‚ captivated readers. These observations‚ recorded in The Travels of Marco Polo‚ remain a cornerstone of historical understanding‚ now accessible in free PDF formats for modern scholars and enthusiasts alike.

3.3. The Wealth and Power of the Mongol Empire

Marco Polo marveled at the Mongol Empire’s immense wealth and power‚ describing Kublai Khan’s vast dominions and opulent court. He highlighted the empire’s efficient administration‚ extensive trade networks‚ and rich resources‚ such as gold‚ silver‚ and precious stones. Polo’s accounts revealed the Mongols’ military prowess and their ability to unify diverse territories‚ creating a prosperous and centralized state. His detailed observations‚ now available in free PDF editions of The Travels of Marco Polo‚ provide invaluable insights into the empire’s grandeur and its lasting impact on Asian and global history.

The Return to Europe

Marco Polo returned to Venice in 1295 after 24 years. His wealth sparked suspicion‚ leading to imprisonment during the Genoese war. His travels were later chronicled.

4.1. The Long Journey Back to Venice

Marco Polo’s return to Venice in 1295 marked the end of his 24-year journey. The arduous voyage back was fraught with challenges‚ including treacherous sea routes and political turmoil. Upon arrival‚ his wealth and tales of Asia sparked both admiration and suspicion. His imprisonment during the Genoese war provided the opportunity for his stories to be recorded‚ shaping European perceptions of the East. This period was pivotal in transforming his experiences into the literary legacy known as The Travels of Marco Polo.

4.2. Marco Polo’s Imprisonment and the Writing of His Book

During the war between Venice and Genoa‚ Marco Polo was captured and imprisoned. It was during this time that he dictated his experiences to Rusticiano da Pisa‚ resulting in the book Il Milione (The Travels of Marco Polo). The manuscript detailed his journeys‚ observations of Asian cultures‚ and interactions with Kublai Khan. Despite initial skepticism‚ the book became a bestseller‚ inspiring future explorers like Christopher Columbus. Its widespread translation and availability in PDF formats today continue to preserve Marco Polo’s legacy as a pioneering chronicler of the Silk Road and Asian civilizations.

The Travels of Marco Polo in PDF Format

The Travels of Marco Polo is widely available as a free PDF download‚ with popular editions like the 1926 Komroff version accessible online for readers worldwide.

5.1. Availability of Free PDF Downloads

The Travels of Marco Polo is accessible as a free PDF download from various online platforms. Websites like archive.org and Google Books offer downloadable versions‚ including the 1926 Komroff edition. These PDFs are available for free‚ enabling global access to Polo’s historic account. Additionally‚ platforms like Internet Archive provide free access to the Yule-Cordier edition‚ ensuring the text remains widely accessible. Readers can explore Polo’s journey through Asia and his experiences at Kublai Khan’s court without cost‚ making this historical text reachable to everyone with internet access.

5.2. Popular Translations and Editions of the Book

The Travels of Marco Polo is available in various translations and editions‚ including the 1926 Komroff edition and the Yule-Cordier edition. These versions are widely downloaded as free PDFs‚ offering detailed annotations and historical context. The Komroff edition‚ known for its readability‚ is a popular choice among readers. Additionally‚ translations by scholars like R. Latham have made the text accessible to modern audiences‚ preserving Polo’s original accounts while enhancing understanding. These editions remain essential for scholars and enthusiasts exploring Marco Polo’s journeys and legacy.

Key Themes and Highlights from the Book

The book highlights Marco Polo’s encounters with exotic lands‚ the Silk Road’s significance‚ and his observations of Asian cultures‚ inspiring European exploration and shaping global understanding.

6.1. Descriptions of the Silk Road and Trade Routes

Marco Polo’s book vividly describes the Silk Road‚ detailing trade routes connecting Europe and Asia. He highlights key cities‚ goods like spices and silks‚ and the network’s economic significance. Polo’s accounts of learning Mongol languages and adapting to customs illustrate his deep immersion. The text also portrays the road’s infrastructure‚ including well-maintained roads and bridges‚ facilitating trade. His descriptions of hospitality and bustling markets paint a vibrant picture of the Silk Road’s importance‚ showcasing its role in cultural and economic exchange between East and West‚ as detailed in free PDF versions of his travels.

6.2. Encounters with Exotic Lands and Peoples

Marco Polo’s travels introduced Europeans to exotic lands and diverse cultures. He described China’s vibrant cities‚ India’s rich traditions‚ and Persia’s bustling markets. Polo marveled at the Mongol Empire’s complexity‚ detailing its people‚ customs‚ and rulers like Kublai Khan. His accounts of Asian societies‚ religions‚ and lifestyles fascinated readers‚ bridging cultural gaps. The free PDF versions of his book highlight his encounters‚ offering vivid portrayals of distant lands and fostering curiosity about the East. These descriptions remain a cornerstone of historical exploration literature.

6.3. The Influence of Marco Polo’s Accounts on European Exploration

Marco Polo’s vivid descriptions of Asia’s wealth and diverse cultures profoundly influenced European exploration. His accounts of the Silk Road‚ Kublai Khan’s empire‚ and exotic trade routes sparked curiosity and ambition. Many explorers‚ including Christopher Columbus‚ were inspired by Polo’s tales‚ seeking to establish new trade routes and uncover the riches he described. The free PDF versions of his book further disseminated these ideas‚ fueling the Age of Exploration and shaping Europe’s perception of the East. His writings remain a cornerstone of historical inspiration for global discovery.

Historical Accuracy and Controversies

Marco Polo’s accounts have faced debates over their authenticity‚ with scholars questioning the accuracy of certain claims. Modern perspectives offer insights into potential exaggerations and interpretations.

7.1. Debates Over the Authenticity of Marco Polo’s Claims

Marco Polo’s accounts have sparked debates over their accuracy‚ with some scholars questioning the validity of certain descriptions. While his book remains a vital historical source‚ critics argue that exaggerations or interpretations may have influenced the narrative. Despite these controversies‚ The Travels of Marco Polo continues to be celebrated for its detailed insights into 13th-century Asia‚ offering unparalleled perspectives on cultures and trade routes. The availability of free PDF versions ensures ongoing accessibility for scholars and readers worldwide‚ fostering further exploration of its historical significance.

7.2. Modern Scholarly Perspectives on the Book

Modern scholars view The Travels of Marco Polo as a foundational text for understanding medieval European perceptions of Asia. While debates persist about the accuracy of certain claims‚ the book is widely regarded as a vital historical resource. Its detailed descriptions of trade routes‚ cultures‚ and political structures provide invaluable insights into the Mongol Empire and Kublai Khan’s reign. PDF editions have made the text more accessible‚ allowing contemporary researchers to analyze its content and assess its influence on European exploration and cultural exchange during the Middle Ages.

Legacy of Marco Polo’s Travels

Marco Polo’s travels reshaped Europe’s understanding of Asia‚ inspiring future explorers and fostering cultural exchange. His accounts‚ now widely available in PDF formats‚ remain a timeless historical treasure.

8.1. Impact on European Perception of Asia

Marco Polo’s vivid descriptions of Asia’s wealth‚ cultures‚ and trade routes revolutionized European perceptions‚ transforming the continent from a mysterious “Other” into a realm of fascination and opportunity. His accounts of Kublai Khan’s empire‚ Chinese cities‚ and exotic landscapes sparked curiosity and ambition‚ inspiring future explorers. The detailed narratives in The Travels of Marco Polo‚ now accessible in free PDF downloads‚ remain a cornerstone of historical understanding‚ bridging East and West and shaping Europe’s worldview for centuries. His work continues to illuminate the cultural and economic ties between Asia and Europe.

8.2. The Role of the Book in Inspiring Later Explorers

Marco Polo’s Travels ignited a sense of wonder and ambition in Europe‚ inspiring explorers like Christopher Columbus and Vasco da Gama. His vivid descriptions of Asia’s riches and trade routes fueled the desire for discovery and expansion. The book‚ now widely available as a free PDF‚ became a blueprint for later voyages‚ shaping the Age of Exploration. Its influence endured for centuries‚ motivating generations to venture beyond the known world‚ leaving an indelible mark on global history and cultural exchange.

Marco Polo’s travels remain a timeless testament to exploration and cultural exchange‚ while their availability in PDF ensures historical preservation and accessibility for future generations.

9.1. The Enduring Appeal of Marco Polo’s Travels

Marco Polo’s travels captivate readers with vivid descriptions of exotic lands and cultures‚ blending adventure and history. His accounts of the Silk Road‚ Kublai Khan‚ and Asian riches sparked European imagination‚ inspiring explorers like Columbus. The book’s historical significance‚ detailed observations‚ and cultural insights remain unparalleled‚ ensuring its relevance. Available in free PDF formats‚ Polo’s narratives continue to bridge past and present‚ offering a window into the medieval world’s diversity and complexity‚ making it a timeless classic for scholars and enthusiasts alike.

9.2. The Importance of Preserving Historical Texts in Digital Formats

Preserving historical texts like The Travels of Marco Polo in digital formats ensures their accessibility and longevity. Digital versions prevent the degradation of physical manuscripts and make the content widely available‚ fostering education and research globally. Free PDF downloads of Polo’s accounts enable scholars and enthusiasts to explore his journeys and cultural observations effortlessly. This digital preservation not only honors the past but also safeguards it for future generations‚ promoting a deeper understanding of history and its impact on modern society.

Continue Reading