mass in latin pdf

The Traditional Latin Mass, also known as the Tridentine Mass, is a historic form of the Roman Rite celebrated in Latin. Rooted in centuries of liturgical tradition, it emphasizes the sacrificial nature of the Mass and fosters deep reverence. Resources like PDF missals and guides provide faithful participants with tools to engage fully in its timeless beauty.

1.1 Overview of the Latin Mass

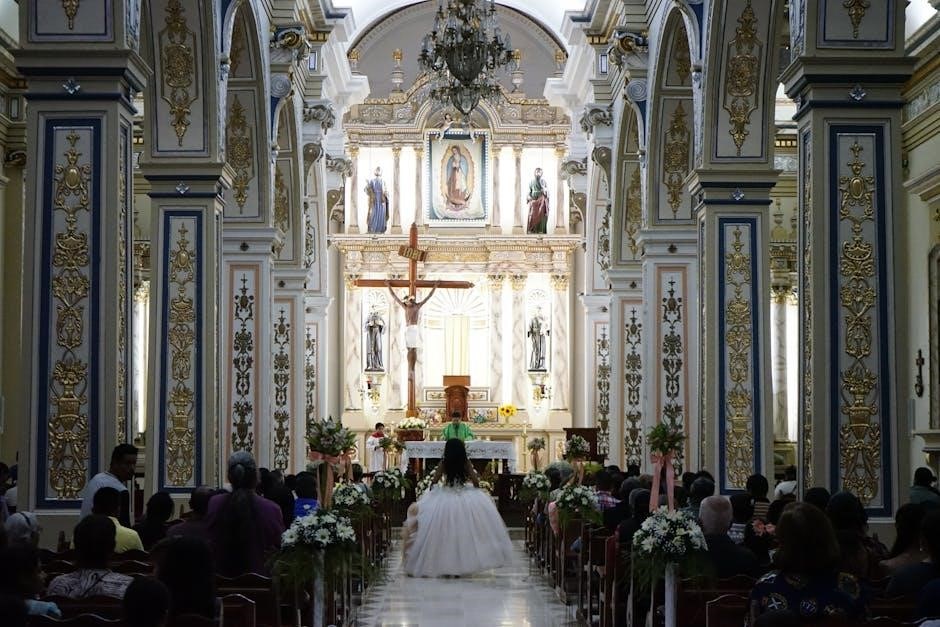
The Traditional Latin Mass, known as the Tridentine Mass, is a solemn and reverent form of the Roman Rite celebrated in Latin. It consists of two main parts: the Ordinary, which remains constant, and the Proper, which varies by liturgical day. The Mass is structured to reflect the sacrificial and devotional nature of Catholic worship, emphasizing prayer and contemplation. Resources such as PDF missals and guides are widely available, offering translations and explanations to aid participation; This ancient liturgy, rooted in tradition, continues to inspire devotion and a deep connection to the Church’s heritage. Its beauty and timelessness attract many seeking a profound spiritual experience.

1.2 Historical Significance of Latin in the Mass

The use of Latin in the Mass dates back to the early Church, becoming the universal language of Catholic liturgy. It was formalized in the Roman Rite by Pope Pius V in 1570, ensuring liturgical unity worldwide. Latin’s stability and timelessness preserved sacred texts, fostering a sense of continuity and reverence. Its universality transcended local languages, uniting Catholics across cultures. Even after Vatican II, Latin remained integral to the Church’s liturgical heritage, with many cherishing its solemnity and beauty. Resources like PDF missals continue to make Latin accessible, ensuring its enduring legacy in Catholic worship and devotion. Its historical significance endures as a bridge to the Church’s rich past.

The Structure of the Latin Mass

The Latin Mass is divided into the Ordinary and the Proper. The Ordinary includes unchanging parts like the Kyrie and Agnus Dei, while the Proper contains variable prayers and readings specific to the liturgical day. This structure ensures continuity while accommodating the Church’s seasonal and feast-day celebrations.

2.1 The Ordinary of the Mass

The Ordinary of the Mass consists of the unchanging texts and chants used in every Tridentine Mass. These include the Kyrie Eleison, Gloria in Excelsis, Credo, Sanctus, and Agnus Dei. Found in the 1962 Roman Missal, these parts form the liturgical backbone, ensuring a consistent and reverent worship experience. Many PDF resources provide English-Latin versions, aiding the faithful in participation. The Ordinary’s timelessness reflects the universal and enduring nature of Catholic liturgical tradition, connecting believers across generations in a shared act of devotion and sacrifice. This structure underscores the Mass’s transcendence and its role as a sacred, unchanging offering to God.

2.2 The Proper of the Mass

The Proper of the Mass consists of texts and chants that change according to the liturgical day or feast. These include the Introit, Collect, Epistle, Gospel, Offertory, and Communion prayers. Unlike the Ordinary, the Proper is specific to each day, reflecting the Church’s calendar and the sanctity of the occasion. Many PDF resources, such as the Liber Usualis, provide these texts in Latin with English translations, helping the faithful follow and pray along. The Proper’s variability highlights the richness of the liturgical year, allowing worship to resonate with the spiritual themes of each season or saint’s life. This section is essential for fully engaging with the Tridentine Rite.

2.3 The Liturgical Calendar and Its Impact on the Mass

The liturgical calendar plays a central role in shaping the Traditional Latin Mass, as it determines the specific prayers, readings, and chants for each day. Seasons like Advent, Lent, and Easter influence the tone and content of the Mass, emphasizing themes of penance, redemption, and joy. Feasts of saints and solemnities further enrich the liturgy with unique propers; PDF resources, such as the Liber Usualis and daily Mass sheets, provide the proper texts for each occasion, ensuring the faithful can fully participate. This connection to the Church’s annual cycle underscores the timeless and universal nature of the Tridentine Rite.

Resources for the Latin Mass

Latin-English missals, PDF guides, and online repositories offer essential tools for participating in the Traditional Latin Mass. These resources include the Ordinary, Proper, and liturgical chants.

3.1 Latin-English Missals and Their Importance

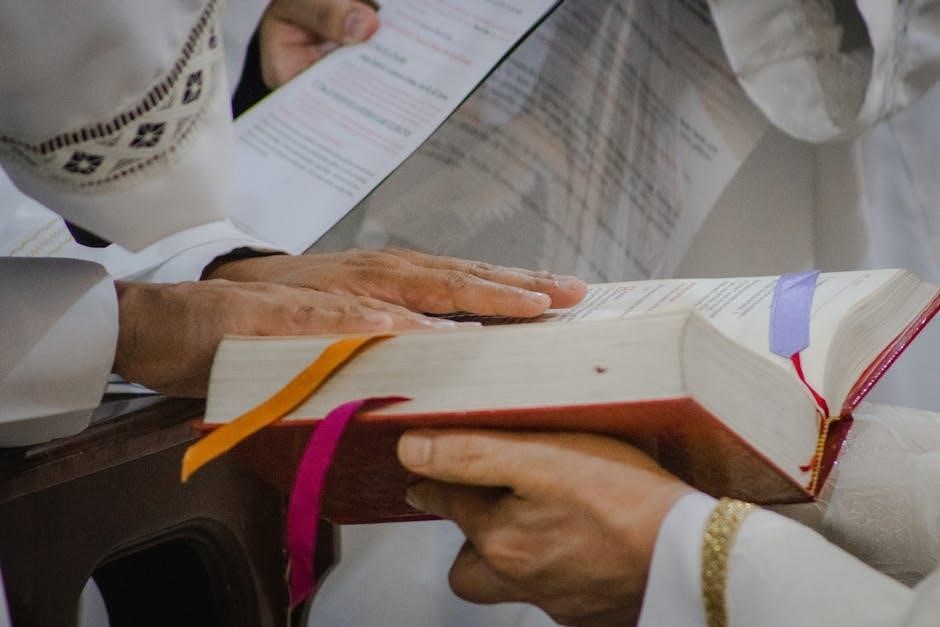
Latin-English missals are indispensable for faithful participation in the Traditional Latin Mass. They provide the Ordinary and Proper of the Mass in both languages, enabling attendees to follow the liturgy seamlessly. These missals often include translations of prayers, chants, and rubrics, making the Tridentine Rite accessible to modern congregations. Available in PDF formats, they are convenient for digital devices, ensuring that worshippers can engage deeply with the liturgical texts. By bridging the gap between Latin and the vernacular, these resources preserve tradition while fostering active participation and spiritual enrichment for all attendees.

3.2 PDF Resources for the Latin Mass

PDF resources for the Latin Mass are widely available, offering a convenient way to access liturgical texts, missals, and guides. These documents often include the Ordinary of the Mass, Proper of the day, and complementary prayers like the Leonine Prayers. Many PDFs are formatted for duplex printing, making them ideal for creating personal missallettes. Some resources also feature Gregorian chant settings and benediction prayers, enhancing the spiritual experience. Websites like ExtraordinaryForm.org provide detailed PDFs, ensuring that faithful attendees can fully participate in the Tridentine Rite. These digital tools are invaluable for modern Catholics seeking to engage deeply with the Traditional Latin Mass.

3.3 Online Repositories for Latin Mass Materials

Numerous online repositories provide extensive materials for the Traditional Latin Mass, offering easy access to liturgical texts, guides, and resources. Websites like ExtraordinaryForm.org and others host PDF missals, chant books, and theological writings. These platforms often feature the Ordinary of the Mass, Proper of the day, and complementary prayers. Many repositories also include Gregorian chant settings, benediction prayers, and historical documents; Some sites offer searchable databases, facilitating quick access to specific materials. These online resources are invaluable for both newcomers and seasoned participants, ensuring the Traditional Latin Mass remains accessible and vibrant in the digital age.

Participating in the Latin Mass

Participating in the Traditional Latin Mass requires preparation and reverence. Attendees should obtain a missal to follow the liturgy, understand the rites, and engage prayerfully in the sacred ceremony.

4.1 Etiquette and Preparation for Attendees

Attending the Traditional Latin Mass requires proper preparation and respect for its sacred nature. Arrive early to prayerfully prepare, dress modestly, and ensure electronic devices are silenced. Obtain a Latin-English missal to follow the Mass, as the liturgy is primarily in Latin. Familiarize yourself with the structure of the Mass beforehand to fully engage. Maintain reverent silence in the church, avoiding unnecessary conversation. Participate by following the missal, and respect traditional customs such as kneeling, standing, and sitting at appropriate times. This preparation fosters a deeper spiritual experience and shows respect for the timeless liturgical tradition.

4.2 Following the Mass with a Missal

Using a Latin-English missal is essential for actively participating in the Traditional Latin Mass. The missal contains the Ordinary and Proper prayers, allowing attendees to follow the liturgy in both languages. It helps bridge the gap between the Latin text and personal devotion, ensuring understanding and engagement. Many missals are available as PDF downloads, making them easily accessible for printing or digital use. By referring to the missal, participants can unite their prayers with the priest, fostering a deeper connection to the sacred rites. This practice enriches the spiritual experience, enabling the faithful to fully embrace the beauty of the Tridentine Mass.

4.3 Active Participation in the Tridentine Rite

Active participation in the Tridentine Rite involves more than mere attendance; it requires spiritual engagement and prayerful unity with the liturgy. Followers are encouraged to use Latin-English missals or prayer books to follow the Mass, uniting their prayers with the priest’s actions. This fosters a deeper connection to the sacred rituals and enhances the spiritual experience. Resources like PDF guides and missals provide the necessary texts for the Ordinary and Proper of the Mass, enabling the faithful to participate fully. Preparation through prayer and dressing modestly also reflects reverence for the liturgy. By actively engaging, attendees embody the Tridentine Mass’s timeless beauty and profound spiritual significance.

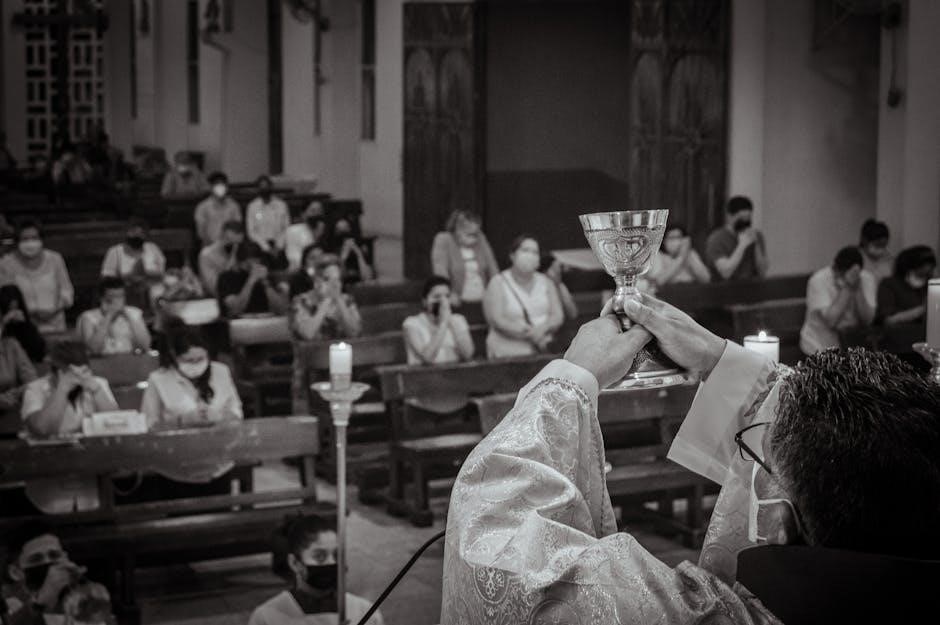
The Music of the Latin Mass

The Latin Mass is enriched by sacred music, including Gregorian chant and polyphony, which elevate the liturgy to a sublime experience. These musical traditions enhance the spiritual beauty of the Mass.

5.1 Gregorian Chant and Its Role

Gregorian chant holds a central place in the Traditional Latin Mass, serving as the liturgical music par excellence. Its monophonic melodies, often notated in square notes, are designed to complement the sacred texts of the Mass, enhancing their spiritual impact. The chants are typically sung by the choir or schola, and they include parts of the Ordinary, such as the Kyrie, Gloria, Credo, Sanctus, and Agnus Dei, as well as the Proper, which varies according to the liturgical day. Gregorian chant is not merely decorative but integral to the liturgy, fostering an atmosphere of reverence and contemplation among the faithful.

5.2 Polyphonic Music in the Latin Mass

Polyphonic music enriches the Traditional Latin Mass, adding layers of harmony to the liturgical text. Composers like Palestrina and Orlando di Lasso created masterpieces that reflect the Mass’s sanctity. Polyphony is often used for the Ordinary, such as the Gloria and Credo, while Gregorian chant handles the Proper. This interplay of musical styles elevates the liturgy, drawing the faithful into prayer. Polyphonic settings, often written for choirs, highlight the theological depth of the Mass, blending human creativity with divine worship. They are not mere embellishments but integral expressions of the sacred, preserving the liturgy’s timeless beauty and transcendent quality.

5.3 Musical Settings for the Ordinary of the Mass

The Ordinary of the Mass includes texts like the Kyrie, Gloria, Credo, Sanctus, and Agnus Dei, whose musical settings vary widely. Polyphonic compositions by masters such as Palestrina and Victoria provide rich harmonies, while Gregorian chant offers simplicity and timelessness. These settings are often found in PDF resources, allowing choirs and congregations to participate. The Ordinary’s music is unchanging, making it a constant in the liturgical experience. Such musical settings enhance the Mass’s sacrificial nature, connecting the faithful to centuries of tradition and elevating the act of worship to a sublime level of beauty and devotion. They are integral to the Latin Mass’s enduring appeal.

The History of the Latin Mass

The Latin Mass traces its roots to early Christianity, evolving through centuries into the Roman Rite. The Council of Trent solidified its structure, culminating in the 1962 Missal.

6.1 Development of the Roman Rite

The Roman Rite, central to the Latin Mass, evolved organically from early Christian liturgies. Influenced by Church Fathers like St. Ambrose, it incorporated elements from the Apostolic era. By the 4th century, it was formalized, with Pope Gregory the Great standardizing the Mass structure. Over centuries, the rite refined, yet retained its essence. The Council of Trent further solidified its practices, resulting in the 1962 Missal. This rite reflects the Church’s continuity, preserving ancient traditions while adapting to the needs of the faithful. Its development mirrors the Church’s commitment to liturgical integrity and the expression of timeless theological truths.

6.2 The Council of Trent and Its Impact

The Council of Trent (1545–1563) significantly influenced the Latin Mass, reaffirming its sacramental theology and liturgical practices. In response to the Protestant Reformation, Trent emphasized the sacrificial nature of the Mass and the role of the priest as an alter Christus. The council mandated a uniform Missal, standardizing the rite across the Latin Church. This led to the 1570 Missal of Pope Pius V, which became the foundation for the Tridentine Mass. Trent’s decrees ensured the preservation of Latin, reinforcing the Mass’s universal character. The council’s impact endured, shaping the liturgy for centuries and maintaining its theological richness and liturgical integrity.

6.3 The 1962 Missal and Its Significance

The 1962 Missal, often referred to as the “Missal of Pope John XXIII,” marks a pivotal moment in the history of the Latin Mass. It represents the last edition of the Tridentine Missal before the liturgical reforms following Vatican II. This Missal is significant for its meticulous preservation of centuries-old liturgical traditions, including the use of Latin and the structure of the Mass. It remains a cornerstone for traditionalist Catholics, ensuring the continuity of the Tridentine Rite. The 1962 Missal’s detailed rubrics and prayers reflect the rich theological and spiritual heritage of the Latin Mass, making it a cherished resource for those devoted to its timeless form.

The Theology of the Latin Mass

The Latin Mass profoundly reflects Catholic theology, emphasizing the Mass as a sacrificial act offered by the priest in persona Christi. Its structure and language highlight the transcendence and sacredness of the Eucharist, fostering devotion and reverence among the faithful.

7.1 The Sacrificial Nature of the Mass

The Latin Mass underscores the sacrificial nature of the Eucharist, mirroring Christ’s offering on Calvary. The priest, acting in persona Christi, offers the sacrifice to God the Father. This emphasis is evident in the liturgical prayers and gestures, such as the elevation of the Host and the chalice. The faithful participate by uniting their prayers and sacrifices with Christ’s, fostering a deep sense of reverence and spiritual union. This theology is central to the Tridentine Rite, highlighting the Mass as both a sacrifice and a sacred banquet, fulfilling the command to “do this in memory of Me.”

7.2 The Role of the Priest in the Latin Rite

In the Traditional Latin Mass, the priest acts as in persona Christi, offering the sacrifice of the Eucharist to God the Father. The priest’s role is deeply sacrificial, emphasizing the divine and mysterious nature of the liturgy. Through precise gestures and prayers, the priest facilitates the sacred rites, ensuring the integrity of the liturgical tradition. The use of Latin underscores the universality and timelessness of the Mass, with the priest serving as a bridge between the faithful and the divine. This role requires a profound understanding of liturgical norms and a commitment to preserving the sacred character of the Tridentine Rite.

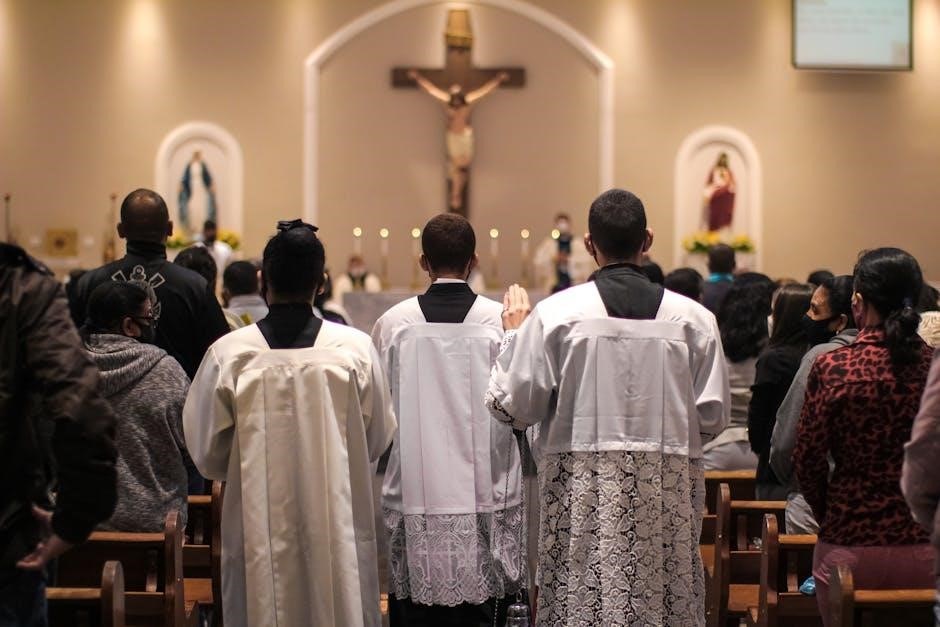
7.3 The Sanctity and Reverence of the Tridentine Mass

The Tridentine Mass embodies profound sanctity and reverence, reflecting its centuries-old tradition. The use of Latin and elaborate rituals fosters an atmosphere of awe and mystery, emphasizing the sacred nature of the Eucharistic sacrifice. The priest’s ad orientem posture and the congregation’s kneeling during communion deepen the sense of worship. The Mass’s structure and prayers, unchanged for centuries, convey a timeless connection to the divine. This reverence is preserved through meticulous adherence to liturgical norms, ensuring that the faithful experience the fullness of Catholic worship, rooted in tradition and spiritual elevation. The Tridentine Mass remains a powerful expression of devotion and transcendence.

Comparisons with the Novus Ordo Mass

The Novus Ordo Mass differs from the Traditional Latin Mass in language, structure, and emphasis, offering a modern liturgical approach while maintaining core Catholic doctrines and rituals.

8.1 Similarities and Differences

The Traditional Latin Mass and the Novus Ordo Mass share the same sacramental essence, but differ in liturgical language and structure. The Latin Mass, rooted in ancient traditions, uses Latin exclusively, emphasizing sacrificial and reverent aspects. In contrast, the Novus Ordo, introduced post-Vatican II, incorporates vernacular languages and a more participatory style, while maintaining the sacramental integrity. Both forms express the Eucharistic mystery but cater to different spiritual and cultural preferences within the Church. Resources like PDF missals help bridge understanding between these liturgical expressions, ensuring continuity and unity in Catholic worship.

8.2 Liturgical Language and Its Implications

Liturgical language significantly impacts the spiritual experience of the Mass; The Traditional Latin Mass uses Latin, emphasizing universality and timelessness, while the Novus Ordo often employs vernacular languages to enhance understanding and participation. Latin’s retention in the Tridentine rite underscores the Mass’s sacrificial and transcendent nature, fostering a sense of continuity with centuries of Catholic tradition. Vernacular languages, however, facilitate active engagement and accessibility for modern congregations. Resources like PDF missals and bilingual texts help bridge these linguistic and liturgical differences, ensuring that both forms remain vital and meaningful to the faithful.

8.3 The Reception of the Latin Mass in Modern Times

The Traditional Latin Mass has experienced a resurgence in modern times, attracting diverse demographics seeking spiritual depth and liturgical beauty. Younger generations, in particular, find solace in its timeless rituals and universal language. Despite its traditional nature, the Latin Mass is increasingly accessible through PDF resources, online missals, and workshops. This revival reflects a broader desire for liturgical authenticity and connection to the Church’s rich heritage. While some view it as a counter to contemporary trends, others see it as a complementary expression of Catholic worship, enriching the spiritual landscape of the modern Church.

The Traditional Latin Mass remains a profound expression of Catholic worship, bridging centuries of devotion. Its timeless appeal and availability through PDF resources ensure its enduring legacy.

9.1 The Timeless Appeal of the Latin Mass

The Traditional Latin Mass captivates believers with its profound beauty and historical depth. Its use of sacred language and rituals transcends time, connecting modern worshippers to centuries of devotion. PDF resources, like missals and guides, facilitate participation, making this ancient rite accessible. The Latin Mass’s enduring appeal lies in its ability to evoke reverence and unity among the faithful, offering a spiritual experience rooted in tradition and continuity. Its timeless nature ensures that it remains a cherished part of Catholic heritage, inspiring awe and fostering a deeper connection to the divine.

9.2 The Importance of Preserving Liturgical Tradition

Preserving liturgical tradition ensures the continuity of sacred practices, safeguarding the spiritual richness of the Latin Mass. The Tridentine Rite, documented in PDF missals and resources, retains the essence of Catholic worship, emphasizing the sacrificial nature of the Mass and fostering reverence. By maintaining these traditions, future generations can experience the profound beauty and theological depth of the liturgy. This preservation not only honors the past but also nourishes the spiritual lives of the faithful, ensuring that the timeless truths of the Church remain vibrant and accessible in an ever-changing world.

Continue Reading

mitsubishi fuso fault codes pdf

Mitsubishi Fuso, a leader in heavy-duty vehicles, provides essential fault codes for efficient diagnostics. These codes, detailed in PDF manuals, help identify issues in engines, transmissions, ABS, and ECUs, ensuring timely repairs and maintenance.

1.1 Overview of Mitsubishi Fuso Trucks and Buses

Mitsubishi Fuso, a renowned manufacturer of commercial vehicles, offers a diverse range of trucks and buses known for their reliability and durability. Their product lineup includes popular models like the Canter and Fighter trucks, designed for various commercial applications, and the Aero series buses, which emphasize passenger comfort and safety. These vehicles are equipped with advanced systems, including engines, transmissions, and braking technologies, to ensure optimal performance and safety on the road.

Fault codes play a crucial role in maintaining these vehicles, as they provide insights into system malfunctions. From engine issues to ABS and ECU-related problems, understanding these codes enables quicker diagnoses and repairs. Mitsubishi Fuso’s commitment to innovation and quality is reflected in their comprehensive service manuals and PDF guides, which are essential resources for technicians and fleet owners alike.

1.2 Importance of Understanding Fault Codes

Understanding fault codes is essential for maintaining the performance and longevity of Mitsubishi Fuso vehicles. These codes provide critical insights into system malfunctions, allowing technicians to identify issues quickly and accurately. By referencing the PDF manuals and diagnostic guides, professionals can determine the root cause of problems, whether they involve engine components, transmission systems, ABS modules, or ECU communication errors.

Ignoring or misinterpreting fault codes can lead to more severe damage, increased repair costs, and potential safety hazards. Regular monitoring and analysis of these codes ensure proactive maintenance, reducing downtime and ensuring vehicles operate efficiently. Moreover, fault codes help in resetting systems after repairs, verifying that issues have been resolved. This knowledge is vital for both routine maintenance and complex troubleshooting, making it indispensable for anyone working with Mitsubishi Fuso trucks and buses.

Types of Mitsubishi Fuso Fault Codes

Mitsubishi Fuso fault codes categorize issues into engine-related, transmission, ABS/brake system, and ECU communication errors. These codes help pinpoint malfunctions, ensuring precise diagnostics and efficient repairs for optimal vehicle performance.

2.1 Engine-Related Fault Codes

Engine-related fault codes in Mitsubishi Fuso vehicles indicate issues with the powertrain, such as fuel injection, combustion, or exhaust systems. Codes like P0202 and P0203 point to injector circuit malfunctions in specific cylinders. These codes are critical for diagnosing problems like low compression, faulty sensors, or fuel system leaks. The 6M60 engine, commonly used in Fuso trucks, often generates codes related to the common rail system, which controls fuel injection timing and pressure. By analyzing these codes, technicians can identify whether the issue stems from a mechanical failure or an electronic malfunction; Regularly updating diagnostic tools ensures access to the latest code definitions, which is essential for accurate troubleshooting. Engine-related faults must be addressed promptly to avoid progressive damage, emphasizing the importance of consulting Mitsubishi Fuso service manuals for detailed repair guidance.

2.2 Transmission and Gearbox Fault Codes

Transmission and gearbox fault codes in Mitsubishi Fuso vehicles are crucial for identifying issues within the drivetrain system. These codes often indicate problems such as slipping gears, solenoid malfunctions, or sensor failures. For example, codes related to torque converter performance or clutch pack engagement can signal mechanical wear or electronic control errors. Regular monitoring of these codes is essential to prevent progressive damage, as transmission issues can lead to costly repairs if left unaddressed. Mitsubishi Fuso service manuals provide detailed explanations of these codes, enabling technicians to perform precise diagnostics and repairs. By leveraging tools like the Multi-Use Tester II, operators can retrieve and interpret transmission-related fault codes efficiently. Addressing these issues promptly ensures optimal vehicle performance and extends the lifespan of the transmission system. Always refer to the latest PDF manuals for accurate troubleshooting and repair guidance.

2.3 ABS and Brake System Fault Codes

ABS and brake system fault codes in Mitsubishi Fuso vehicles are vital for ensuring safety and reliability. These codes identify issues such as sensor malfunctions, hydraulic system leaks, or electronic control unit errors. Common codes may indicate problems with the ABS module, wheel speed sensors, or brake pedal switches. For instance, a code signaling low brake fluid levels or a faulty ABS pump can prevent accidents by alerting drivers to potential braking failures. Mitsubishi Fuso PDF manuals provide comprehensive lists of these codes, along with diagnostic procedures and repair guidelines. Technicians can use tools like the Multi-Use Tester II to read and clear these codes, ensuring the brake system operates correctly. Regular inspection of ABS and brake components, guided by the fault codes, helps maintain vehicle safety and compliance with regulatory standards. Addressing these issues promptly is critical to preventing accidents and ensuring driver safety on the road.

2.4 ECU and Communication Fault Codes

ECU and communication fault codes in Mitsubishi Fuso vehicles are crucial for diagnosing issues within the vehicle’s electronic control systems. These codes often indicate problems with communication between ECUs, such as the Engine Control Module (ECM) or Transmission Control Module (TCM). Common faults include CAN bus communication errors, faulty sensors, or corrupted software. For example, a code like “E03 VCM communication error” points to issues with the Vehicle Control Module, while “E04 ECM communication error” highlights problems with the Engine Control Module. Mitsubishi Fuso PDF manuals provide detailed explanations of these codes, enabling technicians to pinpoint malfunctions. Tools like the Multi-Use Tester II can read these codes, allowing for targeted repairs. Addressing ECU and communication faults is essential for maintaining optimal vehicle performance, as these systems govern critical functions such as engine operation, transmission shifting, and safety features. Regular updates to these codes ensure accurate diagnostics and effective troubleshooting.

How to Read Mitsubishi Fuso Fault Codes

Reading Mitsubishi Fuso fault codes involves using the Multi-Use Tester II or vehicle-side diagnostic functions. Count the malfunction indicator lamp flashes to identify codes, ensuring accurate troubleshooting and repairs.

3.1 Using the Multi-Use Tester II

The Multi-Use Tester II is a specialized tool for diagnosing Mitsubishi Fuso vehicles. It connects to the vehicle’s ECU, enabling the retrieval of detailed fault codes, live data, and system tests; By following the on-screen instructions, users can identify specific issues, such as engine or transmission problems, and monitor real-time sensor data. This tool is essential for technicians to pinpoint malfunctions accurately and efficiently, ensuring repairs are done correctly. The Tester II also supports code clearing after repairs, helping to restore the vehicle to optimal operation. Regular updates to the tool ensure compatibility with the latest Fuso models and technologies.

3.2 Vehicle Side Diagnostic Functions

Mitsubishi Fuso vehicles are equipped with built-in diagnostic functions that can be accessed without specialized tools. By monitoring the malfunction indicator lamp (MIL) on the instrument panel, technicians can identify fault codes through the number of flashes. This method provides a straightforward way to diagnose issues, especially in the field. Additionally, certain models feature an LCD display in the instrument cluster, which shows actual service data, such as sensor readings and system status. This real-time information aids in troubleshooting by allowing technicians to monitor vehicle performance directly. While this method is convenient, it is often used in conjunction with the Multi-Use Tester II for more detailed analysis. Leveraging these vehicle-side diagnostic functions ensures efficient issue identification and resolution, helping to maintain the vehicle’s reliability and performance. Regular use of these features can also help prevent minor issues from escalating into major problems.

3.3 Reading Actual Service Data

Reading actual service data is crucial for diagnosing issues in Mitsubishi Fuso vehicles. This data, retrieved from the vehicle’s sensors and switches, provides real-time insights into system performance. By accessing the actual service data, technicians can monitor parameters such as engine speed, temperature, and pressure, helping to identify deviations from normal operating conditions. The Multi-Use Tester II or vehicle-side diagnostic functions can display this data, enabling precise troubleshooting. For example, abnormal sensor readings may indicate faulty components or system malfunctions. This feature is particularly useful for identifying intermittent issues that do not trigger fault codes. Regular monitoring of actual service data can also aid in preventive maintenance, reducing the risk of unexpected breakdowns. By analyzing this data, technicians can address potential problems early, ensuring the vehicle operates efficiently and safely. This capability is a key component of Mitsubishi Fuso’s diagnostic system, enhancing overall vehicle reliability and performance.

Mitsubishi Fuso Repair and Service Manuals

Mitsubishi Fuso repair and service manuals offer detailed guides for trucks and buses, including fault codes, wiring diagrams, and repair procedures for models like Canter and Fighter, ensuring efficient diagnostics and maintenance.

4.1 Where to Find Mitsubishi Fuso Service Manuals PDF

Mitsubishi Fuso service manuals in PDF format are readily available through various channels. The official Mitsubishi Fuso website offers downloadable manuals for specific models, ensuring access to authentic and updated information. Additionally, authorized dealerships provide these manuals, either free of charge or for a nominal fee, catering to both professionals and DIY enthusiasts. For convenience, third-party platforms like repairmanuals.com or manualslib.com host a wide range of Mitsubishi Fuso service manuals, including fault code lists and wiring diagrams. These resources are particularly useful for troubleshooting and maintenance tasks. When downloading, ensure the manual corresponds to your vehicle’s model year and type, such as Canter or Fighter, to guarantee relevance and accuracy. Always verify the source’s reliability to avoid outdated or incorrect information, which could lead to unsafe repairs. These manuals are indispensable for anyone aiming to maintain or repair their Mitsubishi Fuso vehicle effectively.

4.2 Mitsubishi Fuso Canter and Fighter Service Manuals

Mitsubishi Fuso Canter and Fighter service manuals are comprehensive guides tailored to specific models, offering detailed instructions for maintenance, repairs, and diagnostics. The Canter manual covers light-duty trucks, including models like the FE, FG, and FB series, while the Fighter manual focuses on medium-duty buses and trucks. Both manuals include fault code lists, wiring diagrams, and troubleshooting procedures, essential for addressing issues efficiently. These resources are available in PDF format, ensuring easy access and portability. They are particularly useful for technicians and mechanics, providing step-by-step repair instructions and specifications. By following the manual’s guidelines, users can ensure compliance with manufacturer standards, reducing the risk of improper repairs. Regular updates to these manuals reflect the latest technical advancements, making them indispensable tools for maintaining Mitsubishi Fuso vehicles in optimal condition. They are a must-have for anyone involved in the service and repair of these vehicles.

4.3 Mitsubishi Fuso Electrical Wiring Diagrams

Mitsubishi Fuso electrical wiring diagrams provide a detailed visual representation of the vehicle’s electrical systems, making it easier to identify and repair faults. These diagrams are included in the service manuals and are essential for understanding the complex electrical circuits in Fuso trucks and buses. They cover various systems, including the engine, transmission, ABS, and ECU, ensuring technicians can trace wiring routes and diagnose issues efficiently. The diagrams are available in PDF format, allowing for easy access and zooming in on specific sections. Regular updates ensure the diagrams reflect the latest technical changes, making them indispensable for accurate repairs. By referencing these wiring diagrams, professionals can quickly locate faulty components, such as sensors, actuators, or connectors, and perform targeted repairs. This resource is crucial for maintaining the reliability and performance of Mitsubishi Fuso vehicles, ensuring electrical systems operate smoothly and safely.

Troubleshooting Based on Fault Codes

Mitsubishi Fuso electrical wiring diagrams are essential for diagnosing and repairing electrical system issues. Found in service manuals, these diagrams provide detailed layouts of wiring circuits for engines, transmissions, ABS, and ECUs. They help technicians trace connections, identify faulty components, and understand system interactions. Available in PDF format, the diagrams are easily accessible and scalable for precise viewing. Regular updates ensure they reflect the latest technical specifications, making them a reliable resource for accurate repairs. By referencing these diagrams, professionals can efficiently locate issues such as faulty sensors, connectors, or wiring harnesses. This resource is vital for maintaining the electrical integrity and performance of Mitsubishi Fuso vehicles, ensuring safe and effective troubleshooting and maintenance.

5.1 Interactive Troubleshooting Guide

The Mitsubishi Fuso Interactive Troubleshooting Guide is a dynamic tool designed to help technicians diagnose and resolve issues efficiently. By inputting specific fault codes, users can access detailed step-by-step inspection procedures tailored to the stored diagnostic trouble codes (DTCs). For example, codes like P0202 (Injector Circuit, Cylinder No.) trigger guided checks to identify faulty injectors or wiring issues. The guide also integrates actual service data, allowing technicians to monitor sensor readings and system performance in real time. Additionally, it includes visual aids like wiring diagrams to trace connections and pinpoint malfunctions. This interactive approach streamlines the repair process, reducing downtime and ensuring accurate fixes. The guide covers a wide range of systems, including engine, transmission, ABS, and ECU-related faults. Regular updates keep the tool aligned with the latest technical specifications, making it an indispensable resource for Mitsubishi Fuso technicians. It also provides instructions for resetting fault codes after repairs, ensuring proper system reset and verification. This comprehensive solution enhances diagnostic accuracy and efficiency, helping professionals maintain Mitsubishi Fuso vehicles at peak performance.

5.2 Common Issues and Their Solutions

Common issues with Mitsubishi Fuso vehicles often relate to fault codes such as P0202 (Injector Circuit, Cylinder No.) and P0203, which indicate problems with fuel injectors or wiring. Solutions involve checking injector resistance, wiring connections, and replacing faulty components. Communication errors like E03 (VCM communication error) and E04 (ECM communication error) can be resolved by inspecting CAN bus connections and ensuring proper module communication. Brake-related faults, such as low rear brake light current, require checking bulb condition, wiring, and brake light switches. For ECU-related codes like E05 (DCM communication error), resetting the system or updating software may be necessary. Regularly consulting the Mitsubishi Fuso fault code PDF ensures accurate diagnoses. Additionally, issues like faulty sensors or malfunctioning ABS modules can be addressed by referencing the troubleshooting guide and performing sensor calibration or module replacements. Timely repairs based on these solutions help maintain vehicle performance and safety.

5.3 Resetting Fault Codes After Repair

After resolving the issues identified by fault codes, resetting the codes is crucial to clear the ECU memory. For Mitsubishi Fuso vehicles, this can be done using the Multi-Use Tester II or vehicle side diagnostic functions. Connect the Multi-Use Tester II to the OBD-II port, select the erase function, and confirm the reset. Vehicle side diagnostics involve using the instrument panel to count the malfunction indicator lamp flashes, then turning the ignition on and off in a specific sequence. Additionally, some models require entering the diagnostic mode via the trip meter or other buttons. Always refer to the Mitsubishi Fuso fault code PDF manual for precise instructions, as procedures may vary by model. Resetting ensures the system no longer displays resolved issues, preventing confusion during future diagnostics. Proper resetting also helps maintain accurate monitoring of the vehicle’s condition, ensuring reliability and performance. Regular checks post-reset are recommended to confirm no recurring faults.

Preventive Maintenance and Fault Code Prevention

Regular maintenance is key to preventing fault codes. Adhere to service schedules, monitor sensors, and address wear promptly. Using Mitsubishi Fuso PDF guides ensures proactive care, reducing unexpected issues and extending vehicle lifespan.

6.1 Regular Maintenance Schedules

Regular maintenance is crucial for preventing fault codes in Mitsubishi Fuso vehicles. Adhering to the recommended service intervals ensures optimal performance and minimizes the risk of system malfunctions. Maintenance schedules typically include oil changes, filter replacements, tire pressure checks, and inspections of critical components like brakes and belts. These schedules are detailed in Mitsubishi Fuso service manuals, which provide specific guidelines tailored to different models such as the Canter and Fighter. By following these schedules, operators can identify potential issues early, reducing downtime and repair costs. Additionally, maintaining accurate service records helps track the vehicle’s condition over time. Regular maintenance not only prevents fault codes but also extends the lifespan of the vehicle, ensuring reliability and safety on the road.

6.2 Best Practices to Avoid Common Faults

Adhering to best practices is essential for minimizing the occurrence of fault codes in Mitsubishi Fuso vehicles. Regular inspections and timely repairs, as outlined in Mitsubishi Fuso service manuals, help prevent issues before they escalate. Proper use of diagnostic tools, such as the Multi-Use Tester II, allows for early detection of potential faults. Maintaining clean electrical connections and ensuring all software updates are installed can prevent communication errors. Operators should also avoid ignoring warning signs, such as unusual noises or dashboard alerts, as addressing these promptly reduces the risk of severe malfunctions. Additionally, following proper repair procedures and using genuine parts ensures long-term reliability. By combining these practices with a proactive maintenance approach, operators can significantly reduce the likelihood of common faults and extend the lifespan of their Mitsubishi Fuso vehicles.

6.3 Using PDF Guides for Proactive Maintenance

Mitsubishi Fuso PDF guides are invaluable for proactive maintenance, enabling operators to identify and address potential issues before they lead to costly repairs. These comprehensive resources, such as service manuals and fault code lists, provide detailed maintenance schedules, diagnostic procedures, and troubleshooting steps. By following the recommended routines outlined in these guides, operators can ensure that their vehicles remain in optimal condition. Regular checks of critical systems, such as brakes, engines, and transmissions, can prevent faults from arising. Additionally, the PDF guides include wiring diagrams and parts catalogs, which simplify the process of identifying and replacing worn or faulty components. Proactive maintenance not only extends the lifespan of Mitsubishi Fuso vehicles but also enhances their reliability and performance. Operators are encouraged to refer to these guides regularly to stay informed and ensure their fleets operate efficiently.

Resources and References

Official Mitsubishi Fuso websites and trusted forums offer downloadable PDF manuals, fault code lists, and wiring diagrams. These resources are essential for diagnostics and repairs, ensuring accurate troubleshooting and maintenance.

7.1 Links to Download Mitsubishi Fuso PDF Manuals

Various online platforms offer downloadable Mitsubishi Fuso PDF manuals, including official Mitsubishi Fuso websites and trusted automotive forums. These manuals provide detailed information on fault codes, repair procedures, and wiring diagrams for specific models like the Canter and Fighter. Users can access service manuals for engines, transmissions, and electrical systems, ensuring comprehensive diagnostics and repairs. Additionally, some forums share user-contributed resources, such as fault code lists and troubleshooting guides. Always verify the source for accuracy and compatibility with your vehicle model. These manuals are invaluable for mechanics and owners seeking to resolve issues efficiently. They often include step-by-step instructions and diagrams, making complex repairs more manageable. Regularly updated resources ensure access to the latest technical information, keeping your Mitsubishi Fuso vehicle in optimal condition.

7.2 Availability of Fault Code Lists and Repair Guides

Fault code lists and repair guides for Mitsubishi Fuso vehicles are widely available online. Official Mitsubishi Fuso websites and authorized service centers provide detailed PDF documents that include comprehensive fault code explanations, diagnostic procedures, and repair instructions. These resources cover various models, such as the Canter and Fighter series, ensuring that specific issues can be addressed effectively. Additionally, automotive forums and specialized repair websites host extensive libraries of fault codes and troubleshooting guides, often contributed by experienced mechanics and vehicle owners. These documents are essential for both professional technicians and DIY enthusiasts, offering step-by-step solutions and practical advice. Regular updates ensure that the information remains current and relevant, reflecting the latest advancements in Mitsubishi Fuso technology. By utilizing these resources, users can efficiently diagnose and resolve faults, minimizing downtime and maintaining optimal vehicle performance.

Continue Reading

clean eating shopping list pdf

Clean eating emphasizes whole, unprocessed foods, promoting better health and energy. It focuses on natural ingredients, avoiding additives, and mindful meal planning to simplify grocery shopping and nourish your body effectively.

What is Clean Eating?

Clean eating is a dietary approach that focuses on consuming whole, unprocessed foods in their natural state. It emphasizes fresh vegetables, fruits, lean proteins, whole grains, and healthy fats while avoiding additives, preservatives, and artificial ingredients. The goal is to nourish the body with nutrient-dense foods, promoting better digestion, energy, and overall health. Clean eating encourages mindfulness about food choices, ensuring meals are balanced and free from harmful substances. By prioritizing quality ingredients, individuals can create a foundation for long-term wellness and vitality. This approach also supports sustainable eating habits, making it easier to maintain a healthy lifestyle over time.

Benefits of Clean Eating

Clean eating promotes overall well-being by focusing on nutrient-dense foods that boost energy levels and support weight management. It helps improve digestion, reduce inflammation, and enhance skin health. By avoiding processed foods, individuals can experience fewer cravings and better blood sugar control. Clean eating also fosters a healthier relationship with food, encouraging mindful eating and a balanced diet. Over time, this approach can reduce the risk of chronic diseases, such as heart disease and diabetes, while improving mental clarity and physical performance. Incorporating clean eating habits can lead to long-term benefits, making it a sustainable choice for a healthier lifestyle.

How to Get Started with Clean Eating

Starting with clean eating begins with small, manageable changes. Begin by purging your pantry of processed foods and restocking with whole, unprocessed ingredients. Plan your meals weekly to ensure balanced nutrition and reduce food waste. Use a clean eating shopping list to guide your grocery trips, focusing on fresh vegetables, fruits, lean proteins, whole grains, and healthy fats. Gradually incorporate these foods into your diet, substituting unhealthy choices with cleaner alternatives. Stay hydrated by drinking plenty of water and limiting sugary beverages. Consider meal prepping to save time and maintain consistency. Finally, educate yourself on clean eating principles and seek inspiration from recipes and guides to keep your meals diverse and enjoyable.

Understanding the Clean Eating Shopping List

A clean eating shopping list serves as a guide for selecting whole, unprocessed foods. It emphasizes fresh produce, lean proteins, whole grains, and healthy fats, helping you avoid processed items and stay organized during grocery trips while personalizing your nutrition needs.

Importance of a Shopping List

A clean eating shopping list is essential for maintaining focus and discipline while grocery shopping. It helps avoid unhealthy impulse purchases and ensures you stick to whole, nutrient-dense foods. By planning ahead, you can reduce food waste and save time. A well-organized list also ensures you don’t forget key ingredients, keeping your meals balanced and nutritious. Additionally, it serves as a guide to avoid processed and high-sugar items, aligning with your clean eating goals. Personalizing your list based on preferences and dietary needs makes it more effective. Over time, using a shopping list becomes a habit, simplifying your transition to a cleaner lifestyle and helping you stay committed to healthy choices.

Key Components of a Clean Eating List

A clean eating shopping list typically includes fresh vegetables like leafy greens, broccoli, and bell peppers, along with vibrant fruits such as berries, apples, and bananas. Lean proteins like chicken, turkey, fish, eggs, and legumes are essential. Whole grains like quinoa, brown rice, and oats provide sustained energy; Healthy fats, including avocados, nuts, seeds, and olive oil, are also vital. Herbs, spices, and natural sweeteners like honey or maple syrup can enhance flavors without processed additives. Including organic options when possible ensures fewer pesticides and richer nutrients. This structured approach ensures meals are balanced, nutrient-dense, and aligned with clean eating principles, helping to avoid unhealthy choices and stay on track with dietary goals.

How to Personalize Your List

Personalizing your clean eating shopping list involves tailoring it to your dietary needs, preferences, and lifestyle. Start by assessing your weekly meal plan and identifying essential items. Incorporate organic options for produce with high pesticide exposure, and add your favorite fruits, vegetables, and proteins. Consider your budget and availability of seasonal ingredients. For meal variety, include a mix of staples like whole grains, nuts, and seeds, alongside versatile ingredients like herbs and spices. If you have specific dietary restrictions, such as vegan or gluten-free, adjust the list accordingly; Finally, organize your list by store sections or categories to streamline shopping. Regularly review and update your list to reflect changing preferences and nutritional goals for optimal success.

Essential Food Categories for Clean Eating

Fresh vegetables, fruits, lean proteins, whole grains, and healthy fats form the core of clean eating. These categories provide balanced nutrition, supporting overall health and energy.

Fresh Vegetables

Fresh vegetables are a cornerstone of clean eating, offering essential vitamins, minerals, and antioxidants. They should be consumed in a variety of colors to ensure a broad range of nutrients. Popular choices include leafy greens like spinach and kale, cruciferous vegetables such as broccoli and cauliflower, and vibrant options like bell peppers and tomatoes. These vegetables can be enjoyed raw, roasted, or steamed, making them versatile for various meals. Incorporating seasonal produce maximizes flavor and nutrient content, while frozen options provide convenience without compromising nutritional value. A well-stocked fridge with fresh vegetables supports healthy eating habits and keeps meals exciting and wholesome.

Fresh Fruits

Fresh fruits are a vibrant and nutritious addition to a clean eating diet, providing natural sweetness, fiber, and essential vitamins. Incorporate a variety of colorful fruits like berries, apples, bananas, and citrus to ensure a wide range of nutrients. Opt for seasonal fruits to maximize flavor and nutrient density, and consider organic options when possible to reduce exposure to pesticides. Frozen fruits are also a convenient alternative, retaining most of their nutritional value and offering year-round accessibility. Fresh fruits are perfect for snacks, smoothies, or adding natural sweetness to meals. They support energy levels, digestion, and overall well-being, making them a fundamental component of a clean eating lifestyle.

Lean Proteins

Lean proteins are essential for muscle repair, growth, and maintaining overall health. Clean eating emphasizes sourcing high-quality, unprocessed protein sources like poultry, fish, eggs, beans, and legumes. Opt for organic, grass-fed, or wild-caught options to avoid harmful additives and hormones. Chicken, turkey, and fish like salmon or cod are excellent choices due to their high protein content and lower fat levels. Plant-based proteins, such as lentils, chickpeas, and black beans, are also versatile and nutritious. Low-fat dairy products like Greek yogurt or cottage cheese can be included for additional variety; Incorporating lean proteins into meals helps regulate hunger, supports energy levels, and promotes a balanced diet. Always choose fresh or frozen options over processed meats to align with clean eating principles.

Whole Grains

Whole grains are a cornerstone of clean eating, offering essential nutrients, fiber, and sustained energy. They include options like brown rice, quinoa, oats, barley, and whole wheat. Unlike refined grains, whole grains retain their bran, germ, and endosperm, providing vitamins, minerals, and antioxidants. Incorporate whole grain bread, pasta, and cereals into your meals for a nutritious base. Look for labels that specify “100% whole grain” to avoid processed alternatives. Ancient grains like Kamut and farro are also excellent choices for variety. Whole grains support digestive health, reduce inflammation, and help maintain stable blood sugar levels. They are versatile and can be used in salads, as side dishes, or as the foundation for meals, making them a fundamental part of a clean eating lifestyle.

Healthy Fats

Healthy fats are crucial for brain function, hormone production, and absorbing essential vitamins. They include avocados, nuts, seeds, olive oil, and fatty fish like salmon. These fats are rich in omega-3s and monounsaturated fatty acids, which reduce inflammation and improve heart health. Incorporate sources like almonds, walnuts, chia seeds, and flaxseeds into your diet for added nutrition. Avocados are also a versatile and nutrient-dense option. When shopping, opt for unprocessed fats and avoid hydrogenated oils. Healthy fats add flavor and satisfaction to meals, making them a key component of a balanced clean eating lifestyle. They support energy levels and overall well-being, ensuring your body functions optimally while maintaining a natural, wholesome diet.

Best Practices for Shopping

Best practices for clean eating shopping include buying organic when possible, planning meals, sticking to your list, and avoiding processed foods to ensure healthy choices.

Buying Organic: When and Why

Buying organic is a cornerstone of clean eating, ensuring foods are free from synthetic pesticides, herbicides, and genetically modified organisms (GMOs). Opt for organic when possible, especially for produce with thin skins or high pesticide residues, like berries, spinach, and apples. Organic meats and dairy avoid antibiotics and hormones, promoting cleaner, healthier options. While organic can be more expensive, it’s worth the investment for better nutrient density and reduced exposure to harmful chemicals. Prioritize organic for items you consume frequently to maximize health benefits. Always check for the USDA Organic label to verify authenticity, and consider local farmers’ markets for fresh, organic produce. This practice aligns with clean eating principles, fostering a healthier lifestyle and environment.

Reading Labels: Avoiding Processed Foods

Reading food labels is crucial for clean eating, as it helps identify and avoid processed foods. Look for products with fewer ingredients and avoid those containing added sugars, excessive sodium, and unhealthy fats. Be wary of artificial flavors, colors, and preservatives, which are common in packaged items. Opt for foods with recognizable, whole ingredients rather than chemical-sounding names. Check for hidden additives like MSG, high-fructose corn syrup, and partially hydrogenated oils. Clean eating emphasizes simplicity, so prioritize products with short, straightforward ingredient lists. Avoid foods labeled as “low-fat” or “diet,” as they often contain substitutes that are unhealthy. By becoming a label reader, you can make informed choices and steer clear of processed foods that undermine your clean eating goals.

Seasonal Produce: Maximizing Nutrients

Incorporating seasonal produce into your clean eating shopping list ensures you’re getting the freshest, most nutrient-dense foods. Produce that’s in season tends to have higher vitamin and mineral content, as it’s harvested at peak ripeness. This approach also supports local farmers and reduces the environmental impact of transporting out-of-season foods. Seasonal fruits and vegetables often cost less and taste better, making them a practical and flavorful choice. For example, spring brings leafy greens like spinach and asparagus, while summer offers vibrant berries and tomatoes. Fall introduces hearty squash and apples, and winter provides citrus fruits and root vegetables like sweet potatoes. By aligning your grocery list with what’s in season, you can maximize nutrients, enjoy variety, and connect with nature’s cycles in your clean eating journey.

Sample Clean Eating Shopping List

A clean eating shopping list includes fresh vegetables, fruits, lean proteins, whole grains, and healthy fats. Customize it with organic options and seasonal produce for variety and nutrients.

Vegetables: Common Choices

Vegetables are an essential part of a clean eating diet, offering vitamins, minerals, and antioxidants. Common choices include leafy greens like spinach, broccoli, cauliflower, and kale. Root vegetables such as sweet potatoes, carrots, and beets are also popular. Cruciferous options like Brussels sprouts and cabbage provide excellent nutrition. Fresh vegetables like tomatoes, cucumbers, and bell peppers add variety to meals. Frozen or canned options (without added sodium or sugar) are convenient alternatives. Incorporating a mix of colors ensures a wide range of nutrients. Organic and seasonal produce is recommended for optimal flavor and health benefits. These vegetables can be used in salads, stir-fries, soups, or as snacks, making them versatile for any meal plan.

Fruits: Nutritious Options

Fruits are a vibrant and nutritious addition to a clean eating diet, offering natural sweetness and essential vitamins. Popular choices include berries like blueberries, strawberries, and raspberries, which are rich in antioxidants. Apples, bananas, and oranges provide sustained energy and fiber. Tropical options like mangoes and pineapples add flavor and variety. Citrus fruits such as lemons and grapefruits are great for boosting immunity. Avocados, though often considered a fruit, are celebrated for their healthy fats. Incorporating seasonal fruits ensures freshness and optimal nutrition. Opting for organic and pesticide-free varieties is recommended. Fruits can be enjoyed as snacks, added to salads, or blended into smoothies, making them a versatile and delicious part of your clean eating journey.

Proteins: Healthy Sources

Proteins are essential for muscle repair and energy, making them a cornerstone of clean eating. Opt for lean sources like chicken, turkey, and fish, which are rich in omega-3s and low in saturated fats. Eggs, tofu, and legumes such as beans and lentils are versatile and packed with nutrients. Grass-fed beef and bison offer higher-quality protein with fewer additives. Plant-based options like quinoa and edamame are great for vegetarians. Wild-caught fish, such as salmon and cod, provide additional health benefits. Choosing organic or free-range proteins reduces exposure to hormones and antibiotics. Incorporating a variety of protein sources ensures a balanced diet and supports overall wellness, helping you feel satisfied and energized throughout the day. Always check labels to avoid processed or high-sodium options.

Grains: Whole and Unprocessed

Whole grains are a foundational component of clean eating, offering essential nutrients like fiber, vitamins, and minerals. Opt for unprocessed options such as brown rice, quinoa, oatmeal, and whole wheat to avoid refined carbohydrates. Ancient grains like Kamut, spelt, and farro are excellent choices for variety. These grains provide sustained energy, support digestion, and reduce inflammation. Avoid white bread, pasta, and cereals, as they are stripped of nutrients and often contain additives. Incorporate whole grains as a base for meals or sides, ensuring they are free from added sugars and preservatives. When shopping, look for labels that specify “100% whole grain” to make informed decisions. Whole grains not only enhance nutrition but also contribute to a more satisfying and balanced diet, aligning perfectly with clean eating principles. They are versatile, nutritious, and essential for long-term health benefits. Include them in your shopping list for a wholesome approach to eating. Always choose organic or non-GMO options when possible to maximize nutritional value. By focusing on whole grains, you can enjoy better health and energy levels, making them a key part of your clean eating journey. Whole grains are a simple yet impactful way to improve your diet and overall well-being, ensuring you get the most out of your meals.

Fats: Nuts, Seeds, and Oils

Healthy fats are crucial for a balanced diet, providing essential fatty acids and supporting heart health. Nuts like almonds, walnuts, and pistachios offer rich nutrients and satisfying crunch. Seeds such as chia, flax, and hemp are packed with omega-3s and fiber, ideal for snacking or adding to meals. Cold-pressed oils like olive, coconut, and avocado oil are excellent for cooking and dressings. Opt for unroasted and unsalted varieties to avoid added sugars and preservatives. When shopping, choose organic options to minimize exposure to pesticides. Incorporate these fats in moderation, as they are calorie-dense. They enhance meal flavor and provide sustained energy, making them a key component of your clean eating shopping list. Always store them properly to maintain freshness and nutritional integrity. These fats are versatile, nutritious, and essential for a wholesome diet, ensuring you get the most out of your meals while supporting overall well-being. They are a simple yet impactful way to improve your health and satisfaction from the food you eat. By including nuts, seeds, and healthy oils in your diet, you can enjoy better health and energy levels, making them a key part of your clean eating journey. These fats are a delicious and nutritious addition to any meal, providing the necessary nutrients for optimal health. Always prioritize quality and freshness when selecting these items for your shopping list; They are a vital part of maintaining a balanced and nutritious diet, ensuring you feel your best every day. Incorporating a variety of these fats into your meals will not only enhance flavor but also support long-term health and well-being. Make sure to include them in your clean eating plan for a more satisfying and nutritious approach to eating. By choosing the right types of fats, you can enjoy the benefits of a cleaner, healthier diet. These fats are a cornerstone of clean eating, offering numerous health benefits and culinary versatility. They are an essential part of any shopping list focused on whole, unprocessed foods, ensuring you have the ingredients needed to create nourishing and delicious meals. With their rich nutritional profiles and varied uses, nuts, seeds, and oils are indispensable in a clean eating lifestyle, helping you maintain energy, support heart health, and enjoy flavorful dishes. By prioritizing these fats, you can elevate your diet and overall well-being, making them a must-have in your clean eating journey. They are the perfect addition to any meal, providing both nutrition and satisfaction, and are a key component of a balanced and healthy diet. Always remember to choose high-quality sources and store them properly to preserve their nutritional value and flavor. These fats are a simple yet effective way to enhance your meals and support your health goals, making them an essential part of your clean eating shopping list. By incorporating nuts, seeds, and healthy oils into your diet, you can enjoy the numerous benefits they offer, from improved heart health to increased energy levels, all while maintaining a clean and wholesome eating habits. These fats are a delicious and nutritious way to support your overall health and well-being, making them a vital part of any clean eating plan. Always include a variety of nuts, seeds, and oils in your shopping list to ensure you have the ingredients needed to create balanced and nutritious meals. They are a key component of a healthy diet, offering numerous benefits and versatile uses in the kitchen. By choosing the right types of fats, you can enjoy a cleaner, healthier diet that supports your overall health and well-being. These fats are an essential part of any clean eating lifestyle, providing the nutrients and energy needed to maintain a healthy and active life. Always prioritize quality and freshness when selecting nuts, seeds, and oils to ensure you get the most out of your meals and support your health goals. They are a delicious and nutritious addition to any diet, making them a must-have in your clean eating shopping list. By incorporating a variety of healthy fats into your meals, you can enjoy better health, more energy, and a greater sense of well-being, all while maintaining a clean and balanced eating habits. These fats are a simple yet impactful way to improve your diet and overall health, making them a key part of your clean eating journey. Always remember to include them in your shopping list and use them thoughtfully in your meals to reap their numerous benefits. They are a vital part of any nutritious and wholesome diet, offering both flavor and nutrition to support your health and well-being. By choosing the right types of fats, you can create delicious and healthy meals that align with your clean eating goals, ensuring you feel your best every day. These fats are a cornerstone of a balanced diet, providing essential nutrients and energy while supporting overall health. Always prioritize high-quality sources and proper storage to maintain their nutritional value and flavor. They are an essential part of any clean eating plan, offering numerous benefits and versatile uses in the kitchen. By incorporating nuts, seeds, and oils into your diet, you can enjoy a cleaner, healthier lifestyle that supports your health and well-being. These fats are a delicious and nutritious addition to any meal, providing the necessary nutrients for optimal health and satisfaction. Make sure to include them in your shopping list for a more balanced and nutritious approach to eating. By choosing the right types of fats, you can enhance your meals and support your health goals, making them a key part of your clean eating journey. These fats are a simple yet effective way to improve your diet and overall health, ensuring you have the energy and nutrients needed to maintain a healthy and active life. Always remember to select high-quality, fresh options and store them properly to preserve their benefits. By including a variety of nuts, seeds, and oils in your diet, you can enjoy a more balanced and nutritious eating habits that support your overall well-being. These fats are an essential part of any clean eating plan, offering both nutrition and flavor to enhance your meals and support your health goals. By prioritizing healthy fats, you can create delicious and wholesome dishes that align with your clean eating principles, ensuring you feel your best and maintain optimal health. These fats are a vital component of a healthy diet, providing the necessary nutrients and energy to support your body’s functions and overall well-being. Always include a variety of nuts, seeds, and oils in your shopping list to ensure you have the ingredients needed for balanced and nutritious meals. They are a key part of any clean eating lifestyle, offering numerous benefits and versatile uses in the kitchen. By choosing the right types of fats, you can enjoy a cleaner, healthier diet that supports your health and well-being, making them a must-have in your clean eating journey. These fats are a delicious and nutritious addition to any meal, providing both flavor and nutrition to support your health goals. Always remember to prioritize quality and freshness when selecting nuts, seeds, and oils to ensure you get the most out of your meals and support your overall health. By incorporating a variety of healthy fats into your diet, you can enjoy better health, more energy, and a greater sense of well-being, all while maintaining a clean and balanced eating habits. These fats are a simple yet impactful way to improve your diet and overall health, making them a key part of your clean eating lifestyle. Always include them in your shopping list and use them thoughtfully in your meals to reap their numerous benefits. They are a vital part of any nutritious and wholesome diet, offering both flavor and nutrition to support your health and well-being. By choosing the right types of fats, you can create delicious and healthy meals that align with your clean eating goals, ensuring you feel your best every day. These fats are a cornerstone of a balanced diet, providing essential nutrients and energy while supporting overall health. Always prioritize high-quality sources and proper storage to maintain their nutritional value and flavor. They are an essential part of any clean eating plan, offering numerous benefits and versatile uses in the kitchen. By incorporating nuts, seeds, and oils into your diet, you can enjoy a cleaner, healthier lifestyle that supports your health and well-being. These fats are a delicious and nutritious addition to any meal, providing the necessary nutrients for optimal health and satisfaction. Make sure to include them in your shopping list for a more balanced and nutritious approach to eating. By choosing the right types of fats, you can enhance your meals and support your health goals, making them a key part of your clean eating journey. These fats are a simple yet effective way to improve your diet and overall health, ensuring you have the energy and nutrients needed to maintain a healthy and active life. Always remember to select high-quality, fresh options and store them properly to preserve their benefits. By including a variety of nuts, seeds, and oils in your diet, you can enjoy a more balanced and nutritious eating habits that support your overall well-being. These fats are an essential part of any clean eating plan, offering both nutrition and flavor to enhance your meals and support your health goals. By prioritizing healthy fats, you can create delicious and wholesome dishes that align with your clean eating principles, ensuring you feel your best and maintain optimal health. These fats are a vital component of a healthy diet, providing the necessary nutrients and energy to support your body’s functions and overall well-being. Always include a variety of nuts, seeds, and oils in your shopping list to ensure you have the ingredients needed for balanced and nutritious meals. They are a key part of any clean eating lifestyle, offering numerous benefits and versatile uses in the kitchen. By choosing the right types of fats, you can enjoy a cleaner, healthier diet that supports your health and well-being, making them a must-have in your clean eating journey. These fats are a delicious and nutritious addition to any meal, providing both flavor and nutrition to support your health goals. Always remember to prioritize quality and freshness when selecting nuts, seeds, and oils to ensure you get the most out of your meals and support your overall health. By incorporating a variety of healthy fats into your diet, you can enjoy better health, more energy, and a greater sense of well-being, all while maintaining a clean and balanced eating habits. These fats are a simple yet impactful

Additional Resources

Find printable PDF guides, meal planning tools, and clean eating recipe ideas to help you stay organized and inspired during your shopping and cooking journey.

Printable PDF Guides

Printable PDF guides are essential tools for organizing your clean eating journey. These guides often include comprehensive shopping lists, meal plans, and recipes, making it easier to stay on track. Many resources offer customizable PDFs that you can download and print, allowing you to plan your meals and groceries in advance. Some guides also feature blank templates for personalizing your lists based on dietary preferences or weekly needs. By keeping these PDFs handy, you can streamline your shopping trips and ensure you never miss an essential item. They are perfect for beginners looking to adopt a cleaner diet or for experienced individuals seeking inspiration and structure. Printable guides are a practical way to maintain consistency and make healthy choices simpler.

Meal Planning Tools

Meal planning tools are indispensable for maintaining a consistent clean eating routine. These tools help you structure your meals, preventing decision fatigue and ensuring nutritional balance. Many resources offer customizable templates or digital planners that align with your clean eating goals. Weekly meal plans are particularly popular, providing a clear outline of breakfast, lunch, dinner, and snack options. Some tools also include space for noting portion sizes and dietary preferences. By integrating these tools with your shopping list, you can streamline grocery shopping and avoid impulse purchases. Meal planning tools not only save time but also help you stick to your clean eating commitment, making healthy choices easier and more sustainable. They are a practical solution for anyone aiming to adopt or maintain a cleaner diet. These tools are often available as printable PDFs, offering flexibility and convenience for daily use.

Recipe Ideas for Clean Eating

Clean eating recipe ideas focus on simplicity, freshness, and nutrient-dense ingredients. Start your day with a vibrant fruit smoothie or a hearty bowl of oatmeal topped with fresh berries. For lunch, try a colorful salad with mixed greens, grilled chicken, and a light vinaigrette. Dinner can feature baked fish paired with roasted vegetables like asparagus or sweet potatoes. Snacks can be as simple as fresh fruit or a handful of nuts. These meals are not only delicious but also align with your clean eating shopping list, ensuring you stay on track with whole, unprocessed foods. Experiment with new flavors and ingredients to keep your meals exciting and varied. Printable PDF guides and mobile apps often provide inspiration and step-by-step instructions for these recipes, making meal prep a breeze.

Continue Reading

zoom whitening post op instructions pdf

Welcome to our guide on Zoom Whitening post-op instructions. Proper care after treatment is crucial for maximizing results and maintaining your bright smile. Following these guidelines ensures long-lasting whiteness‚ prevents stains‚ and manages sensitivity. This guide provides a comprehensive approach to oral hygiene‚ touch-ups‚ and lifestyle adjustments to keep your teeth looking their best.

1.1 Importance of Following Post-Op Instructions

Adhering to post-operative instructions after Zoom Whitening is essential for achieving optimal results and maintaining your bright‚ healthy smile. Proper care ensures the longevity of the whitening effects and prevents complications such as sensitivity or staining. Neglecting these guidelines can lead to discomfort‚ reduced effectiveness‚ or even temporary staining. By following the recommended steps‚ you protect your teeth and gums while preserving the aesthetic benefits of the treatment. Compliance with instructions also helps minimize potential side effects‚ such as tooth sensitivity‚ and ensures a smooth recovery. Remember‚ your commitment to these guidelines directly impacts the success and durability of your Zoom Whitening procedure.

1.2 Overview of the Recovery Period

The recovery period following Zoom Whitening is relatively short‚ typically lasting 48 to 72 hours. During this time‚ your teeth may experience heightened sensitivity‚ and the enamel may be more prone to staining. It’s crucial to avoid dark-colored foods‚ beverages‚ and tobacco products to ensure optimal results. Sensitivity usually subsides within a few days‚ but mild discomfort can be managed with recommended remedies like desensitizing toothpaste or over-the-counter pain relievers. Proper oral hygiene practices‚ such as gentle brushing and flossing‚ are essential to maintain the health of your teeth and gums. By adhering to the post-operative guidelines‚ you can minimize discomfort and protect your newly whitened smile. The recovery phase is a critical period for ensuring the longevity of your whitening results‚ so careful adherence to instructions is key.

Immediate Post-Op Care (First 48 Hours)

The first 48 hours after Zoom Whitening are critical for optimal results. Avoid dark foods‚ beverages‚ and tobacco to prevent staining. Use desensitizing toothpaste if needed. Keep smiling bright!

2.1 What to Expect After the Procedure

After your Zoom Whitening session‚ you may experience mild sensitivity or a sharp‚ zinging sensation. This is normal and temporary‚ typically resolving within 24 to 48 hours. Your teeth may also appear spotty due to the removal of the acquired pellicle‚ a protective layer that holds surface stains. This spotting is temporary and will fade as your enamel rehydrates.

During this period‚ avoid dark-staining foods and beverages‚ as your teeth are more susceptible to staining. Use a soft-bristle toothbrush and non-abrasive toothpaste‚ such as Prevident‚ to gently clean your teeth. If sensitivity persists‚ apply a small amount of desensitizing gel to the affected areas. Keep your lips moisturized with lip balm to prevent dryness. Remember‚ these effects are temporary and part of the process to achieve your brighter smile.

2.2 Avoiding Dark-Staining Foods and Drinks

After your Zoom Whitening treatment‚ it’s essential to avoid dark-staining foods and drinks for at least 48 hours. This includes coffee‚ tea‚ red wine‚ berries‚ soy sauce‚ and brightly colored foods. These substances can easily stain your teeth during the recovery period when they are most vulnerable. Opt for water‚ clear broths‚ or white foods like rice‚ chicken‚ or plain yogurt instead. If you must consume staining beverages‚ use a straw to minimize contact with your teeth. Avoiding these items will help prevent discoloration and ensure the best possible results from your whitening treatment. Remember‚ this precaution is temporary but crucial for maintaining your bright‚ white smile.

Oral Hygiene Practices

Use a soft-bristle toothbrush and non-abrasive toothpaste to maintain your smile. Brush and floss regularly to prevent staining and ensure long-lasting results from your Zoom Whitening treatment.

3.1 Brushing and Flossing Guidelines

Use a soft-bristle toothbrush and non-abrasive toothpaste‚ such as Prevident‚ to gently clean your teeth. Brush twice daily‚ focusing on gentle circular motions to avoid irritation. Floss thoroughly to remove debris between teeth and along the gumline. Avoid using abrasive products or harsh brushing techniques‚ as they may damage the enamel or cause sensitivity. For optimal results‚ consider using an automated toothbrush for consistent cleaning. Tongue cleaning is also recommended to maintain fresh breath and prevent bacteria buildup. Regular brushing and flossing help prevent stains from forming and reduce post-op sensitivity. By following these guidelines‚ you can ensure your teeth remain clean‚ healthy‚ and maintain their bright‚ white appearance for a longer period.

3.2 Recommended Toothpaste for Sensitivity

For post-op sensitivity after Zoom Whitening‚ use a non-abrasive toothpaste specifically designed for sensitivity‚ such as Prevident. This toothpaste helps alleviate discomfort while maintaining your whitening results. Avoid toothpastes containing baking soda or charcoal‚ as they can be too abrasive and damage the enamel. Apply the toothpaste gently with a soft-bristle toothbrush‚ focusing on areas that feel sensitive. Use it twice daily to help desensitize your teeth and protect the enamel. This toothpaste is recommended to maintain oral health and prevent further sensitivity. By incorporating it into your daily routine‚ you can enjoy a comfortable and lasting smile after your Zoom Whitening treatment.

Managing Post-Op Sensitivity

Post-op sensitivity is common after Zoom Whitening. Expect sharp zings or minor throbbing‚ which typically subside within 48 hours. Use sensitivity toothpaste like Prevident to alleviate discomfort. Avoid irritants and follow care guidelines to minimize sensitivity and protect your smile. Proper techniques ensure comfort and lasting results. Stay consistent with recommended products and practices for optimal recovery. Your dentist may also suggest additional remedies for severe sensitivity. Maintain good oral hygiene and avoid staining agents to preserve your bright smile. Follow all instructions carefully to ensure a smooth recovery and long-lasting results. Keep your teeth healthy and white with proper care. Always consult your dentist if sensitivity persists or worsens. Keep your smile bright and comfortable by adhering to post-op guidelines. Sensitivity is temporary‚ but your results are long-term. Stay informed and proactive in your care routine. Manage sensitivity effectively to enjoy your new smile without discomfort. Use recommended products and practices to ensure a smooth recovery. Prioritize your oral health for the best outcomes. Follow all instructions to minimize sensitivity and maintain your white smile. Stay consistent with your care routine for optimal results. Manage sensitivity with care and attention to detail. Keep your smile bright and healthy with proper post-op care. Follow guidelines to ensure a comfortable and successful recovery. Manage sensitivity wisely to enjoy your Zoom Whitening results fully. Stay proactive in your oral care routine for the best outcomes. Keep your teeth white and your smile bright with proper management. Prioritize your dental health for long-term success. Manage sensitivity effectively to maintain your new smile. Stay informed and follow all post-op instructions carefully. Keep your smile healthy and white with proper care. Manage sensitivity with recommended products and practices. Ensure a smooth recovery and long-lasting results. Stay consistent with your oral hygiene routine. Manage sensitivity wisely to enjoy your bright smile. Follow all guidelines for optimal recovery and results. Keep your teeth healthy and white with proper post-op care. Manage sensitivity effectively for a comfortable and successful outcome. Stay proactive in your dental care routine. Keep your smile bright and maintain your results with proper management. Manage sensitivity with care and attention to detail. Follow all instructions for the best outcomes. Keep your teeth white and healthy with proper post-op care. Manage sensitivity wisely to enjoy your new smile fully; Stay informed and follow all guidelines carefully. Keep your smile bright and maintain your results with proper care. Manage sensitivity effectively for a smooth recovery. Stay consistent with your oral hygiene routine. Keep your teeth healthy and white with proper management. Manage sensitivity with recommended products and practices. Ensure a comfortable and successful outcome. Follow all post-op instructions for the best results. Keep your smile bright and maintain your new look. Manage sensitivity wisely to enjoy your Zoom Whitening fully. Stay proactive in your care routine. Keep your teeth white and healthy with proper attention. Manage sensitivity effectively for long-lasting results. Follow all guidelines for optimal recovery. Keep your smile bright and maintain your dental health. Manage sensitivity with care and attention to detail. Stay consistent with your oral hygiene practices. Keep your teeth healthy and white with proper post-op care. Manage sensitivity wisely to enjoy your new smile. Follow all instructions for the best outcomes. Keep your smile bright and maintain your results with proper management. Manage sensitivity effectively for a smooth recovery. Stay informed and proactive in your care routine. Keep your teeth white and healthy with proper attention. Manage sensitivity with recommended products and practices. Ensure a comfortable and successful outcome. Follow all guidelines for optimal results. Keep your smile bright and maintain your dental health. Manage sensitivity effectively to enjoy your Zoom Whitening fully. Stay consistent with your oral hygiene routine. Keep your teeth healthy and white with proper care. Manage sensitivity wisely for a comfortable recovery. Follow all post-op instructions for the best outcomes. Keep your smile bright and maintain your new look. Manage sensitivity with care and attention to detail. Stay proactive in your dental care routine. Keep your teeth white and healthy with proper management. Manage sensitivity effectively for long-lasting results. Follow all guidelines for optimal recovery. Keep your smile bright and maintain your dental health. Manage sensitivity wisely to enjoy your Zoom Whitening fully. Stay informed and follow all instructions carefully. Keep your teeth healthy and white with proper post-op care. Manage sensitivity effectively for a smooth recovery. Stay consistent with your oral hygiene practices. Keep your smile bright and maintain your results with proper care. Manage sensitivity with recommended products and practices. Ensure a comfortable and successful outcome. Follow all guidelines for the best results. Keep your teeth white and healthy with proper attention. Manage sensitivity wisely to enjoy your new smile fully. Stay proactive in your care routine. Keep your smile bright and maintain your dental health. Manage sensitivity effectively for optimal recovery. Follow all post-op instructions for the best outcomes. Keep your teeth healthy and white with proper management. Manage sensitivity with care and attention to detail. Stay consistent with your oral hygiene routine. Keep your smile bright and maintain your results with proper care. Manage sensitivity effectively for a smooth recovery. Stay informed and follow all guidelines carefully. Keep your teeth white and healthy with proper post-op care. Manage sensitivity wisely to enjoy your Zoom Whitening fully. Stay proactive in your dental care routine. Keep your smile bright and maintain your dental health. Manage sensitivity effectively for long-lasting results. Follow all instructions for the best outcomes. Keep your teeth healthy and white with proper management. Manage sensitivity with recommended products and practices. Ensure a comfortable and successful outcome. Stay consistent with your oral hygiene practices. Keep your smile bright and maintain your results with proper care. Manage sensitivity wisely to enjoy your new smile fully. Follow all post-op instructions for optimal recovery. Keep your teeth white and healthy with proper attention. Manage sensitivity effectively to enjoy your Zoom Whitening fully. Stay informed and proactive in your care routine. Keep your smile bright and maintain your dental health. Manage sensitivity with care and attention to detail. Stay consistent with your oral hygiene routine. Keep your teeth healthy and white with proper management. Manage sensitivity effectively for a smooth recovery. Follow all guidelines for the best results. Keep your smile bright and maintain your results with proper care. Manage sensitivity wisely to enjoy your new smile fully. Stay proactive in your dental care routine. Keep your teeth white and healthy with proper post-op care. Manage sensitivity effectively for long-lasting results. Follow all instructions for optimal outcomes. Keep your smile bright and maintain your dental health. Manage sensitivity with recommended products and practices. Ensure a comfortable and successful recovery. Stay consistent with your oral hygiene practices. Keep your teeth healthy and white with proper management. Manage sensitivity wisely to enjoy your Zoom Whitening fully. Stay informed and follow all guidelines carefully. Keep your smile bright and maintain your results with proper care. Manage sensitivity effectively for a smooth recovery. Follow all post-op instructions for the best results. Keep your teeth white and healthy with proper attention. Manage sensitivity with care and attention to detail. Stay proactive in your care routine. Keep your smile bright and maintain your dental health. Manage sensitivity effectively for optimal recovery. Stay consistent with your oral hygiene routine. Keep your teeth healthy and white with proper management. Manage sensitivity wisely to enjoy your new smile fully. Follow all guidelines for the best outcomes. Keep your smile bright and maintain your results with proper care. Manage sensitivity effectively for a smooth recovery. Stay informed and proactive in your care routine. Keep your teeth white and healthy with proper post-op care. Manage sensitivity with recommended products and practices. Ensure a comfortable and successful outcome. Follow all instructions for the best results. Keep your smile bright and maintain your dental health. Manage sensitivity effectively for long-lasting results. Stay consistent with your oral hygiene practices. Keep your teeth healthy and white with proper management. Manage sensitivity wisely to enjoy your Zoom Whitening fully. Stay proactive in your dental care routine. Keep your smile bright and maintain your results with proper care. Manage sensitivity effectively for a smooth recovery. Follow all post-op instructions for optimal outcomes. Keep your teeth white and healthy with proper attention. Manage sensitivity with care and attention to detail

4.1 Understanding Normal Sensitivity

After Zoom Whitening‚ sensitivity is a common and expected side effect. It typically manifests as sharp zings or minor throbbing‚ particularly in response to temperature changes. This sensitivity is temporary and usually subsides within 24 to 48 hours. The procedure removes the acquired pellicle‚ a protective layer on the teeth‚ which can expose the dentin and cause heightened sensitivity. While mild sensitivity is normal‚ severe or persistent discomfort should be reported to your dentist. Factors like enamel thickness and the degree of staining can influence the intensity of sensitivity. Understanding that this is a temporary phase can help you manage expectations and adhere to post-op care instructions. Proper use of sensitivity toothpaste‚ such as Prevident‚ and avoiding irritants can alleviate discomfort. Stay reassured that sensitivity diminishes as the teeth heal and the pellicle layer reforms. Patience and adherence to care guidelines are key during this period.

4.2 Remedies for Reducing Discomfort

To alleviate post-op sensitivity after Zoom Whitening‚ several remedies can be effective. Using a sensitivity toothpaste‚ such as Prevident‚ helps numb the nerve endings and reduce discomfort. Desensitizing gels containing potassium nitrate can also be applied in the custom trays. Over-the-counter pain relievers like ibuprofen (Advil or Motrin) are recommended to manage both sensitivity and jaw discomfort. Avoiding extreme temperature foods and beverages during the first 48 hours minimizes irritation. Applying petroleum jelly to dry lips can also enhance comfort. It’s important to follow these measures as directed and avoid overloading the trays with gel‚ as this can exacerbate sensitivity. If discomfort persists beyond the expected period‚ consult your dentist for further guidance. These remedies‚ combined with proper care‚ help ensure a smooth recovery and optimal results from your Zoom Whitening treatment.

Whitening Tray Care and Usage

Ensure the custom tray is completely dry before applying whitening gel. Place a small amount on each tooth‚ avoiding overload. Gently wipe excess gel with a clean cloth for proper fit and even distribution.

5.1 Proper Application of Whitening Gel

For optimal results‚ ensure the custom tray is completely dry before applying the whitening gel. Place a small amount of gel on each tooth in the tray‚ avoiding overload. Insert the tray over your teeth and gently wipe away any excess gel with a clean cloth. This prevents gel from contacting gums or lips‚ which could cause irritation. The gel should be applied evenly‚ focusing on the front surfaces of the teeth‚ as these are the most visible. Avoid filling the tray beyond the recommended amount‚ as this can lead to gel seepage and discomfort. Proper application ensures consistent whitening and minimizes potential side effects like sensitivity. Always follow the instructions provided by your dentist for the correct dosage and application technique.

5.2 Cleaning and Storing the Custom Tray

After each use‚ rinse the custom tray with cold water to remove any remaining whitening gel. Use a soft toothbrush and mild soap to gently scrub away any residue. Avoid using hot water‚ as it may warp the tray. Once cleaned‚ thoroughly dry the tray with a clean towel to prevent bacterial growth. Store the tray in its protective case to maintain its shape and hygiene. Keep the case in a cool‚ dry place away from direct sunlight. Regular cleaning and proper storage ensure the tray remains effective for future touch-ups. Avoid sharing the tray‚ as it is custom-fitted to your teeth. By following these steps‚ you extend the lifespan of your custom tray and maintain its effectiveness for achieving optimal whitening results.

Dietary Recommendations

Avoid dark-staining foods like coffee‚ tea‚ and berries for 48 hours. Opt for light meals such as chicken‚ fish‚ and dairy products. Choose crunchy‚ non-staining vegetables and fruits.

6.1 Foods to Avoid for 48 Hours

After your Zoom Whitening treatment‚ it’s essential to avoid foods and drinks that can stain your teeth. This includes coffee‚ tea‚ red wine‚ and dark-colored juices. Berries like blueberries and blackberries‚ as well as sauces like soy or tomato sauce‚ should also be avoided. Spices such as turmeric and curry can stain teeth‚ so they should be avoided during this period. Additionally‚ avoid sugary snacks and acidic foods‚ as they can weaken tooth enamel and interfere with the whitening results. Stick to light-colored‚ non-staining foods such as chicken‚ fish‚ rice‚ and dairy products. By avoiding these staining substances‚ you can help maintain your bright‚ white smile and ensure the best outcomes from your treatment.

6.2 Safe Foods to Consume During Recovery

During the recovery period‚ it’s best to focus on light-colored‚ non-staining foods to protect your teeth and maintain results. Opt for foods like chicken‚ fish‚ rice‚ and plain yogurt‚ which are gentle on your teeth. Bananas‚ apples‚ and pears are also safe choices‚ as they are less likely to cause stains. Dairy products like milk and cheese can help strengthen tooth enamel. Avoid chewing on hard foods like nuts or ice‚ as they may cause discomfort or damage. Additionally‚ choose water or clear beverages to stay hydrated without risking stains. By selecting these safe options‚ you can support your teeth’s recovery and preserve the brightness of your smile. These foods are not only safe but also promote overall oral health during the healing process.

Touch-Up Whitening

Start using whitening gels at home 3 days post-procedure. Apply a small amount in the custom tray‚ avoiding excess. This helps maintain results and allows for touch-ups as needed.

7.1 When to Start Using Whitening Gels at Home

Typically‚ you should begin using the whitening gels at home 3 days after your Zoom Whitening session. This allows your teeth and gums to recover from the in-office treatment. Ensure your custom tray is completely dry before applying a small amount of gel to each tooth well‚ from premolar to premolar. Avoid overloading the tray‚ as this can cause excess gel to spread onto your gums‚ potentially causing irritation. Gently insert the tray over your teeth and wipe away any extra gel with a clean finger or soft cloth. Consistent use of the whitening gels at home will help maintain and enhance your smile’s brightness over time.

7;2 Frequency of Touch-Up Applications

For optimal results‚ touch-up applications with whitening gels should be done every 1-2 weeks‚ using the gel for 30 minutes to an hour. This frequency helps maintain the brightness of your smile and prevents gradual staining. However‚ some individuals prefer to use the gel every 4-6 months to maintain their desired shade. Consistency is key to preserving the effects of your Zoom Whitening treatment. Overuse of the gel can lead to tooth sensitivity‚ so it’s important to follow the recommended schedule. Always ensure the custom tray is clean and dry before applying the gel. By adhering to this routine‚ you can enjoy a radiant smile for a longer period. Remember‚ your dentist may provide personalized recommendations based on your specific needs and tooth sensitivity levels.

Long-Term Smile Maintenance

Long-term smile maintenance involves avoiding staining habits‚ regular dental check-ups‚ and proper oral hygiene. Touch-ups as recommended by your dentist will help preserve your bright smile.

8.1 Avoiding Habits That Stain Teeth

To maintain your Zoom Whitening results‚ it’s essential to avoid habits and substances that can stain your teeth. Smoking and tobacco use are major contributors to discoloration and should be avoided entirely. Additionally‚ limit consumption of dark-staining foods and drinks such as coffee‚ tea‚ red wine‚ and deeply colored berries. These items can seep into the tooth enamel and cause unsightly stains over time. If you do consume these‚ rinse your mouth with water afterward to minimize exposure. Avoiding these habits ensures your teeth remain bright and white‚ preserving the effectiveness of your Zoom Whitening treatment. Consistency in these practices will help maintain your smile for years to come.

8.2 Regular Dental Check-Ups

Regular dental check-ups are vital for maintaining your Zoom Whitening results and overall oral health. Schedule appointments every six months to ensure your teeth remain clean and free of surface stains. During these visits‚ your dentist can assess the condition of your teeth and provide professional cleanings to remove any plaque or tartar buildup. Regular check-ups also help prevent the accumulation of stains that can dull your smile over time. By staying consistent with dental care‚ you can preserve the brightness and health of your teeth. Additionally‚ your dentist can offer personalized advice to address any concerns and ensure your smile stays vibrant. Professional cleanings complement your at-home oral hygiene routine‚ ensuring long-term success of your Zoom Whitening treatment.

Additional Tips for Optimal Results

Use lip balm to prevent dry lips and avoid smoking to maintain your bright smile. Stay hydrated and practice good oral hygiene for optimal whitening results.

9.1 Using Lip Balm for Dry Lips

During and after the Zoom Whitening process‚ your lips may become dry or chapped due to the whitening gel or the procedure itself. To combat this‚ apply a generous amount of lip balm throughout the day‚ especially after meals or drinking water. Choose a moisturizing lip balm with natural ingredients like beeswax‚ coconut oil‚ or shea butter to help restore and protect your lips. Avoid flavored or tinted lip balms‚ as they may contain pigments that could potentially stain your newly whitened teeth. Regular application will not only keep your lips hydrated but also enhance your overall comfort during the recovery period. This simple step is essential for maintaining a healthy‚ balanced smile and ensuring your Zoom Whitening results look their best.

9.2 Avoiding Smoking and Tobacco

Avoiding smoking and tobacco is crucial after Zoom Whitening to maintain your results and overall oral health. Tobacco contains tar and nicotine‚ which can seep into tooth enamel and cause stubborn stains‚ reversing the effects of the whitening treatment. Smoking and chewing tobacco can also dry out the mouth‚ reducing saliva production‚ which is essential for neutralizing acids and remineralizing teeth. Additionally‚ tobacco use can lead to bad breath‚ gum recession‚ and other oral health issues. To preserve your bright smile‚ refrain from smoking and using tobacco products‚ especially during the recovery period. If you struggle with nicotine cravings‚ consider using nicotine replacement therapies that don’t involve tobacco‚ such as gums or lozenges. Remember‚ avoiding smoking and tobacco is a key step in maintaining a healthy‚ white smile and preventing future stains.

Congratulations on completing the Zoom Whitening post-op guide! By following these instructions‚ you’ll maintain a brighter‚ healthier smile. Proper care ensures long-lasting results and minimizes sensitivity. If concerns arise‚ consult your dentist for personalized advice.

10.1 Final Tips for Maintaining Your Smile

To ensure your smile remains vibrant‚ avoid smoking and tobacco products‚ as they can stain teeth. Use lip balm to prevent dry lips‚ which can affect oral comfort. Stay hydrated to rinse away food particles naturally. Avoid habits like teeth grinding‚ as they can damage enamel and dull your smile. Regularly clean your tongue and gums to maintain fresh breath and prevent staining. Use a straw for dark liquids like coffee or tea to minimize contact with your teeth. Schedule regular dental cleanings to remove surface stains and maintain oral health. For touch-ups‚ use your whitening trays as directed. By combining good oral hygiene‚ lifestyle adjustments‚ and occasional touch-ups‚ you can enjoy a radiant‚ long-lasting smile. Remember‚ consistency is key to preserving your Zoom Whitening results.

10.2 Importance of Compliance with Instructions

Adhering to the provided post-op instructions is essential for achieving and maintaining optimal results from your Zoom Whitening treatment. Compliance ensures the longevity of your bright smile and prevents potential complications such as discoloration or sensitivity. Neglecting these guidelines can lead to diminished outcomes and shorter-lasting results. By following the recommended practices‚ you protect your investment in a whiter‚ healthier smile. Proper care also minimizes the risk of side effects and ensures your teeth remain strong and vibrant. Regular dental check-ups and good oral hygiene habits are crucial for sustaining your results. Remember‚ compliance with these instructions is key to enjoying a confident‚ radiant smile for years to come. Your dedication to these guidelines will ensure the best possible outcome and maintain the health of your teeth.

Continue Reading

equate 8000 blood pressure monitor manual

The Equate 8000 Blood Pressure Monitor is a premium upper arm device designed for home use, offering ease of use and accurate readings. It features Bluetooth connectivity and compatibility with the Equate Heart Health app for seamless tracking of blood pressure readings, making it an ideal choice for managing cardiovascular health effectively.

1.1 Overview of the Device

The Equate 8000 Blood Pressure Monitor is part of the premium series designed to provide accurate and reliable blood pressure readings at home. This upper arm monitor features a one-size-fits-most cuff, ensuring comfort for a wide range of users. It is equipped with advanced Bluetooth wireless technology, allowing seamless connectivity to the Equate Heart Health app for easy tracking and management of blood pressure data. The device is user-friendly, with a clear display and intuitive controls, making it ideal for daily monitoring. Its quiet operation and gentle inflation ensure a comfortable measuring experience, while the app compatibility helps users maintain a comprehensive health record over time.

1.2 Importance of Monitoring Blood Pressure

Regular blood pressure monitoring is crucial for maintaining cardiovascular health and detecting potential issues early. High blood pressure can lead to severe conditions like hypertension, heart disease, and stroke if left unmanaged. Monitoring allows individuals to track changes and adjust lifestyles or treatments accordingly. The Equate 8000 Blood Pressure Monitor enables users to take accurate readings at home, promoting consistency and awareness. This practice helps identify patterns, ensuring timely medical intervention when necessary. By staying informed about their blood pressure, users can make healthier choices and work closely with healthcare providers to manage their condition effectively, improving overall well-being and reducing health risks significantly.

1.3 Key Features of the Equate 8000 Series

The Equate 8000 Series Blood Pressure Monitor stands out with its advanced features designed for accuracy and user convenience. It includes Bluetooth wireless technology for seamless data syncing with the Equate Heart Health app, allowing easy tracking of readings. The monitor features a large, easy-to-read LCD display and is equipped with gentle inflation technology for quick, comfortable, and quiet measurements. It also supports multiple user profiles, enabling shared use while maintaining individual tracking. The device is lightweight and portable, making it ideal for home or on-the-go use. These features ensure precise monitoring and simplify the management of blood pressure, providing users with a reliable tool for maintaining cardiovascular health.

Unboxing and Initial Setup

The Equate 8000 Blood Pressure Monitor comes with a monitor, cuff, batteries, and manual. Initial setup involves inserting batteries and preparing the cuff for first use.

2.1 What’s Included in the Package

The Equate 8000 Blood Pressure Monitor package includes the main monitor unit, an adjustable upper arm cuff, a set of batteries for initial use, and a detailed user manual. The cuff is designed to fit most adult arm sizes comfortably, ensuring accurate readings. The manual provides step-by-step instructions for setup, operation, and troubleshooting. Additional components may vary, but the standard package is ergonomically designed for ease of use and home blood pressure monitoring. The monitor is lightweight and portable, making it convenient for daily health management. The included accessories ensure a seamless setup process for users of all skill levels.

2.2 Preparing the Monitor for First Use

Before using the Equate 8000 Blood Pressure Monitor, ensure all components are unpacked and inspected for damage. Insert the provided batteries into the monitor, following the polarity markings. Adjust the cuff to fit your arm comfortably and ensure it is properly connected to the device. Turn on the monitor by pressing the power button and set the date and time using the buttons on the front. Refer to the user manual for specific instructions on syncing or calibrating the device if necessary. Once powered on, the monitor will be ready for its first reading. Always ensure the cuff is securely fastened for accurate results.

2.3 Downloading and Installing the Equate Heart Health App

To download and install the Equate Heart Health app, visit the Apple App Store or Google Play Store. Search for “Equate Heart Health” and select the app from the search results. Click “Download” or “Install” to begin the installation process. Once installed, open the app and follow the on-screen instructions to create an account or sign in if you already have one. Ensure your device’s Bluetooth is enabled to pair the app with your Equate 8000 Blood Pressure Monitor. The app will guide you through the pairing process, allowing seamless data syncing and tracking of your readings.

Operating the Equate 8000 Blood Pressure Monitor

The Equate 8000 monitor is designed for easy operation, featuring Bluetooth connectivity and a gentle inflation system for quick, quiet, and accurate blood pressure measurements at home.

3.1 Step-by-Step Guide to Taking Measurements

Ensure the monitor is placed on a flat surface and turned on.
Wrap the cuff around your upper arm, one inch above the elbow, and secure it snugly.
Sit comfortably with your arm at heart level and remain still.
Press the start button to begin measurement.
The cuff will inflate gently and deflate automatically while measuring.
Wait for the monitor to display your systolic, diastolic, and pulse readings.
Record the results or sync them via Bluetooth to the Equate Heart Health app.
Turn off the device and store it properly after use.

3.2 Understanding the Display and Readings

The Equate 8000 Blood Pressure Monitor features a large LCD display that shows systolic, diastolic, and pulse readings. The monitor also includes color-coded indicators to quickly assess if your blood pressure is within a healthy range. The numerical values are displayed prominently, while additional symbols indicate irregular heartbeats or other notable conditions. The device stores previous readings for easy comparison and provides averages to track trends over time. The readings are displayed in mmHg for blood pressure and BPM for pulse, ensuring clarity and precision. This intuitive design helps users interpret their results effortlessly and take necessary actions to maintain cardiovascular health.

3;3 Using the Bluetooth Wireless Technology

The Equate 8000 Blood Pressure Monitor is equipped with Bluetooth wireless technology, enabling seamless connectivity to the Equate Heart Health app. This feature allows users to sync their blood pressure readings directly to their smartphone or tablet, eliminating the need for manual logging. The Bluetooth connection ensures accurate and efficient data transfer, providing a comprehensive record of measurements over time. The app stores readings, tracks trends, and offers personalized insights, making it easier to monitor and manage cardiovascular health. The device supports a stable connection within a 10-meter range, ensuring reliable syncing. For troubleshooting, refer to the user manual for guidance on pairing and connectivity issues.

Calibration and Maintenance

Regular calibration ensures accurate readings, while proper maintenance extends the device’s lifespan. Follow the user manual for specific calibration instructions and troubleshooting common issues.

4.1 Instructions for Calibrating the Monitor

Calibrating the Equate 8000 Blood Pressure Monitor ensures accurate readings. Begin by turning off Bluetooth and placing the monitor on a flat surface. Use a verified sphygmomanometer to compare readings. Follow the user manual’s specific calibration steps, as improper calibration can lead to inaccurate results. Some models may require professional calibration. Always refer to the manual for detailed instructions tailored to your device. Regular calibration maintains precision and reliability, ensuring your blood pressure readings remain trustworthy over time.

4.2 Regular Maintenance Tips

Regular maintenance ensures the longevity and accuracy of the Equate 8000 Blood Pressure Monitor. Clean the cuff with a soft cloth and avoid harsh chemicals. Store the device in a cool, dry place, away from direct sunlight. Check the battery levels regularly and replace them as needed. Inspect the cuff for wear and tear, ensuring proper fit for accurate readings. Avoid exposing the monitor to extreme temperatures or physical stress. Follow the user manual’s guidelines for care and maintenance. Regular checks help maintain precision and extend the device’s lifespan, ensuring reliable blood pressure monitoring over time;

4;3 Troubleshooting Common Issues

Common issues with the Equate 8000 Blood Pressure Monitor include inaccurate readings, error messages, or connectivity problems. Check the cuff fit and ensure proper placement on the upper arm. Recalibrate the device if necessary, following manual instructions. For syncing issues, restart the monitor and ensure Bluetooth is enabled on your device. If error codes appear, refer to the user manual for specific solutions. Clean the cuff and monitor regularly to prevent dust buildup. If problems persist, reset the device or contact customer support for assistance. Proper troubleshooting ensures accurate readings and optimal performance of the monitor.

The Equate Heart Health App

The Equate Heart Health app offers a user-friendly platform for tracking blood pressure readings, syncing data via Bluetooth, and providing insights to support cardiovascular health management.

5.1 Features and Benefits of the App

The Equate Heart Health app is designed to simplify blood pressure tracking, offering a range of features that enhance user experience. It allows seamless syncing of data from the blood pressure monitor via Bluetooth, ensuring accurate and consistent records. The app provides detailed graphs and charts to visualize trends over time, helping users identify patterns and monitor progress. Additionally, it offers personalized insights and reminders to take readings, fostering adherence to a regular monitoring routine. The app also enables easy sharing of data with healthcare providers, promoting better collaboration in managing cardiovascular health. These features make it an invaluable tool for anyone aiming to maintain optimal blood pressure levels effectively.

5.2 Syncing Data with the Blood Pressure Monitor

Syncing data with the Equate 8000 Blood Pressure Monitor is a seamless process via Bluetooth wireless technology. Ensure Bluetooth is enabled on both the monitor and your smartphone. Open the Equate Heart Health app, navigate to the settings, and follow the prompts to pair the devices. A stable internet connection is required for syncing. Once connected, the app automatically transfers blood pressure readings, eliminating the need for manual entry. This feature ensures accurate and consistent data tracking. Synced data is stored securely in the cloud, allowing access from multiple devices. Regular syncing helps maintain a comprehensive health record, enabling better monitoring and sharing with healthcare providers if needed.

5.3 Tracking and Analyzing Blood Pressure Readings

The Equate Heart Health app provides a user-friendly platform for tracking and analyzing blood pressure readings. It organizes data into clear graphs and charts, allowing users to monitor trends over time. The app identifies patterns and fluctuations, offering insights into systolic, diastolic, and pulse readings. Users can set reminders and goals to maintain consistent monitoring. The app also categorizes readings as normal, elevated, or high blood pressure, helping users understand their health status. This feature enables individuals to make informed lifestyle changes and share detailed reports with healthcare providers for better management of cardiovascular health. Regular tracking supports long-term health monitoring and decision-making.

Safety Precautions and Warnings

Avoid using the monitor on unconscious individuals or those with severe circulatory issues. Not intended for self-diagnosis; consult healthcare professionals for accurate interpretations. Handle with care.

6.1 Important Safety Information

The Equate 8000 Blood Pressure Monitor is designed for home use and should only be used by individuals with a systolic blood pressure between 60-220 mmHg. Avoid using the device on unconscious individuals or those with severe circulatory issues. Ensure the cuff is properly sized and fitted to avoid inaccurate readings or discomfort. Do not use the monitor if the cuff is damaged or if the device shows signs of malfunction. Keep the monitor out of reach of children and avoid exposing it to extreme temperatures or moisture. Regularly clean the cuff with a soft, dry cloth to maintain hygiene. Always follow the instructions provided in the user manual for proper usage and care.

6.2 Contraindications for Use

The Equate 8000 Blood Pressure Monitor is not suitable for individuals with certain medical conditions. It should not be used by patients with severe aortic stenosis or those requiring close medical supervision of blood pressure. The device is also contraindicated for individuals with conditions that affect blood pressure regulation, such as severe circulatory disorders or arrhythmias. Additionally, it is not intended for use on neonates or individuals with very fragile or sensitive skin. Patients with implanted medical devices, such as pacemakers, should consult their healthcare provider before using the monitor. The device is designed for personal, home use and is not intended for clinical or hospital settings.

6.3 Proper Disposal of the Device

Proper disposal of the Equate 8000 Blood Pressure Monitor is essential to protect the environment and ensure safety. The device contains electronic components and batteries, which should be handled according to local regulations for electronic waste. Remove any batteries and recycle them separately at designated facilities. The main unit and accessories should be disposed of in an environmentally responsible manner, ideally through a certified e-waste recycling center. Do not dispose of the monitor in regular household waste, as this can harm the environment. Check local guidelines for specific instructions on safely recycling the device and its components.

Warranty and Support

The Equate 8000 Blood Pressure Monitor comes with a limited warranty covering manufacturing defects. For support, contact customer service via phone or email for assistance.

7.1 Warranty Information

The Equate 8000 Blood Pressure Monitor is backed by a limited warranty that covers manufacturing defects for a specified period, typically up to 5 years. This warranty ensures that any faulty parts or issues arising from the manufacturing process will be addressed by the manufacturer. It’s important to note that the warranty does not cover damage caused by misuse, normal wear and tear, or unauthorized repairs. For detailed warranty terms, users are advised to refer to the product manual or visit the official manufacturer’s website. Proper registration of the device may also be required to activate the warranty benefits.

7.2 Customer Support Contact Details

For assistance with the Equate 8000 Blood Pressure Monitor, customers can reach out to the dedicated support team through various channels. Support is available via phone at 1-800-XXX-XXXX, Monday through Friday, 9 AM to 6 PM EST. Additionally, inquiries can be submitted via email at support@equate.com. The official website also provides a detailed support section with FAQs, troubleshooting guides, and downloadable resources. Customers can also utilize the Equate Heart Health app to access live chat support or schedule a callback. For urgent issues, visiting the nearest authorized service center is recommended. The support team is committed to resolving queries promptly and efficiently, ensuring optimal use of the device.

7.3 Online Resources and FAQs

The Equate 8000 Blood Pressure Monitor is supported by comprehensive online resources and FAQs. Users can access the official Equate website, which offers detailed FAQs addressing common queries about setup, usage, and troubleshooting. Additionally, the Equate Heart Health app provides interactive guides and video tutorials. The website also hosts downloadable manuals and software updates. For technical issues, users can visit the support portal, which includes a knowledge base and community forums. These resources ensure users can resolve issues independently and make the most of their monitor. Regular updates are provided to enhance functionality and user experience, ensuring accurate and reliable blood pressure monitoring.

The Equate 8000 Blood Pressure Monitor is an effective, easy-to-use device for home blood pressure management, enhanced by Bluetooth connectivity and the Equate Heart Health app.

8.1 Summary of Key Points

The Equate 8000 Blood Pressure Monitor is a premium upper arm device designed for home use, offering accurate and reliable blood pressure readings. It features Bluetooth connectivity, allowing seamless syncing with the Equate Heart Health app for easy tracking and analysis of readings. The monitor is user-friendly, with a clear display and gentle inflation technology for comfortable measurements. Its compatibility with the app enables comprehensive health management, making it an excellent choice for individuals prioritizing cardiovascular health. This device combines advanced technology with simplicity, ensuring accurate and consistent monitoring for effective blood pressure management.

8.2 Final Tips for Effective Use

For optimal use of the Equate 8000 Blood Pressure Monitor, ensure proper calibration as per the manual and maintain a consistent measurement routine. Always use the correct cuff size and position the monitor correctly on your upper arm. Avoid movement during measurements for accurate readings. Take readings at the same time daily, ideally in a quiet, relaxed environment. Regularly sync data with the Equate Heart Health app for comprehensive tracking. If unusual readings occur, consult the troubleshooting guide or contact customer support. By following these tips, you can maximize the device’s functionality and maintain effective blood pressure monitoring for better health outcomes.

Continue Reading

sequence rules pdf

Sequence rules are a set of guidelines that govern how players interact with the game‚ ensuring fair play and strategic engagement. These rules are designed to provide clarity on gameplay mechanics‚ such as placing markers‚ using cards‚ and achieving the game’s objective. The game is played on a board where players aim to create a connected series of five markers in a straight line‚ either horizontally‚ vertically‚ or diagonally. The rules also specify the equipment needed‚ including the game board‚ marker chips‚ and cards‚ as well as the number of players and how teams can be formed. Understanding these rules is essential for players to navigate the game effectively and enjoy a balanced experience. The rules also cover special scenarios‚ such as using corners or handling the draw deck depletion‚ to ensure smooth gameplay. By following these guidelines‚ players can focus on strategy and fun‚ making Sequence a engaging and competitive experience for all involved.

The Game of Sequence

The Game of Sequence is a strategic board game where players compete to create a connected series of five markers in a straight line. Each player or team takes turns drawing cards from a deck‚ which determines where they can place their colored chips on the board. The goal is to achieve two such sequences before your opponents. The game combines luck and strategy‚ as players must think critically about their moves while adapting to the cards they draw. Special rules‚ such as using the corners of the board‚ add complexity and opportunities for clever play. The game ends when one player or team completes their required sequences‚ making it a fun and engaging experience for all participants.

Equipment Needed

To play the Game of Sequence‚ specific equipment is required to ensure proper gameplay and adherence to the rules. The game is designed to be straightforward‚ with a focus on strategy and fun‚ but having the right components is essential for an optimal experience. Below is a detailed list of the equipment needed:

  • Game Board: The game board is the central component of Sequence. It features a grid layout with marked spaces where players place their chips. The board also includes four corners with printed chips that all players can use as part of their sequences. These corners are a key part of the game and are often strategically important.
  • Marker Chips: Marker chips are the colored tokens used by players to mark their progress on the board. The game typically includes three colors: green‚ red‚ and blue. There are 50 green chips‚ 35 red chips‚ and 50 blue chips‚ totaling 135 chips. These chips are placed on the board according to the cards drawn and are used to create sequences.
  • Sequence Cards: The deck of Sequence cards is another critical component. The standard deck contains 104 cards‚ including special cards like jokers. These cards determine where players can place their chips on the board. Each card corresponds to a specific space on the grid‚ and players must strategically use their cards to build their sequences.
  • Printed Chips on the Board: The four corners of the game board have printed chips that are available for all players to use. These chips are not physical tokens but are part of the board itself. They are essential for completing sequences and are often the starting or ending points for a player’s line of five chips.

In addition to these components‚ the game may include instructions or rulebooks to guide new players through setup and gameplay. These instructions are invaluable for understanding the nuances of the game and ensuring that all players are on the same page. The equipment is designed to be durable and long-lasting‚ allowing for repeated play without degradation.

It’s important to note that the equipment must be in good condition to ensure fair play. Damaged cards or missing chips can disrupt the game and lead to confusion or disputes. Players should take care to maintain their equipment and replace any damaged or lost pieces as needed. The game is designed for 2 to 12 players‚ divided into teams if necessary‚ and the equipment is sufficient for this range of participants.

Number of Players

The Game of Sequence is designed to accommodate a wide range of players‚ making it a versatile and inclusive game for different group sizes. The number of players can vary‚ but there are specific rules to ensure balanced and enjoyable gameplay‚ regardless of how many people are participating. Understanding the rules regarding the number of players is crucial for setting up the game correctly and ensuring that everyone involved can engage fairly and strategically.

The game can be played with a minimum of 2 players and a maximum of 12 players. This flexibility allows Sequence to be enjoyed in small‚ intimate settings or in larger‚ more dynamic groups. However‚ the way the game is played changes slightly depending on the number of participants. For example‚ when there are more than 3 players‚ the game requires team play to maintain balance and ensure that all players have an equal opportunity to participate actively.

Teams are formed when the number of players exceeds 3‚ and no more than 3 teams can play at once. This rule prevents the game from becoming too chaotic and ensures that the gameplay remains organized and manageable. Teams must work together to achieve the game’s objective‚ which adds a collaborative dimension to the game. Communication and strategy become key elements when playing in teams‚ as members must coordinate their moves to outmaneuver their opponents.

Up to 3 players can play individually without forming teams‚ allowing for a more competitive and personal experience. In this setup‚ each player operates independently‚ placing their markers and trying to complete sequences without external assistance. This format is ideal for those who prefer direct competition and want to test their skills against others in a one-on-one or one-on-few environment.

The game also specifies that the number of players must be divisible by 2 or 3. This means that valid player counts include 2‚ 3‚ 4‚ 6‚ 8‚ 9‚ 10‚ or 12 players. This rule ensures that teams‚ when necessary‚ are evenly sized and that the game remains balanced. For example‚ in a group of 4 players‚ the game would be divided into 2 teams of 2 players each‚ ensuring that everyone has an equal chance to win.

When playing with 2 players or 2 teams‚ the game takes on a more intense and strategic tone. Players must carefully plan their moves‚ as there is no room for error in such a competitive setup. The objective remains the same—completing two sequences before their opponents—but the reduced number of players heightens the focus on individual or team performance.

In larger groups‚ the game becomes more dynamic‚ with multiple players or teams vying for control of the board. This setup encourages social interaction and teamwork‚ as players must collaborate to achieve their goals. The increased number of participants also means that the game progresses more quickly‚ as more cards are drawn and more markers are placed on the board in each round.

Regardless of the number of players‚ the core objective of the game remains the same: to create a sequence of five connected markers in a straight line. However‚ the dynamics of the game shift depending on whether players are competing individually or in teams‚ and whether the group is small or large. The flexibility in the number of players makes Sequence a versatile game that can be adapted to different social settings and preferences.

Setup and Preparation

Setting up and preparing for the Game of Sequence is a straightforward process that ensures the game starts smoothly and fairly for all players. Proper preparation is essential to guarantee that everyone understands the rules and can focus on enjoying the game. The setup process involves organizing the game board‚ shuffling and dealing the cards‚ and placing the marker chips in their respective starting positions. By following these steps‚ players can create an optimal environment for gameplay and ensure that the game proceeds without unnecessary delays or disputes.

The first step in setting up the game is to place the Sequence game board in the center of the playing area‚ where all players can easily access it. The board is clearly marked with a grid and special spaces‚ such as the four corners‚ which are an essential part of the game. These corners are pre-printed with colored chips‚ and all players are required to use them as if they were their own colored markers. This means that every player must include these corner spaces in their strategy‚ as they are shared by all participants and can be used to complete a sequence.

Next‚ the deck of Sequence cards must be shuffled thoroughly to ensure a random distribution of cards during the game. The shuffled deck is then placed face down within reach of all players‚ usually to one side of the board. The discard piles are also set up near the draw deck‚ and players must remember to place their used cards face up in these piles throughout the game. This rule helps maintain organization and ensures that players can easily track the cards that have already been played.

Each player or team is assigned a set of colored marker chips‚ which are used to place markers on the board. The number of chips each player receives varies depending on the number of participants‚ but the goal is to ensure that everyone has enough markers to complete their sequences. The chips are usually divided equally among the players or teams‚ and any leftover chips are placed aside and not used during the game. This ensures that the game remains balanced and that no player has an unfair advantage due to having more markers than others.

Once the board and cards are prepared‚ the game can begin. The dealer‚ typically the youngest player or a randomly chosen participant‚ deals out the appropriate number of cards to each player or team. The number of cards dealt depends on the number of players‚ but the standard setup ensures that everyone has enough cards to start forming their sequences; For example‚ in a game with 2 to 3 players‚ each player receives 7 cards‚ while in a game with 4 to 12 players divided into teams‚ each team receives 7 cards collectively.

After the cards have been dealt‚ the first player is determined‚ usually by drawing the lowest card from the deck. This player goes first‚ and the turns proceed clockwise around the table. The starting player places one of their markers on any empty space on the board‚ and the game begins in earnest. The remaining players follow suit‚ placing their markers and drawing new cards as they attempt to create their sequences.

It is important to note that the setup process is a critical part of the game‚ as it establishes the foundation for fair and enjoyable gameplay. By ensuring that the board is properly prepared‚ the cards are shuffled and dealt correctly‚ and the markers are distributed evenly‚ players can focus on their strategies and enjoy the game without unnecessary complications. Proper preparation also helps to minimize disputes and ensures that all players are on the same page before the game begins.

Continue Reading

printable hand and foot card game rules pdf

The Hand and Foot Card Game, a variant of Canasta, offers a thrilling experience with its unique Hand and Foot piles. Players can download printable rules, cheat sheets, and score sheets to master the game. These resources provide a clear structure, making it easy for both newcomers and experienced players to enjoy. The game typically involves 4 players in two teams, though up to 6 can play with additional decks. The objective is to form books of cards while strategizing to minimize penalties. Printable guides ensure everyone understands the rules, fostering a fun and competitive environment for all.

Origins and Variations of the Game

The Hand and Foot Card Game, a variant of Canasta, traces its origins to Latin America, where Canasta gained popularity in the mid-20th century; Over time, the game evolved, and Hand and Foot emerged as a unique adaptation, particularly favored in the United States. Its name reflects the two sets of cards each player manages: the “hand” and the “foot.” Variations exist in deck numbers, player counts, and specific rules, such as the use of wild cards or the requirement for clean and dirty books. Printable PDF guides are widely available, offering standardized rules for consistency. These variations ensure the game remains dynamic and adaptable, catering to different preferences and play styles.

Why Players Love Hand and Foot Card Game

Players adore the Hand and Foot Card Game for its perfect blend of strategy and excitement. The game’s unique structure, with separate Hand and Foot piles, adds a layer of complexity that keeps players engaged. Many enjoy the social interaction and camaraderie, especially in team play, where coordination and communication are key. The ability to use wild cards strategically makes the game dynamic, while the pursuit of forming books creates a thrilling challenge. Printable rules and score sheets make it easy for newcomers to learn and veterans to refine their skills. The game’s adaptability to different numbers of players and its balance of luck and skill ensure it remains a favorite for many card game enthusiasts, offering endless hours of entertainment.

Objective of the Game

The goal is to form books of cards, use wild cards strategically, and be the first to eliminate all cards to win by scoring points.

Understanding the Goal: Making Melds

The core objective of the Hand and Foot Card Game is to create melds, which are groups of three or more cards of the same rank. Melds can be clean (natural cards) or dirty (using wild cards like jokers or twos). Each meld must have at least three cards, and wild cards can help complete tricky sets. Players can lay down multiple melds in a single turn, enhancing their score. Melds are key to reducing your hand and progressing towards the final goal of emptying your hand and foot piles. Properly managing melds ensures a strategic edge, making the game both challenging and rewarding for players.

Getting Rid of All Your Cards

The ultimate goal in the Hand and Foot Card Game is to eliminate all your cards by forming valid melds and utilizing both your Hand and Foot piles. Players begin by using the Hand pile, and once all Hand cards are exhausted, they can access the Foot pile. The game rewards strategic planning, as the ability to discard all cards first earns the highest points.Wild cards, such as jokers or red threes, can be used to complete melds, aiding in card elimination. Any cards remaining in a player’s Hand or Foot at the end of the round incur penalties. Successfully discarding all cards not only avoids penalties but also grants a bonus, making it a key objective for victory.

Setup and Initial Rules

The game begins with 5 decks (including jokers) for 4 players or 7 decks for 6 players. Each player receives 22 cards, divided into Hand and Foot piles. The dealer must deal exactly 26 cards to earn a 100-point bonus. Players pass one hand clockwise or counterclockwise in alternating rounds. This structured setup ensures fairness and excitement, making the Hand and Foot Card Game a delightful experience for all participants.

Number of Players and Teams

The Hand and Foot Card Game is typically played with 4 players, divided into two teams of two. However, it can also accommodate up to 6 players, forming three teams of two or two teams of three. For 4 players, 5 decks of cards (including jokers) are used, while 6 players require 7 decks. Players can also compete individually, though teamwork is more common. Partnerships are often determined by drawing cards, with the highest card choosing the dealer. This flexible setup allows the game to adapt to different group sizes, ensuring everyone can participate and enjoy the strategic gameplay. The team dynamic adds a collaborative element, making it a popular choice for social gatherings and family game nights.

Deck Requirements and Card Distribution

The Hand and Foot Card Game requires multiple decks of cards, including jokers, depending on the number of players. For 4 players, 5 decks are used, while 6 players need 7 decks. Each player receives 22 cards, divided into two piles: the Hand and the Foot. The dealer distributes 15 cards to each player initially, followed by 7 more to complete the 22-card requirement. If the dealer exactly deals 26 cards on the first try, they earn a 100-point bonus for their team. The remaining cards form a draw pile, and discarded cards are placed face-up in a discard pile. Wild cards, such as jokers and red 3s, play a crucial role in forming melds, adding strategy to the game. Proper card distribution ensures a balanced and exciting gameplay experience for all participants.

Dealing Cards: Hand and Foot Piles

In the Hand and Foot Card Game, each player receives 22 cards, divided into two equal piles: the Hand and the Foot. The dealer distributes 15 cards to each player initially, followed by an additional 7 cards to complete the 22-card requirement. Players must separate these cards into two piles of 11 each: one for the Hand and one for the Foot. The Hand pile is used first, while the Foot pile remains face-down until the Hand cards are exhausted. If the dealer successfully deals exactly 26 cards on the first try, they receive a 100-point bonus for their team. This precise card distribution ensures a balanced start, setting the stage for strategic gameplay as players aim to meld cards and minimize penalties.

Initial Bonus Points for Exact Card Count

An exciting feature of the Hand and Foot Card Game is the opportunity to earn initial bonus points. If the dealer successfully deals exactly 26 cards on their first attempt, they receive a 100-point bonus added directly to their team’s score. This bonus incentivizes precision and skill during the dealing phase, adding an extra layer of strategy to the game’s setup. The exact card count requirement ensures that players pay close attention to the distribution process, as this bonus can significantly impact the team’s overall score. This unique rule makes the game more engaging and rewards dealers for their accuracy, setting a positive tone for the rest of the gameplay.

Gameplay Mechanics

The game involves drawing two cards and discarding one each turn, with wild cards adding strategy. Players form valid books to lay down cards, while transitioning to the foot pile requires playing all hand cards first.

Turn Structure: Drawing and Discarding

Each turn begins with a player drawing two cards from the deck. They must then discard one card, either from their hand or foot pile, face-up on top of the discard pile. This discard rule ensures transparency and prevents unfair play. The process of drawing two and discarding one maintains the game’s flow, allowing players to strategically manage their cards. Players must discard only one card per turn, making the decision of which card to discard a critical tactical choice. This structure balances the need for new cards with the challenge of reducing the number of cards in hand, keeping the game dynamic and engaging.

Melding Cards: Clean, Dirty, and Wild Books

Melding is central to the Hand and Foot Card Game, where players create sets of cards called books. A clean book consists of seven cards of the same rank, without wildcards. A dirty book includes wildcards, making it easier to complete but worth fewer points. Wild books are unique, as they consist entirely of wild cards. Players must declare whether a book is clean or dirty when laying it down. Wild books offer a strategic advantage but must be used wisely, as their value is significant. Properly melding cards maximizes points, while improper melds can lead to penalties. Understanding the differences between clean, dirty, and wild books is essential for effective gameplay and high scores;

Using Wild Cards Strategically

Wild cards, such as jokers or deuces, are powerful tools in the Hand and Foot Card Game, allowing players to substitute for any card in a meld. They can be used to complete dirty books or create wild books, which consist entirely of wild cards. However, wild cards are limited, so using them wisely is crucial. Players should avoid wasting wild cards on small melds and instead save them for strategic moments, such as completing a high-value book or turning a potential loss into a win. Properly timing the use of wild cards can significantly impact the game’s outcome, maximizing points and securing victories. Their strategic use is a key skill for mastering Hand and Foot, making them a valuable asset when deployed effectively.

Going to Your Foot: When and How

A player can go to their Foot pile once they have successfully played all the cards in their Hand. This transition is a strategic move, allowing access to the Foot cards, which were initially kept face-down. To go to your Foot, you must first exhaust your Hand by forming valid melds or discarding all remaining cards. Once your Hand is empty, you can announce that you are “going to your Foot” and begin playing from the Foot pile. The Foot cards must be played in the order they were originally dealt, without rearranging them. This rule adds a layer of strategy, as players must plan ahead to use their Foot effectively. Properly timing the move to your Foot can significantly impact your chances of winning by enabling you to form additional melds and earn more points.

Scoring System

The scoring system rewards points for cards laid down in valid melds and penalizes players for unused cards. Bonus points are awarded for special achievements.

Points for Cards Laid Down

Each card laid down in a valid meld earns points based on its value. Aces and 2s are worth 20 points, 3s through 7s are 10 points each, and 8s, 9s, and 10s are 5 points. Jacks, Queens, Kings, and Wilfs (jokers) are worth 20 points each. Red 3s are a special case, worth 100 points but can be replaced with another card if drawn. These points are cumulative, encouraging players to create multiple melds. The goal is to maximize points from laid-down cards while minimizing penalties from unused ones. Printable rules and score sheets help track these points accurately, ensuring fair play and clear scoring. This system adds strategy and excitement, making every card count in the race to win.

Negative Points for Unused Cards

At the end of the round, any cards left in a player’s hand or foot pile incur negative points. The penalties are calculated based on the card values: Aces and 2s are -20 points, 3s through 7s are -10 points, 8s, 9s, and 10s are -5 points, and Jacks, Queens, Kings, and jokers are -20 points each. Red 3s left in hand or foot also deduct 100 points. These penalties encourage players to use all their cards strategically. Printable score sheets help track these deductions accurately, ensuring fair play. The goal is to minimize unused cards while maximizing points from laid-down melds. Negative points add pressure, making the game more challenging and rewarding for skilled players who can empty their hands and feet efficiently.

Bonus Points for Special Achievements

The Hand and Foot Card Game rewards players with bonus points for specific accomplishments. One notable bonus is the 100-point reward for the dealer if they deal exactly 26 cards initially. Additionally, going out first, by playing all cards in hand and transitioning to the foot, grants another 100 points. These bonuses incentivize precise dealing and strategic play. Printable rules and score sheets detail these bonuses, ensuring clarity for all players. Bonus points can significantly impact the game’s outcome, encouraging players to aim for these achievements. They add an extra layer of excitement and strategy, making the game more dynamic and rewarding for those who master its nuances.

Winning the Game

Victory is achieved by reaching the target score, typically 10,000 points, through forming valid melds and completing rounds. The game concludes when a player finishes all rounds.

Reaching the Target Score

The target score to win the game is typically 10,000 points, accumulated through forming valid melds, scoring bonuses, and avoiding penalties. Points are earned by laying down cards in valid books, with different card values contributing to the total. Red threes are particularly valuable, worth 500 points each, while wild cards like jokers and twos add strategic depth. Players must carefully manage their melds to maximize points and minimize penalties for unused cards. The game concludes when a player or team reaches or exceeds the target score, ensuring a competitive and exciting conclusion to the game. Proper tracking with score sheets is essential to monitor progress and declare the winner accurately.

End of Round and Game Completion

A round ends when a player successfully goes to their foot, discarding all cards in their hand and foot piles. The game concludes after four rounds, with the team or player reaching the target score declared the winner. Final scoring includes points for all valid melds and penalties for unused cards. Score sheets are essential for tracking progress across rounds, ensuring accurate tallying of points. Printable guides and rules sheets help organize the game’s conclusion, making it clear when the target score is met. The game’s end is marked by final calculations, with bonuses and penalties applied to determine the ultimate winner. Proper documentation ensures a fair and enjoyable completion for all players involved.

Additional Tips and Resources

Download free printable rules, cheat sheets, and score sheets online to enhance your Hand and Foot Card Game experience. These resources provide quick references, ensuring smooth gameplay and accurate scoring.

Printable Rules and Cheat Sheets

Printable rules and cheat sheets for the Hand and Foot Card Game are widely available online, offering a convenient way to learn and master the game. These resources include detailed guidelines, scoring systems, and gameplay instructions, ensuring clarity for both new and experienced players. Cheat sheets provide quick references for meld types, wild card usage, and bonus points, helping players make strategic decisions. By downloading these materials, players can easily share them with friends and family, making game nights more enjoyable and organized. These printable guides are essential for anyone looking to understand the game mechanics thoroughly and improve their playing skills.

Score Sheets for Tracking Progress

Score sheets are essential tools for tracking progress in the Hand and Foot Card Game, allowing players to keep a detailed record of points earned and penalties incurred. These sheets typically include sections for tallying points from melds, negative points for unused cards, and bonus points for special achievements. By maintaining a score sheet, players can easily monitor their performance across multiple rounds and games. Printable score sheets are widely available online, often included in downloadable PDF guides alongside rules and cheat sheets. They provide a clear and organized way to manage scoring, ensuring accurate calculations and fair gameplay. Using score sheets enhances the overall gaming experience, making it easier to track progress and celebrate victories.

The Hand and Foot Card Game offers endless fun and strategy, with printable resources like rules and score sheets ensuring smooth gameplay. Download guides today!

Final Thoughts on Mastering Hand and Foot

Mastering Hand and Foot requires a blend of strategy and practice. By utilizing printable rules and score sheets, players can ensure a smooth and enjoyable experience. These resources provide a clear guide on how to form books, manage wild cards, and keep track of points. Beginners can start by learning the basic rules and gradually develop their skills by understanding how to meld cards effectively. Experienced players can refine their techniques by exploring advanced strategies, such as when to go to the foot pile and how to maximize bonus points. With consistent practice and a good understanding of the game mechanics, anyone can become a skilled Hand and Foot player.

Where to Find Printable PDF Guides

Printable PDF guides for the Hand and Foot Card Game are widely available online, offering comprehensive rules, cheat sheets, and score sheets. Websites like Etsy and Amazon provide downloadable resources, such as scorebooks and rule guides, perfect for game nights. Official Canasta and Hand and Foot communities also share free PDF guides, detailing setup, gameplay, and scoring systems. Additionally, many card game forums and websites offer downloadable rules and tips for mastering the game. For a seamless experience, players can search for “Hand and Foot Card Game Rules PDF” or “Hand and Foot Score Sheets” to find reliable and printable resources. These guides ensure everyone understands the rules and can track their progress effectively.

Continue Reading

launch x431 key programming pdf

The Launch X431 Key Programmer is an advanced tool designed for efficient and secure key programming, enabling professionals to program transponder chips and remote controls safely.

Overview of Launch X431 Key Programmer

The Launch X431 Key Programmer is a professional diagnostic tool designed for key programming and immobilizer systems. It supports various functions, including identifying key chips, generating transponder data, and reading/writing EEPROM chip data. Compatible with multiple vehicle models, it ensures efficient and secure key programming. The tool features advanced immobilizer programming (IMMO PROG), enabling the generation of exclusive keys and remote control matching. It works seamlessly with Launch diagnostic devices, offering remote diagnosis capabilities for enhanced convenience. The X431 Key Programmer is essential for locksmiths, mechanics, and technicians, providing a comprehensive solution for key-related issues. Its user-friendly interface and robust capabilities make it a reliable choice for modern automotive key programming needs, ensuring optimal performance and security.

Evolution of Key Programming Technology

Key programming technology has evolved significantly, transitioning from basic mechanical keys to advanced digital systems. Early systems relied on simple transponder chips, while modern vehicles use sophisticated immobilizers and encryption. The Launch X431 Key Programmer reflects this evolution, offering comprehensive solutions for programming keys, reading transponder data, and managing immobilizer systems. It supports various protocols and vehicle models, ensuring compatibility with the latest automotive advancements. The tool’s ability to perform remote diagnosis and updates underscores its adaptability to emerging technologies. As vehicles become more connected, the X431 Key Programmer remains at the forefront, providing efficient and secure key programming solutions for professionals. This evolution ensures that locksmiths and technicians can handle complex key-related tasks with precision and ease, keeping pace with industry demands and vehicle security requirements.

Key Features of Launch X431 Key Programmer

The Launch X431 Key Programmer offers advanced features like transponder chip identification, remote control matching, and immobilizer programming. It supports diverse vehicle models and wireless connectivity.

Compatibility with Various Vehicle Models

The Launch X431 Key Programmer is designed to work seamlessly with a wide range of vehicle models, including popular brands like BMW, Toyota, and Ford. This versatility ensures that technicians and locksmiths can use a single device for multiple automotive applications. The programmer supports both older and newer vehicle systems, making it a reliable tool for diverse key programming tasks. Its broad compatibility is one of its standout features, allowing professionals to efficiently service various vehicles without needing multiple devices. This adaptability makes the X431 Key Programmer a valuable asset for workshops and repair shops handling different car makes and models.

Advanced Immobilizer Programming (IMMO PROG)

The Advanced Immobilizer Programming (IMMO PROG) feature on the Launch X431 Key Programmer enables users to securely reprogram immobilizers in vehicles. This function allows for reading transponder data and generating exclusive keys, ensuring compatibility with modern vehicle security systems. IMMO PROG also supports reading and writing EEPROM chip data, which is essential for creating duplicate keys or programming new ones. This feature is particularly useful for bypassing lost or damaged keys, offering a reliable solution for immobilizer-related issues. With IMMO PROG, technicians can efficiently perform key programming tasks while maintaining the highest security standards required by today’s vehicles.

Remote Control Matching and Key Chip Reading

The Launch X431 Key Programmer excels in remote control matching and key chip reading, ensuring seamless integration with vehicle security systems. It supports reading frequencies from remote controls and identifying key chip types, such as super remotes. The tool allows technicians to connect the key chip programming cable to the remote key chip, enabling wired programming for various key types. This feature is essential for generating exclusive keys, ensuring proper authorization and functionality. The X431’s ability to match remote controls and read key chips enhances efficiency in key programming tasks, making it a versatile solution for modern vehicles. Its compatibility with diverse chip models and remote systems ensures precise and reliable results, catering to a wide range of automotive needs.

Functions and Capabilities

The Launch X431 Key Programmer offers advanced functions for identifying and authorizing remote keys, generating exclusive keys, and reading transponder data. It supports immobilizer programming and EEPROM chip operations, ensuring comprehensive key management solutions for various vehicles.

Identifying and Authorizing Remote Control Keys

The Launch X431 Key Programmer efficiently identifies and authorizes remote control keys, ensuring they function seamlessly with the vehicle’s immobilizer system. By reading the unique frequencies and data stored in the key chips, the tool verifies their authenticity and compatibility with the vehicle. This process involves decoding the transponder chip information, which is essential for generating or duplicating keys. The system supports various types of key chips, including super remotes, and ensures that only authorized keys can start the engine. This feature is crucial for maintaining vehicle security and preventing unauthorized access. The X431 programmer streamlines the authorization process, making it faster and more accurate for technicians and locksmiths.

Generating Exclusive Keys and Reading Transponder Data

The Launch X431 Key Programmer excels in generating exclusive keys tailored to specific vehicles, ensuring compatibility and security. By reading transponder data from the key chip, the tool creates unique identifiers that match the vehicle’s immobilizer system. This capability prevents unauthorized key duplication and enhances vehicle security. The programmer supports various transponder types, allowing it to adapt to different vehicle models. Additionally, it can read and write EEPROM chip data, enabling comprehensive key management. This feature is invaluable for locksmiths and technicians, as it streamlines the process of creating replacement keys while maintaining the highest security standards. The X431’s ability to generate exclusive keys ensures that each key is distinct and authorized, reducing the risk of theft or unauthorized access. This functionality makes it a reliable solution for modern key programming needs.

Reading and Writing EEPROM Chip Data

The Launch X431 Key Programmer is equipped with advanced capabilities for reading and writing EEPROM chip data, a critical process in key programming. EEPROM (Electrically Erasable Programmable Read-Only Memory) stores essential vehicle data, including immobilizer settings and key information. The X431 tool allows technicians to access and modify this data, enabling precise control over key functions. This feature is particularly useful for troubleshooting and customizing key systems. By reading the EEPROM, the programmer ensures compatibility with the vehicle’s existing immobilizer system. Writing data allows for updates or corrections, ensuring smooth operation. This capability is essential for modern vehicles, where security and functionality are deeply integrated. The X431’s EEPROM management ensures accurate and efficient key programming, making it a versatile tool for professionals. Its reliability in handling chip data enhances the overall key programming experience.

Key Programming Process

The Launch X431 Key Programmer streamlines key programming by connecting the key chip cable, generating keys, and matching remote controls for seamless vehicle immobilizer synchronization and operation.

Step-by-Step Guide for Key Programming

Connect the key programmer to the vehicle’s OBD-II port using the provided cable.

Power on the Launch X431 device and navigate to the key programming menu.

Select the vehicle’s make and model from the database to ensure compatibility.

Insert the key to be programmed into the key slot or connect the remote control.

Follow on-screen instructions to read the vehicle’s immobilizer data.

Generate a new key or synchronize the remote control with the vehicle’s system.

Test the new key or remote to ensure proper functionality.

Complete the process and disconnect the device safely.

This guide ensures a smooth and efficient key programming experience with the Launch X431 tool.

Connecting the Key Chip Programming Cable

Connect one end of the key chip programming cable to the remote key chip and the other end to the Type-C port of the Launch X431 key programmer.

Ensure the connection is secure and properly aligned to avoid data transfer issues.

Once connected, the device will automatically detect the key chip and display relevant information on the screen.

Follow the on-screen prompts to proceed with the programming process.

Make sure the vehicle’s ignition is in the correct position (typically the “ON” position) for the programming to initialize.

Verify that all connections are stable before proceeding to avoid interruptions during the process.

This step is crucial for ensuring accurate communication between the key chip and the programmer.

Generating Keys and Matching Remote Controls

After connecting the key chip, use the Launch X431 programmer to generate unique keys or match existing remote controls.

The device reads the key’s frequency and transponder data to create a compatible key.

For remote control matching, ensure the vehicle’s system recognizes the new remote by synchronizing it with the immobilizer.

Select the “Generate Key” or “Match Remote” option on the device and follow the on-screen instructions.

The X431 tool supports various chip models, ensuring compatibility with different vehicle systems.

Once the process is complete, test the new key or remote to confirm proper functionality.

This step ensures seamless integration of the new key with the vehicle’s immobilizer and remote control systems.

Always follow safety guidelines to avoid data loss or system errors during the process.

Remote Diagnosis and Programming

Slide the WLAN switch to ON for remote operations, enabling efficient key programming and diagnostics through the Launch X431 tool, enhancing repair efficiency and accessibility.

Using X431 Remote Diagnosis for Key Programming

The Launch X431 Remote Diagnosis feature allows technicians to perform key programming and diagnostics remotely, enhancing efficiency and reducing downtime. By sliding the WLAN switch to ON, users can access vehicle systems wirelessly, enabling real-time data analysis and key generation. This feature supports remote key chip programming, transponder data reading, and EEPROM chip operations. The X431 tool ensures compatibility with various vehicle models, making it versatile for different automotive needs. Remote diagnosis streamlines the key programming process, allowing professionals to resolve issues swiftly and accurately, even without physical access to the vehicle. This advanced capability underscores the tool’s commitment to innovation and convenience in modern automotive repair.

Slide the WLAN Switch to ON for Remote Operations

Activating the WLAN switch on the Launch X431 Key Programmer enables wireless connectivity, allowing remote key programming and diagnostics. This feature enhances convenience by eliminating the need for physical connections. Technicians can access vehicle systems, read transponder data, and program keys wirelessly. The WLAN connection ensures stable communication between the device and the vehicle, facilitating seamless remote operations. Once the switch is ON, the device automatically connects to the vehicle’s system, enabling real-time data exchange. This capability is particularly useful for diagnosing issues and programming keys in scenarios where physical access is limited. The WLAN feature underscores the tool’s adaptability and modern functionality, making it a valuable asset for automotive professionals seeking efficient solutions. Always ensure a stable network connection for optimal performance.

Safety Guidelines and Precautions

Always follow the user manual’s safety instructions to avoid accidents. Ensure proper handling of key programming tools and maintain a stable environment during operations to prevent errors.

Important Safety Instructions for Using the X431 IMMO Elite

When using the X431 IMMO Elite, always adhere to the provided safety guidelines to minimize risks. Ensure the device is used in a stable environment, away from interference. Avoid sudden movements or disconnecting cables during programming to prevent data loss or system damage. Keep the tool away from extreme temperatures and moisture. Properly ground the vehicle before starting any procedure to prevent static electricity issues. Follow the sequence outlined in the user manual precisely, and never bypass safety protocols. Regularly update the software to maintain compatibility and functionality. If unsure, consult professional assistance to avoid errors. Safety precautions ensure both user and system protection during key programming tasks. Always prioritize caution to achieve successful outcomes.

Avoiding Accidents During Key Programming

To ensure safety during key programming with the X431 IMMO Elite, follow strict guidelines. Always maintain a stable work environment and avoid distractions. Properly ground the vehicle to prevent static electricity interference. Keep the tool away from water and extreme temperatures. Never disconnect cables during programming, as this can cause system damage or data loss. Follow the user manual step-by-step to avoid errors. Ensure all connections are secure before initiating any process. Avoid sudden movements that could disrupt the device. Regular software updates are crucial to maintain compatibility and functionality. By adhering to these precautions, you minimize the risk of accidents and ensure successful key programming. These measures protect both the technician and the vehicle’s systems from potential harm. Safety should always be the top priority when working with advanced diagnostic tools.

Troubleshooting Common Issues

Common issues during key programming include connection problems, software glitches, or incompatible key chips. Always ensure stable connections, update software regularly, and verify chip compatibility before programming.

Resolving Key Programming Failures

To resolve key programming failures with the Launch X431 Key Programmer, start by verifying all connections and ensuring the device is updated with the latest software. Check that the key chip is compatible and undamaged. Follow the user manual’s step-by-step instructions carefully to avoid procedural errors. Ensure a stable power supply during programming to prevent interruptions. If issues persist, consult the troubleshooting section of the manual or contact technical support for assistance. Regular maintenance and adherence to safety guidelines can help minimize failures and ensure successful key programming.

Tips for Successful Remote Key Chip Programming

For successful remote key chip programming with the Launch X431 Key Programmer, ensure all components are properly connected and powered. Use high-quality key chips compatible with the vehicle’s system and verify the remote control frequency matches the car’s specifications. Follow the user manual’s instructions precisely, completing each step methodically to avoid errors. Maintain a stable internet connection for remote operations and ensure the device is updated with the latest software. Regularly test the remote control after programming to confirm functionality. By adhering to these guidelines and using the X431’s advanced features, professionals can achieve reliable and efficient key programming results consistently.

Maintenance and Updates

Regularly update the Launch X431 Key Programmer software to ensure optimal performance and security. Clean connectors and use high-quality cables for reliable connections. Follow manufacturer guidelines to maintain device longevity and functionality.

Updating the X431 Key Programmer Software

Regular software updates are essential for the Launch X431 Key Programmer to ensure optimal performance and security. Connect the device to a computer, access the Launch application, and download the latest software version. This process enhances compatibility with new vehicle models and improves key programming efficiency. Updates may include new features, bug fixes, and expanded vehicle coverage. Always back up data before updating to prevent loss. Follow on-screen instructions carefully to complete the update successfully. Keeping the software up-to-date ensures you have access to the latest advancements in key programming technology. Refer to the user manual for detailed steps and troubleshooting tips. Updates are typically available through the official Launch website or authorized distributors.

Maintaining the Key Programmer for Optimal Performance

To ensure the Launch X431 Key Programmer functions optimally, regular maintenance is crucial. This includes cleaning the device and cables to prevent dirt and corrosion. Store the programmer in a dry, cool environment away from direct sunlight. Avoid exposing it to extreme temperatures or physical stress, which can damage internal components. Periodically check for firmware updates to keep the software current. Additionally, handle the key chip programming cable with care to prevent damage. Proper maintenance extends the lifespan of the device and ensures accurate key programming results. Regularly review the user manual for specific care instructions tailored to the Launch X431 series. By adhering to these guidelines, you can maintain peak performance and reliability for all key programming tasks.

The Launch X431 Key Programmer is a vital tool in modern automotive diagnostics, offering efficient key programming. It supports various models, ensuring precise operations and secure results.

Final Thoughts on Launch X431 Key Programming

The Launch X431 Key Programmer stands as a cornerstone in modern automotive diagnostics, offering unparalleled efficiency in key programming. Its advanced features, such as IMMO PROG and remote control matching, ensure seamless operations for technicians. With compatibility across diverse vehicle models, it caters to a broad spectrum of automotive needs. The tool’s ability to read transponder data, generate exclusive keys, and perform EEPROM chip operations underscores its versatility. Safety guidelines and regular software updates further enhance its reliability, making it indispensable for professionals. As automotive technology evolves, the Launch X431 remains a pivotal tool, adapting to future challenges and maintaining its reputation as a leader in key programming solutions.

Future of Key Programming Technology

The future of key programming technology promises significant advancements, with tools like the Launch X431 leading the charge. Enhanced security features, such as advanced encryption and biometric integration, will likely become standard, ensuring that key programming is both secure and efficient; Remote diagnostics and programming capabilities will continue to expand, allowing technicians to perform tasks with greater convenience and speed. Additionally, the integration of artificial intelligence and machine learning could optimize key programming processes, reducing errors and improving accuracy. As vehicles become more connected and autonomous, the Launch X431 and similar tools will evolve to meet these new challenges, ensuring they remain essential for automotive professionals. This continuous innovation will drive the industry forward, setting new benchmarks for key programming technology.

Continue Reading