Welcome to the Singer Hand Sewing Machine Manual, your comprehensive guide to understanding and operating Singer handheld sewing machines. This manual is designed to help both beginners and experienced users master the techniques and maintenance required for optimal performance. Whether you’re threading the machine, setting up the bobbin, or exploring advanced stitching options, this guide provides clear instructions and essential tips. Singer, a trusted name in sewing, offers reliable resources to enhance your sewing experience. Use this manual to ensure safety, proper usage, and troubleshooting for years of seamless stitching.
1.1 Overview of the Singer Hand Sewing Machine
The Singer Hand Sewing Machine is a portable, user-friendly device designed for precise stitching and versatility. Known for its durability and ease of use, it is ideal for both beginners and experienced sewists. This handheld machine is perfect for small to medium-sized projects, offering multiple stitch patterns to suit various fabrics and designs. Singer, a trusted brand in the sewing industry, ensures high-quality performance with features like adjustable tension and stitch length. Whether you’re repairing clothes, crafting, or embroidering, this machine provides the control and reliability needed for professional results. Its compact design makes it easy to carry and store, making it a must-have for sewing enthusiasts everywhere.
1.2 Importance of Reading the Manual
Reading the Singer Hand Sewing Machine manual is crucial for ensuring safe and effective operation. It provides detailed instructions for threading, bobbin setup, and stitch adjustments, which are essential for achieving professional results. The manual also outlines safety precautions to prevent accidents and prolong the machine’s lifespan. By understanding the machine’s components and proper usage, users can avoid common mistakes and troubleshoot issues efficiently. Additionally, the manual offers tips for maintaining the machine and enhancing sewing performance. Whether you’re a beginner or an experienced sewer, following the guidelines in the manual ensures optimal functionality and helps you make the most of your Singer Hand Sewing Machine.
1.3 Brief History of Singer Sewing Machines
Singer Sewing Machines have a rich history dating back to the mid-19th century, revolutionizing the sewing industry. Founded by Isaac Merritt Singer, the company introduced the first practical sewing machine in 1851, making sewing accessible to the masses. Over the years, Singer has remained a leader in innovation, producing iconic models like the Vibrating Shuttle and the portable 99k. Today, Singer continues to deliver high-quality machines, including handheld models, known for their durability and versatility. This legacy ensures that Singer remains a trusted name, offering reliable tools for sewers worldwide. The Singer Hand Sewing Machine Manual builds on this tradition, providing guidance for modern users.
Safety Precautions and Warnings
Always follow safety guidelines when using the Singer Hand Sewing Machine. Keep loose clothing tied back, avoid sewing near flammable materials, and ensure the machine is placed on a stable surface. Never touch moving parts or operate the machine near water. Use only Singer-recommended attachments and follow proper threading techniques to avoid accidents. Regularly inspect the machine for damage and ensure it is oiled correctly to prevent malfunction. Store the machine in a dry, cool place out of children’s reach to ensure safe operation and longevity of the device. Adhere to these precautions for a safe and efficient sewing experience.
2.1 General Safety Guidelines
When using the Singer Hand Sewing Machine, prioritize safety to ensure a secure and efficient sewing experience. Always keep loose clothing and long hair tied back to avoid entanglement with moving parts. Ensure the machine is placed on a stable, flat surface to prevent accidental tipping. Avoid sewing near flammable materials or open flames, and never operate the machine near water. Keep children away while sewing, as they may accidentally touch sharp or moving components. Use only Singer-recommended attachments and follow the manual’s instructions for proper usage. Regularly inspect the machine for damage or wear, and ensure it is well-oiled to prevent malfunctions. By adhering to these guidelines, you can maintain a safe and enjoyable sewing environment.
2.2 Proper Handling and Storage
Proper handling and storage of your Singer Hand Sewing Machine are crucial for maintaining its performance and longevity. Always handle the machine with care, using both hands to support it during operation or transport. Avoid exposing the machine to moisture or extreme temperatures, as this can damage internal components. When not in use, store the machine in a dry, clean environment, ideally in its protective case or cover. Regularly clean the machine before storage to prevent dust buildup. Ensure all accessories, such as bobbins and needles, are securely stored in a separate compartment to avoid misplacement. Proper storage ensures your machine remains in excellent condition for future use.
2.3 Electrical Safety Tips
Ensure electrical safety when using your Singer Hand Sewing Machine by following these guidelines. Always unplug the machine when not in use or during cleaning to prevent accidental start-ups; Avoid using the machine near water or in humid environments, as moisture can damage electrical components. Never touch electrical parts with wet hands or while standing on a damp surface. Regularly inspect the power cord for signs of wear or damage; if damaged, replace it immediately. Use only the voltage specified in the manual to prevent overheating or electrical failure. Keep children away from the machine when it is plugged in. Store the machine in a dry location, away from direct sunlight or heat sources. Always follow the manufacturer’s electrical safety recommendations to ensure safe and reliable operation;
Machine Components and Accessories
The Singer Hand Sewing Machine features essential components like the hand wheel, bobbin pin, and stitch regulator. Accessories include needles, bobbins, and thread guides for versatile stitching.
3.1 Identifying Parts of the Singer Hand Sewing Machine
Understanding the components of your Singer Hand Sewing Machine is essential for effective operation. The machine features a hand wheel for manual control, a bobbin area for threading, and a stitch regulator to adjust sew quality. The needle bar holds the sewing needle, while the spool pin secures the thread. Additional parts include tension discs for thread control and a balance wheel for smooth operation. Familiarizing yourself with these components ensures proper setup, maintenance, and troubleshooting. Always refer to the manual for detailed diagrams and descriptions to identify each part accurately.
- Hand Wheel: Controls needle movement manually.
- Bobbin Area: Houses the bobbin for stitching.
- Stitch Regulator: Adjusts stitch length and tension.
- Needle Bar: Holds the sewing needle in place.
- Spool Pin: Secures the thread spool.
- Tension Discs: Regulate thread tension.
- Balance Wheel: Ensures smooth operation.
3.2 Understanding Stitch Types and Settings
The Singer Hand Sewing Machine offers various stitch types and settings to cater to different sewing needs. The straight stitch is ideal for basic sewing, while the backstitch reinforces seams. The forward stitch is perfect for general use. Adjusting stitch length and width ensures proper fabric penetration and seam strength. Tension settings are crucial for consistent stitching, with higher tension suited for thicker fabrics and lower tension for delicate materials. Understanding these settings allows you to customize your stitches for optimal results. Always refer to the manual for guidance on selecting the right stitch type and adjusting settings for your specific project.
- Stitch Length: Adjusts the distance between stitches.
- Stitch Width: Controls the stitch’s horizontal span.
- Tension Settings: Regulates thread tightness for even stitching.
3.3 Accessories Included with the Machine
The Singer Hand Sewing Machine comes with essential accessories to enhance your sewing experience. These include a bobbin pin, multiple bobbins for thread winding, and a needle designed for handheld use. Additional accessories may feature a screwdriver for machine adjustments, a seam ripper for correcting mistakes, and a carrying case for convenient storage. Some models also include a user guide with detailed diagrams and instructions. These accessories ensure you have everything needed to operate and maintain your machine effectively. Always refer to the manual for specific accessory usage and care instructions to prolong the life of your Singer Hand Sewing Machine.
- Bobbin Pin: Holds the bobbin in place during sewing.
- Bobbins: Store thread for consistent stitching.
- Needle: Designed for handheld operation.
- Screwdriver: For adjusting machine parts.
- Seam Ripper: Helps remove incorrect stitches.
- Carrying Case: Protects the machine during transport.
- User Guide: Provides detailed instructions and diagrams.

Threading and Bobbin Setup
Proper threading and bobbin setup are essential for smooth operation. Carefully thread the machine, wind the bobbin correctly, and insert it to ensure seamless stitching and optimal performance.
4.1 Threading the Machine: Step-by-Step Guide
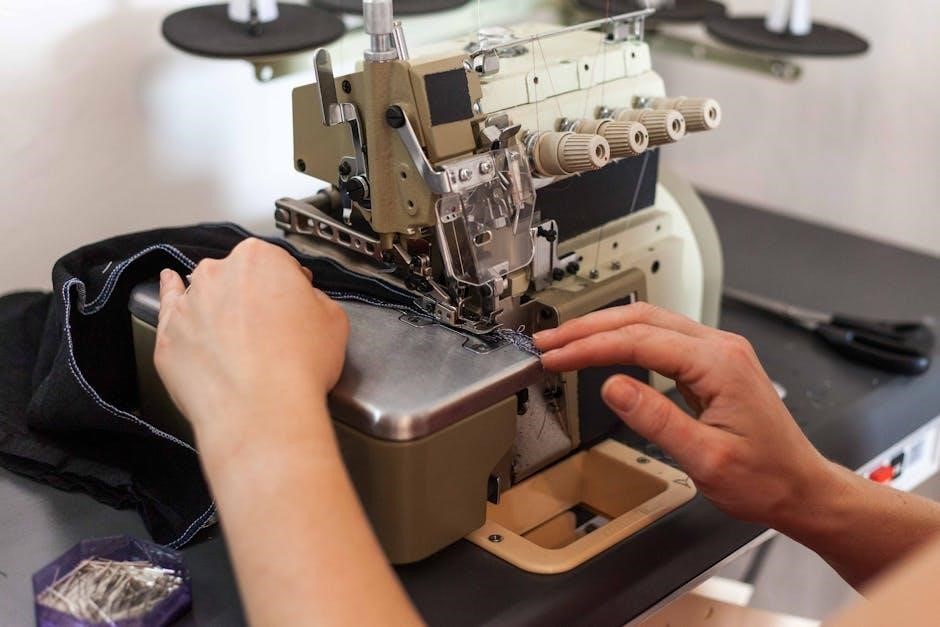
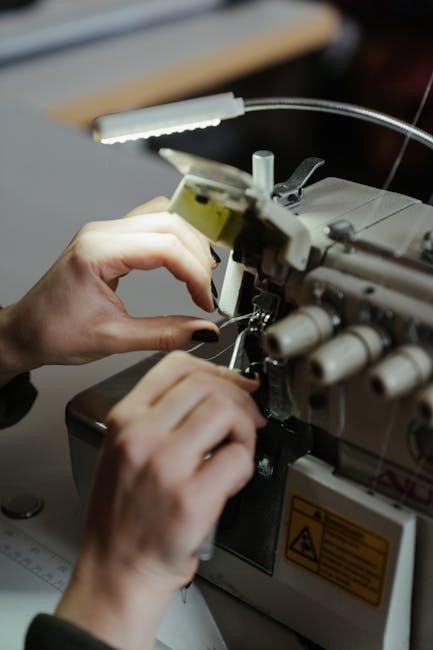
To thread your Singer Hand Sewing Machine, start by locating the spool pin and guide the thread through the tension discs. Gently pull the thread to ensure it is taut but not overly tight. Next, insert the thread through the needle eye from front to back. Hold the thread firmly and turn the hand wheel to complete the threading process. Ensure the thread is properly seated in the tension spring for consistent stitching. Always refer to the manual diagrams for visual guidance. Proper threading is crucial for smooth operation and preventing thread breakage during sewing.
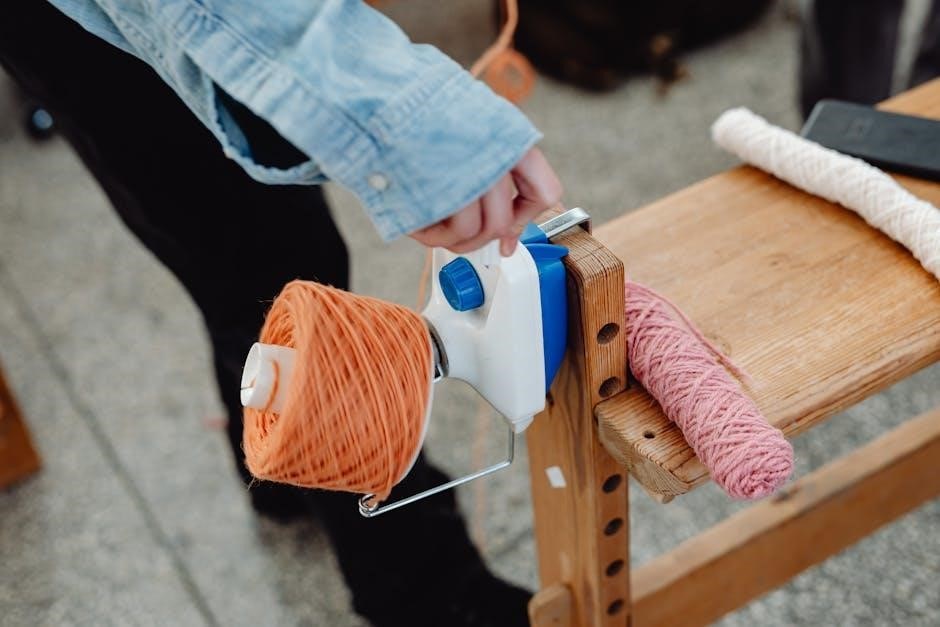
4;2 Winding the Bobbin Correctly
To wind the bobbin for your Singer Hand Sewing Machine, start by placing the thread on the spool pin. Guide the thread through the tension spring and wrap it around the bobbin until it is approximately 2/3 full. Hold the thread taut and turn the hand wheel slowly to wind the thread evenly. Avoid overfilling the bobbin, as this can cause sewing issues. Once wound, cut the thread and insert the bobbin into the machine, ensuring it clicks into place. Pull the thread gently to seat it properly. Correct bobbin winding ensures smooth stitching and prevents thread tangling during operation.
4.3 Inserting the Bobbin into the Machine
To insert the bobbin into the Singer Hand Sewing Machine, locate the bobbin compartment, usually accessible by lifting the machine’s cover. Place the bobbin pin into the designated hole on the machine. Gently insert the wound bobbin, ensuring it sits securely in its compartment. Pull the thread to ensure it is properly seated and the bobbin rotates smoothly. Close the cover and give the hand wheel a slow turn to test the bobbin’s alignment. Proper bobbin insertion is crucial for even stitching and prevents thread jams during sewing. Always ensure the bobbin is correctly seated before starting your project.
Operating the Machine
Hold the Singer Hand Sewing Machine firmly with your right hand, using the hand wheel to control stitch direction. Start sewing slowly, ensuring smooth fabric movement and even stitches. Always maintain proper tension and keep fabric taut for consistent results. Use the hand wheel to guide the needle and manage thread flow efficiently. Regularly check your stitches and adjust settings as needed for optimal performance. Proper operation ensures durability and professional-quality stitching.
5.1 Basic Machine Operation: Getting Started
To begin using your Singer Hand Sewing Machine, ensure it is properly threaded and the bobbin is correctly inserted. Hold the machine firmly with your right hand, using the hand wheel to control the needle’s movement. Start by sewing a few test stitches on scrap fabric to check thread tension and stitch quality. Always keep the fabric taut but not stretched, guiding it smoothly under the needle. Use the hand wheel to regulate the stitching speed and direction. For consistent results, maintain steady pressure and avoid pulling the fabric excessively. Proper handling ensures smooth operation and professional-quality stitches.
5.2 Holding the Machine and Loading Fabric
To ensure precise control, hold the Singer Hand Sewing Machine firmly with your right hand, placing your thumb on the hand wheel for better grip. With your left hand, guide the fabric smoothly under the needle, keeping it taut but not overly stretched. Position the fabric so the edge aligns with the machine’s guide or markings for straight stitching. Gently press the fabric against the needle plate to maintain stability. For larger fabrics, use both hands to steady the machine while sewing, ensuring even movement. Proper fabric loading and machine handling are key to achieving consistent, professional-quality stitches from the very first use.
5.3 Starting to Sew: Initial Stitches
Begin by ensuring the machine is properly threaded and the bobbin is correctly inserted. Position the fabric under the needle, aligning the edge with the machine’s guide. Gently lower the needle into the fabric by turning the hand wheel slowly. Once the needle pierces the fabric, start sewing at a steady pace, moving the fabric smoothly under the needle. For the first few stitches, maintain consistent tension to ensure even stitching. If needed, backstitch to secure the starting point. Adjust the stitch length or tension as required for different fabric types. This initial step sets the foundation for a flawless sewing experience with your Singer Hand Sewing Machine.
5.4 Adjusting Stitch Length and Tension
To achieve the perfect stitch, adjust the stitch length and tension according to your fabric type. Locate the stitch length dial on the machine and turn it clockwise for shorter stitches or counterclockwise for longer ones. For tension, tighten or loosen the bobbin case screw as needed. Test the stitches on scrap fabric to ensure evenness. If the thread is too loose, increase tension; if too tight, reduce it. Proper adjustment ensures consistent stitching and prevents fabric puckering or thread breakage. Always refer to the manual for specific settings for different fabrics, such as cotton, silk, or denim, to optimize your sewing results.
5.5 Using the Hand Wheel for Control
The hand wheel is a crucial control feature on your Singer hand sewing machine. To use it effectively, gently turn the wheel in the direction of the machine’s operation. This allows precise control over the needle’s movement, especially when sewing delicate fabrics or intricate patterns. Always turn the wheel slowly to maintain even stitch formation. For reverse stitching, rotate the wheel in the opposite direction. Regularly check for any oily residue on the wheel and clean it with a soft cloth to ensure smooth operation. Proper use of the hand wheel enhances your sewing experience, providing better control and accuracy in your projects.
Maintenance and Troubleshooting
Regular cleaning and oiling are essential for maintaining your Singer hand sewing machine. Identify common issues and solutions to ensure smooth operation. Refer to Singer’s support for troubleshooting.
6;1 Cleaning the Machine Regularly
Regular cleaning is essential to maintain the performance and longevity of your Singer hand sewing machine. Turn off the machine and unplug it before cleaning. Use a soft, dry cloth or a small brush to remove dust, lint, and thread debris from the exterior and internal parts. Pay special attention to the bobbin area, tension discs, and stitch plate, as these areas tend to accumulate the most lint. Avoid using harsh chemicals or abrasive cleaners, as they may damage the machine’s finish. For stubborn dirt, a slightly damp cloth can be used, but ensure the machine is completely dry before use. Regular cleaning prevents dust buildup and ensures smooth operation. Always refer to the manual for specific cleaning instructions tailored to your Singer model.
6.2 Oiling the Machine for Smooth Operation
Oiling your Singer hand sewing machine is crucial for ensuring smooth operation and extending its lifespan. Locate the oiling points, typically found near the hand wheel and bobbin area, as indicated in your manual. Use only Singer-approved sewing machine oil to avoid damaging the internal components. Apply one or two drops to each specified point, then gently turn the hand wheel to distribute the oil evenly. Avoid over-oiling, as excess oil can attract dust and lint, leading to maintenance issues. Regular oiling prevents rust, reduces friction, and keeps the machine running quietly and efficiently. Perform this maintenance every 10-15 hours of use or as recommended in your manual.
6.3 Common Issues and Solutions
Common issues with Singer hand sewing machines often arise from improper threading, bobbin misalignment, or insufficient oiling. If the thread breaks frequently, check for tangles or knots and ensure the needle is correctly threaded. For uneven stitches, adjust the tension settings or verify that the bobbin is properly seated. If the machine jams, turn it off, remove any tangled fabric, and gently clean debris. Excessive noise may indicate the need for oiling or tightening loose parts. Always refer to the manual for specific troubleshooting steps. Regular maintenance, such as cleaning and oiling, can prevent many of these issues, ensuring smooth and reliable operation. Addressing problems promptly extends the machine’s lifespan and performance quality.

Advanced Techniques and Tips
Explore advanced stitching techniques, fabric handling tips, and customization options to enhance your sewing experience. Master multiple stitch patterns, work with various fabrics, and optimize machine settings for professional results.
7.1 Sewing Different Fabrics: Tips and Tricks
When working with various fabrics, understanding their unique characteristics is key. For delicate materials like silk or chiffon, use a sharp needle and reduce tension to prevent tears. Cotton and linen can handle standard settings, while heavier fabrics like denim require a heavy-duty needle and increased stitch length. Always pre-wash fabrics to avoid shrinkage issues; Using the correct foot or attachment, such as a walking foot for thick layers, ensures smooth sewing. Test stitches on scrap fabric to adjust settings and achieve the best results for your project.
7.2 Using Multiple Stitch Patterns Effectively
Exploring the variety of stitch patterns on your Singer hand sewing machine can elevate your projects. Straight stitches are ideal for general sewing, while zigzag stitches are perfect for stretchy fabrics or decorative edges. For heavy-duty tasks, the reverse stitch ensures strong seams. experiment with different patterns to add creativity to your work. Adjust stitch length and tension according to fabric type for optimal results. When combining multiple patterns, ensure smooth transitions by backstitching at the beginning and end. Always test stitches on scrap fabric before working on your final piece. This approach ensures professional-looking results and enhances your sewing experience.
7.3 Enhancing Your Sewing Experience
To enhance your sewing experience with the Singer hand sewing machine, focus on organization and efficiency. Keep threads, needles, and accessories neatly stored to avoid delays. Regularly clean and oil the machine to ensure smooth operation. Experiment with various stitch patterns to add creativity to your projects. Use high-quality fabrics and notions for professional results. Maintain a well-lit workspace to reduce eye strain and improve accuracy. Consider using a thread organizer to manage multiple thread colors. Practice on scrap fabric before working on final pieces to perfect techniques. By implementing these tips, you can optimize your sewing process and enjoy a more fulfilling creative journey with your Singer machine.
Upgrading and Customizing the Machine
Upgrade your Singer hand sewing machine with performance-enhancing parts and customize it to suit your needs. Accessories like the Singer Motor simplify sewing, reducing fatigue and improving control.
8.1 Upgrading Parts for Better Performance
Enhance your Singer hand sewing machine by upgrading parts for improved functionality. Consider adding a Singer Motor, which attaches easily and frees both hands for fabric guidance. This upgrade reduces fatigue and allows for more precise control, making sewing more efficient and enjoyable. Additionally, explore specialized needles and high-quality thread to achieve professional-grade stitches. Ensure compatibility by using Singer-recommended attachments, as specified in the manual. Regularly check for available upgrades to keep your machine performing at its best and tackle various fabrics with ease. Upgrading not only extends the machine’s life but also enhances your overall sewing experience.
8.2 Customizing the Machine to Your Needs
Customizing your Singer hand sewing machine allows you to tailor it to your specific sewing needs. You can add personalized touches like custom stitch settings or ergonomic handles for better comfort. Consider upgrading to specialized feet or attachments for unique fabrics or techniques. For instance, a quilting foot can enhance precision for large projects. Additionally, you can adjust tension settings to suit different materials, ensuring optimal stitching. Regularly oiling the machine and maintaining it according to the manual ensures it runs smoothly. Customization not only improves functionality but also makes your sewing experience more enjoyable and efficient. Explore Singer’s accessories to find the perfect enhancements for your machine.
Resources and Support
Welcome to Singer’s resources and support section. Here, you’ll find downloadable manuals, online communities, and customer support options to assist with your sewing machine needs. Singer is committed to helping you succeed in your sewing projects with comprehensive guidance and troubleshooting tips. Explore these resources to enhance your sewing experience.
9.1 Accessing Singer Sewing Machine Manuals
Accessing Singer sewing machine manuals is straightforward, with options available for both new and vintage models. Singer offers downloadable PDF manuals on their official website, ensuring you can easily find guidance for your specific machine. Whether you’ve lost your original manual or need instructions for an older model, Singer provides comprehensive resources. Manuals for models like the Singer 99k, 66k, and others are readily available. Additionally, Singer Industrial manuals can be downloaded for free, offering detailed instructions, diagrams, and troubleshooting tips. Visit Singer’s official website or authorized resources to download your manual and ensure seamless operation of your handheld sewing machine.
9.2 Online Communities and Forums
Online communities and forums are invaluable resources for Singer hand sewing machine users. These platforms offer a space to connect with fellow sewists, share tips, and troubleshoot common issues. Websites dedicated to Singer sewing machines provide detailed discussions, tutorials, and user experiences. Many forums feature sections for specific models, such as the Singer 28k or 127k, where users can find tailored advice. Additionally, these communities often include links to free downloadable manuals and guides. Engaging with online forums can enhance your sewing skills and provide solutions to challenges you may encounter while using your Singer handheld machine. Active participation fosters a supportive environment for continuous learning and improvement.
9.3 Contacting Singer Customer Support
For assistance with your Singer hand sewing machine, contacting Singer customer support is a straightforward process. Singer offers dedicated support through various channels, including phone, email, and live chat on their official website. Representatives are available to address inquiries, provide troubleshooting guidance, and offer repair services. Ensure you have your machine’s model number, such as Singer 27K or 28K, ready for efficient support. Additionally, Singer’s website features a comprehensive FAQ section and downloadable resources to help resolve common issues independently. Reach out to Singer’s support team for professional assistance tailored to your handheld sewing machine needs, ensuring optimal performance and longevity.
Mastering the Singer Hand Sewing Machine requires proper care, consistent practice, and exploration of its features. By following this manual, you’ll enhance your sewing skills and create timeless pieces. Keep experimenting, learning, and enjoying the art of sewing with Singer. Thank you for choosing Singer Hand Sewing Machines!
10.1 Final Tips for Using the Singer Hand Sewing Machine
Always thread the machine correctly and use recommended attachments to ensure smooth operation. Regularly clean and oil the machine to maintain its performance. Start with simple projects and gradually experiment with different fabrics and stitch patterns. Keep the manual handy for quick reference. Practice makes perfect, so don’t hesitate to try new techniques. Store the machine properly when not in use to prolong its lifespan. By following these tips, you’ll maximize your sewing experience and create beautiful, professional-looking results with your Singer Hand Sewing Machine.
10.2 Encouragement for Continuous Learning
Mastering the Singer Hand Sewing Machine is a journey, and continuous learning is key to unlocking its full potential. Experiment with new stitch patterns, fabrics, and techniques to expand your sewing skills. Keep exploring online resources, tutorials, and community forums for fresh ideas and inspiration. Remember, practice is essential for improving your craft. Don’t hesitate to try new projects or revisit challenging tasks—each effort brings growth. Embrace creativity and enjoy the process of learning and creating with your Singer Hand Sewing Machine.