piste cyclable la vagabonde pdf

Overview of La Vagabonde Cycle Route

La Vagabonde is a 500 km cycling adventure spanning five French departments, from Montluçon to Montech․ It offers diverse landscapes, family-friendly paths, and connections to other major routes․

La Vagabonde is a captivating 500 km cycle route that meanders through five French departments, offering a blend of urban and rural landscapes․ Designed for cyclists of all levels, it is particularly family-friendly due to its safe, asphalted paths and minimal road exposure․ The route connects Montluçon in Allier to Montech in Tarn-et-Garonne, passing through Creuse, Corrèze, and Lot․ Its diverse scenery includes lakes, forests, and rolling countryside, while its connections to other routes like the Tour de Creuse and Canal des 2 Mers à Vélo enhance its appeal․ Whether for leisurely rides or sportive challenges, La Vagabonde promises an unforgettable journey through France’s hidden gems․

1․2․ Key Features of the Route

La Vagabonde is a 500 km cycle route offering a diverse mix of landscapes, from the serene Lake Vassivière to the rugged Millevaches plateau and the picturesque Lot Valley․ Designed for all skill levels, it features quiet roads, family-friendly paths, and connections to major routes like the Tour de Creuse and Canal des 2 Mers à Vélo․ The route avoids busy towns, emphasizing scenic countryside and charming villages․ Amenities such as picnic areas, water points, and restrooms are plentiful, with train stations along the way for added convenience․ A detailed topoguide is available, making it easier to plan and enjoy this unforgettable journey through southwest France’s natural beauty․

1․3; Length and Difficulty Level

La Vagabonde spans 500 kilometers, offering a challenging yet rewarding journey․ The route features a mix of flat sections and hilly terrain, with notable elevation gains, such as 3,500 meters over 300 km․ While it is demanding for experienced cyclists, the route is also accessible to families and less seasoned riders due to its well-paved, traffic-free paths․ The difficulty varies, with some stages requiring stamina and others offering leisurely rides․ The route is designed to be adaptable, allowing cyclists to break it into manageable stages or explore specific sections․ Overall, it strikes a balance between physical challenge and scenic reward, making it suitable for a wide range of cycling enthusiasts․

Geographical Coverage

La Vagabonde spans five French departments: Allier, Creuse, Corrèze, Lot, and Tarn-et-Garonne․ Starting in Montluçon, it winds through diverse landscapes to Montech, showcasing rivers, plateaus, and valleys․

2․1․ Departments and Regions

La Vagabonde cycle route traverses five diverse departments: Allier, Creuse, Corrèze, Lot, and Tarn-et-Garonne․ These regions are located in the heart of France, spanning across Nouvelle-Aquitaine, Occitanie, and Auvergne-Rhône-Alpes․ The route begins in Allier, known for its rolling hills and rivers, before moving into the rugged landscapes of Creuse and Corrèze․ It then flows through the picturesque Lot Valley and concludes in Tarn-et-Garonne, where the terrain flattens near the Garonne River․ Each department offers unique natural beauty, from the Massif Central’s plateaus to the fertile valleys of the south, creating a rich tapestry of landscapes for cyclists to explore․

2․2․ Major Cities and Towns

The La Vagabonde cycle route passes through several charming cities and towns, each offering unique cultural and historical experiences․ Starting in Montluçon, known for its medieval architecture, the route winds through Aubusson, famous for its tapestries, and Felletin, with its picturesque streets․ Riders also visit Pérols-sur-Vézère, a village surrounded by natural beauty, and Montaignac-sur-Doustre, offering breathtaking views of the Doustre River․ The journey continues through Rocamadour, a historic pilgrimage site, and Cahors, renowned for its wine and medieval architecture․ The route concludes in Montech, a gateway to the Canal des 2 Mers à Vélo․ These towns provide rich cultural and scenic diversity, enhancing the cycling experience․

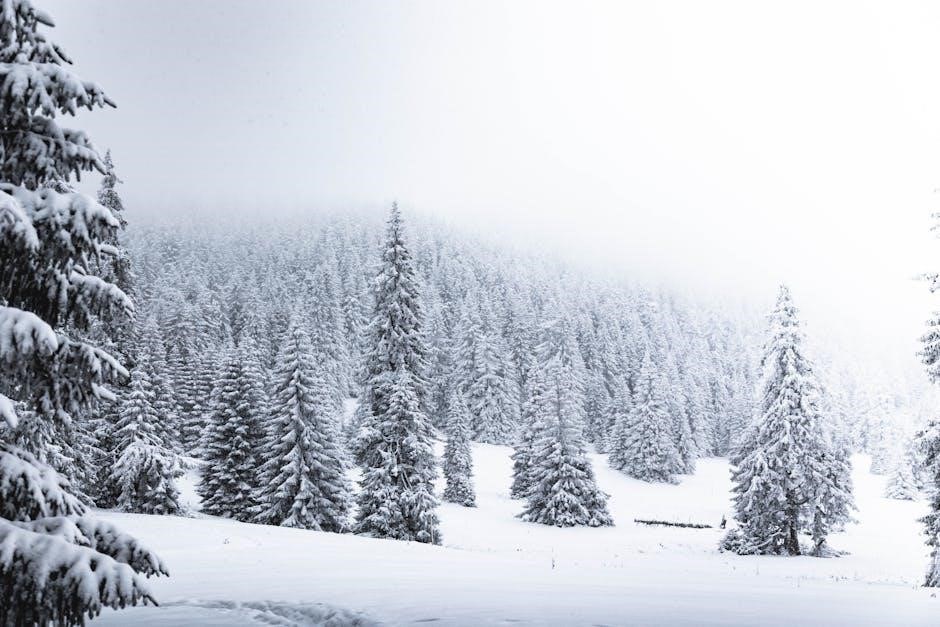
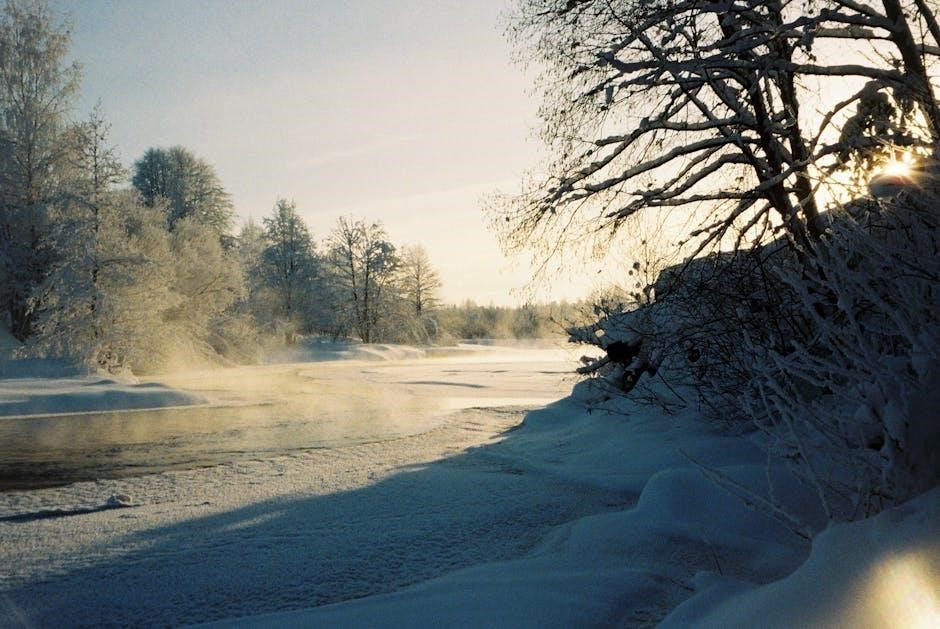
2․3․ Landscapes and Natural Diversity

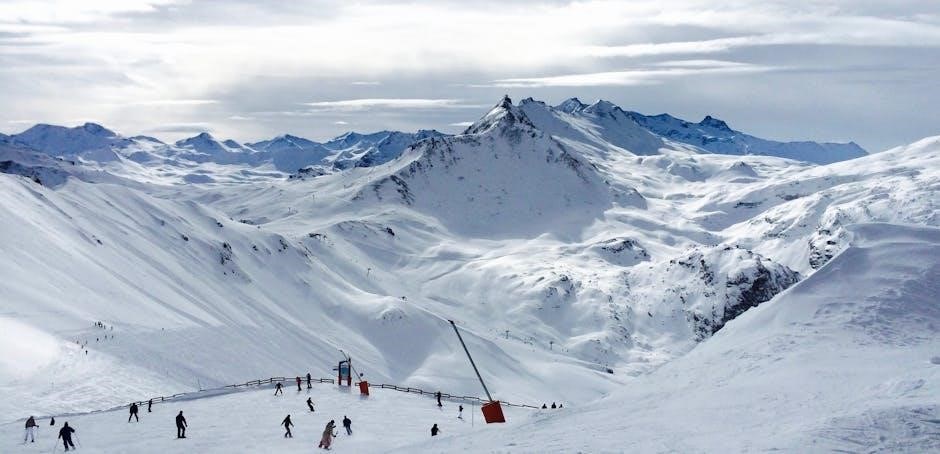
La Vagabonde offers a rich variety of landscapes, from the serene Lake Vassivière to the rugged Millevaches plateau․ Riders traverse the picturesque Dordogne Valley, known for its rolling hills and riverside paths, and explore the limestone plateaus of the Quercy Causses․ The route also winds through the fertile plains of the Lot Valley, where the scenery shifts from open fields to dense forests․ Along the way, cyclists encounter heather-blanketed moors, twisting valley lanes, and scenic vistas․ The diverse terrain ensures a constantly changing backdrop, making every stage of the journey unique and visually rewarding․ Natural attractions like rivers, lakes, and forests provide ample opportunities for rest and exploration, enhancing the cycling experience․

Connecting Cycle Routes

La Vagabonde seamlessly connects to the Tour de Creuse, Vallée du Lot à Vélo, and Canal des 2 Mers à Vélo, offering a network of routes for extended cycling adventures across France․

3․1․ Link to Tour de Creuse

La Vagabonde shares a scenic section with the Tour de Creuse, connecting riders between Chambon-sur-Voueize and Aubusson․ This link enhances the journey through Creuse’s natural beauty and charming villages, blending seamlessly into the broader cycling network․ The route offers a mix of quiet roads and picturesque landscapes, making it ideal for cyclists seeking both adventure and relaxation․ This connection not only expands the route’s possibilities but also provides access to the unique cultural and historical sites of the region․ It’s a perfect opportunity to explore the unspoiled French countryside while enjoying a well-integrated cycling experience․

3․2․ Connection to Vallée du Lot à Vélo

La Vagabonde seamlessly connects to the Vallée du Lot à Vélo between Arcambal and Cahors, offering cyclists a chance to explore the picturesque Lot Valley․ This link provides access to stunning landscapes, medieval villages, and vineyards․ Riders can enjoy the tranquil riverside paths and immerse themselves in the region’s rich history and culture․ The connection enhances the overall cycling experience, allowing adventurers to discover more of southwestern France’s beauty․ It also ensures a well-integrated network for cyclists to explore diverse terrains and landmarks effortlessly․ This junction is a highlight for those seeking a mix of natural beauty and cultural enrichment on their journey;

3․3․ Junction with Canal des 2 Mers à Vélo

La Vagabonde culminates at Montech, where it connects to the Canal des 2 Mers à Vélo, a major cycling route linking the Atlantic to the Mediterranean․ This strategic junction offers cyclists a seamless transition to explore further destinations, such as the iconic Canal du Midi․ The connection at Montech is a key feature, allowing riders to extend their adventure beyond the original 500 km route․ This intersection enhances the overall cycling experience, providing access to diverse landscapes and cultural landmarks․ It is a vital link for those seeking to explore more of southern France’s scenic beauty and historical treasures․

Detailed Route Stages

La Vagabonde is divided into seven stages, each offering unique landscapes․ From Montluçon to Montech, cyclists traverse diverse regions, experiencing natural beauty and cultural richness along the way․

4․1․ Stage 1: Montluçon to Aubusson

Stage 1 of La Vagabonde begins in Montluçon, a historic town in Allier, and spans approximately 50 km to Aubusson in Creuse․ This initial leg introduces riders to the rolling countryside and forests of central France․ The route follows quiet roads, avoiding major towns, and offers scenic views of rural landscapes․ Riders pass near Lake Vassivière and the Millevaches Plateau, known for their natural beauty․ Aubusson, famous for its medieval architecture and connection to the Tour de Creuse, provides a charming endpoint․ This stage sets the tone for the adventure ahead, blending history, nature, and cycling bliss․ The terrain is moderate, making it accessible for cyclists of all levels․

4․2․ Stage 2: Aubusson to Felletin

Stage 2 of La Vagabonde continues from Aubusson to Felletin, covering around 30 km․ This section delves deeper into the Creuse department, showcasing picturesque villages and unspoiled natural beauty․ The route meanders through forests and along rivers, offering serene cycling conditions․ Felletin, known for its medieval heritage and charming streets, provides a delightful stop․ Cyclists will appreciate the peaceful roads and the opportunity to explore local culture․ This stage is relatively short, making it ideal for families or those seeking a leisurely pace․ The terrain remains gentle, with minimal elevation changes, ensuring an enjoyable ride for all skill levels․

4․3․ Stage 3: Felletin to Pérols-sur-Vézère

Stage 3 of La Vagabonde takes cyclists from Felletin to Pérols-sur-Vézère, covering approximately 35 km․ This section transitions into the Corrèze department, offering a mix of rolling hills and flat stretches․ The route winds through lush forests and alongside rivers, providing a serene cycling experience․ Pérols-sur-Vézère, known for its natural springs and historic charm, is a refreshing stop․ The terrain remains manageable, with occasional climbs that add variety to the ride․ This stage is ideal for cyclists seeking a balance of nature and culture, with opportunities to explore quaint villages and enjoy local hospitality․

4․4․ Stage 4: Pérols-sur-Vézère to Montaignac-sur-Doustre

Stage 4 of La Vagabonde spans 30 km, guiding cyclists from Pérols-sur-Vézère to Montaignac-sur-Doustre․ This section delves into the heart of the Dordogne Valley, offering a mix of rolling hills and riverside paths․ The terrain remains varied, with smooth roads and occasional gravel sections, making it suitable for medium-level cyclists․ Scenic views of the Vézère River and surrounding forests dominate the landscape․ Riders can stop at charming villages along the way, exploring local landmarks and enjoying regional cuisine․ This stage is a perfect blend of nature and culture, providing a relaxing yet engaging ride through one of France’s most picturesque regions․

4․5․ Stage 5: Montaignac-sur-Doustre to Rocamadour

Stage 5 covers approximately 35 km, leading cyclists from Montaignac-sur-Doustre to the iconic village of Rocamadour․ This section features hilly terrain with scenic views of the Dordogne Valley and surrounding limestone plateaus․ Riders will pass through quaint villages and dense forests, offering a mix of challenging climbs and rewarding descents․ The stage highlights the region’s natural beauty and historical significance, culminating in Rocamadour, a medieval village perched on a cliff․ The Chapelle Notre-Dame and its famed Black Madonna are must-see attractions․ This stage is ideal for those seeking a blend of physical challenge and cultural enrichment in a breathtaking setting․

4․6․ Stage 6: Rocamadour to Cahors

Stage 6 is a 40 km journey from Rocamadour to Cahors, offering a mix of undulating terrain and scenic views․ The route passes through charming villages like Lacave and crosses the Dordogne River․ Riders will encounter moderate climbs, including a notable ascent near the Céou Valley․ The landscape shifts from lush forests to open pastures, providing a diverse visual experience․ The stage concludes in Cahors, a historic town known for its medieval architecture, including the iconic Pont Valentré․ This section is ideal for cyclists seeking a balance of physical challenge and cultural exploration, with opportunities to enjoy local cuisine and wine in Cahors․

4․7․ Stage 7: Cahors to Montech

Stage 7 spans 35 km, leading from Cahors to Montech, the final destination of La Vagabonde․ The route follows the Lot River, offering serene views of the surrounding countryside․ The terrain is relatively flat, making it accessible for cyclists of all levels․ Key highlights include the villages of Laroque and Montcuq, with their medieval charm․ The stage concludes in Montech, where cyclists can connect to the Canal des 2 Mers à Vélo, extending their journey further․ This stage is perfect for those looking to unwind and enjoy the scenic beauty of southwestern France, with ample opportunities to stop at local vineyards and savor regional delicacies․

Natural Attractions

La Vagabonde boasts stunning natural diversity, featuring serene lakes, winding rivers, and expansive forests․ Highlights include Lac des Deux Montagnes and the Parc national dOka, offering breathtaking scenery and tranquil environments․

5․1․ Lakes and Rivers

La Vagabonde cycle route meanders through stunning aquatic landscapes, including the majestic Lac des Deux Montagnes and the serene rivière des Mille Îles․ These waterways offer tranquil views and refreshing stops․ Cyclists can enjoy the reflective beauty of Lac des Deux Montagnes, a popular spot for relaxation․ The rivière des Mille Îles adds a touch of wilderness, with its gentle flow and surrounding greenery․ These natural gems provide perfect opportunities for picnics or simply soaking in nature’s splendor․ The route’s proximity to water ensures a cooling breeze and scenic variety, making it a haven for nature lovers and photographers alike;

5․2․ National Parks and Forests

La Vagabonde cycle route passes through several national parks and forests, offering cyclists a chance to immerse themselves in nature․ The Parc national d’Oka is a highlight, with its lush forests, diverse wildlife, and scenic trails․ Riders can also explore the Plateau de Millevaches, known for its rugged landscapes and dense woodlands․ The route winds through chests of chestnut groves and pine forests, providing shaded paths and opportunities to spot local flora and fauna․ These natural reserves add a serene and adventurous dimension to the journey, allowing cyclists to connect with France’s rich natural heritage while enjoying the ride․

5․3․ Coastal and Mountain Scenery

La Vagabonde cycle route offers breathtaking coastal and mountain scenery, blending diverse landscapes for an unforgettable experience․ The route traverses rolling hills, scenic valleys, and dramatic mountain plateaus, such as the Quercy Causses, with their limestone cliffs and vast vistas․ Along the way, cyclists can enjoy the serene beauty of riverside paths, particularly in the Dordogne Valley and Lot Valley, where the interplay of water and land creates picturesque settings․ The contrast between the rugged terrain and the gentle coastal plains adds to the route’s charm, making it a visual feast for nature enthusiasts and photographers alike․

Practical Information

La Vagabonde offers convenient access to train stations, bike rentals, and repair services․ A detailed guidebook is available for planning, ensuring a smooth cycling experience across the route․

6․1․ Accommodation Options

Along La Vagabonde, cyclists can choose from a variety of accommodations, including charming hotels, bed-and-breakfasts, and camping sites․ Many options are strategically located near the cycle route, offering easy access to trails and local attractions․ Some establishments provide secure bike storage, while others offer repair services or equipment rentals․ For a more immersive experience, consider staying in rural guesthouses or farmhouse inns, where you can enjoy local cuisine and hospitality․ Camping enthusiasts will find well-equipped sites, often near lakes or forests․ Advance booking is recommended, especially during peak season․ Families and solo travelers alike will find suitable options, ensuring a comfortable stay throughout the journey․

6․2․ Bike Rentals and Services

Bike rentals are readily available along La Vagabonde, with options in major towns like Montluçon, Aubusson, and Cahors․ Local shops offer a range of bikes, including hybrid, mountain, and electric models․ Many providers also offer child seats and trailers for families․ Repair services are accessible, with mechanics skilled in handling common cycling issues․ Some rental shops partner with hotels to deliver bikes directly to your accommodation․ Online booking platforms make it easy to reserve bikes in advance․ Additionally, mobile repair services can assist cyclists en route, ensuring minimal downtime․ These services cater to all levels, from casual riders to serious enthusiasts, ensuring a smooth journey along the route․

6․3․ Safety Tips and Precautions

While cycling on La Vagabonde, always wear a helmet and ensure your bike is well-maintained․ Follow local traffic rules and stay visible with reflective gear․ Carry a basic repair kit, spare tires, and a map or GPS device․ Check weather forecasts to avoid riding in harsh conditions․ Stay hydrated and carry snacks, especially on remote sections․ Be mindful of shared paths and wildlife, especially near natural reserves․ Inform someone of your route and estimated return time․ For families, ensure children are supervised and aware of road safety․ Regularly inspect your bike’s brakes and tires before starting your journey․ Enjoy the ride responsibly and respect the environment․

Cultural and Historical Highlights

La Vagabonde showcases historic villages, local cuisine, and cultural festivals, offering a rich blend of heritage and tradition along the route․

7․1․ Historical Villages

La Vagabonde route meanders through picturesque historical villages, each offering a glimpse into France’s rich past․ Villages like Aubusson, renowned for its tapestry heritage, and Felletin, with its medieval architecture, captivate cyclists․ The charming stone houses and cobblestone streets of Pérols-sur-Vézère and Montaignac-sur-Doustre provide a serene backdrop for exploration․ These villages are not just scenic stops but living museums, where centuries-old traditions and craftsmanship are still celebrated․ The route’s design ensures cyclists can easily explore these historic gems, making the journey as culturally enriching as it is visually stunning․

7․2․ Local Cuisine and Wine

La Vagabonde offers a culinary journey through France’s diverse regions, showcasing local specialties․ In the Limousin, savor dishes like Agneau de Limousin (Limousin lamb) and chestnut-based delicacies․ The Dordogne region introduces cyclists to confit de canard and truffles, while Quercy highlights its rich foie gras traditions․ The Lot Valley is famous for its Cahors wine, a bold Malbec-based red․ Along the route, cyclists can enjoy fresh, locally sourced produce and artisanal products at village markets and family-run restaurants․ The combination of regional flavors and wines makes every meal a memorable experience, complementing the natural beauty of the cycling route․

7․3․ Cultural Festivals and Events

La Vagabonde cycle route is immersed in a vibrant cultural landscape, with numerous festivals and events celebrating local traditions․ Cyclists can experience the rich heritage of the regions they traverse, from medieval reenactments in historical villages to lively markets showcasing artisanal goods․ The Dordogne Valley hosts festivals honoring its prehistoric roots, while Cahors is known for its wine harvest celebrations and jazz performances․ Along the route, local fairs, farmers’ markets, and live music events provide opportunities to connect with the community․ These cultural highlights add a dynamic layer to the journey, offering cyclists a chance to immerse themselves in the region’s history, art, and traditions․

Family-Friendly Aspects

La Vagabonde offers family-friendly cycling with safe, paved paths, picnic areas, and rest stops․ Enjoy activities like swimming at Oka Beach and exploring Oka National Park․

8․1․ Safe Paths for Children

La Vagabonde features safe, asphalted paths designed for family cycling․ The route avoids main roads, ensuring a secure environment for children․ Shallow slopes and clear signage make it accessible for young riders․ Picnic areas and water points are strategically placed, allowing families to take breaks․ The trail passes near parks like Oka National Park, offering additional recreational opportunities․ This ensures a fun and worry-free experience for families with kids, making La Vagabonde an ideal choice for cycling adventures with children․

8․2․ Picnic and Rest Areas

La Vagabonde offers numerous picnic and rest areas, perfectly integrated into the landscape; These spaces are strategically located near scenic highlights, such as rivers, lakes, and forests, providing cyclists with opportunities to relax․ Picnic tables, shaded areas, and water points are available, ensuring comfort during breaks․ Families and cyclists can recharge in peaceful environments, enjoying the natural beauty of the route․ These areas are well-maintained and easily accessible, making them ideal for refreshing stops․ The presence of these facilities enhances the overall cycling experience, allowing riders to fully appreciate the diverse landscapes of La Vagabonde․

8․3․ Family Activities Along the Route

La Vagabonde offers a variety of family-friendly activities along its route, ensuring an engaging experience for all ages․ Cyclists can enjoy swimming at Oka Beach or exploring the trails of Parc national d’Oka․ The route passes through charming villages, where families can discover local history and culture․ Interactive experiences, such as visiting farms or tasting regional cuisine, add fun and education․ The flat, paved paths and scenic rest areas make it easy for families to take breaks and enjoy quality time together․ These activities create lasting memories, combining outdoor adventure with cultural enrichment․

La Vagabonde offers an unforgettable cycling adventure, blending diverse landscapes, cultural richness, and family-friendly paths․ It’s a journey that connects nature, history, and local traditions, inspiring cyclists to explore․

9․1․ Final Thoughts on La Vagabonde

La Vagabonde is a captivating cycle route that offers a diverse and enriching experience for cyclists of all levels․ Its 500 km journey through five French departments showcases stunning natural beauty, from the serene lakes to the rolling countryside․ The route’s ability to balance scenic variety with family-friendly paths makes it a standout choice for both casual riders and adventure seekers․ By connecting to other major cycling networks, it provides endless opportunities for exploration․ La Vagabonde is more than just a bike trail—it’s a gateway to discovering France’s hidden gems, cultural heritage, and the joy of slow, immersive travel․

9․2․ Encouragement to Explore

Embark on the La Vagabonde cycle route and discover the charm of France’s diverse landscapes and cultural richness․ This 500 km journey is designed for cyclists of all levels, offering a mix of serene natural beauty and vibrant rural life; Whether you’re seeking adventure or a leisurely ride, the route’s well-marked trails and family-friendly paths ensure an unforgettable experience․ Don’t miss the opportunity to explore hidden villages, enjoy local cuisine, and connect with nature․ With its strategic links to other cycling networks, La Vagabonde invites you to pedal beyond the ordinary and create lasting memories․ Start your adventure today and uncover the magic of southwest France!

Continue Reading

toshiba e-studio 7506ac manual

The Toshiba e-Studio 7506AC manual provides comprehensive guidance for setup‚ operation‚ and troubleshooting. It covers models 5506AC‚ 6506AC‚ and 7506AC‚ offering detailed instructions for optimal performance.

The manual includes Imaging‚ Copying‚ and Operators guides‚ ensuring users master basic and advanced functions. It is essential for maximizing productivity and maintaining device efficiency.

1.1 Overview of the Toshiba e-Studio 7506AC Series

The Toshiba e-Studio 7506AC series includes multifunctional digital systems designed for high-performance printing‚ copying‚ scanning‚ and faxing. Models like the 5506AC‚ 6506AC‚ and 7506AC offer advanced features‚ security options‚ and integration capabilities. These devices cater to various business needs‚ ensuring efficiency and productivity. Their robust design and user-friendly interface make them ideal for modern office environments.

1.2 Importance of the Manual for Users

The manual is essential for understanding the Toshiba e-Studio 7506AC’s features‚ setup‚ and operation. It provides detailed instructions for troubleshooting and optimizing performance.

Users can learn to master basic and advanced functions‚ ensuring efficient use of the device. The guide also covers maintenance tips and security settings‚ crucial for prolonging device lifespan and protecting sensitive data.

Main Features of the Toshiba e-Studio 7506AC

The Toshiba e-Studio 7506AC offers versatile print‚ copy‚ scan‚ and fax functions‚ ensuring high productivity. It supports advanced security features‚ intuitive operation‚ and seamless integration with office workflows‚ making it a reliable solution for modern business needs.

2.1 Print Functions and Capabilities

The Toshiba e-Studio 7506AC delivers high-quality printing with precise resolution and vibrant color accuracy. It supports versatile paper sizes and formats‚ including duplex printing for efficient document management. The device integrates advanced print security features and eco-friendly settings‚ ensuring cost-effective and environmentally responsible printing solutions for businesses. Its robust print capabilities cater to diverse office requirements with ease and reliability.

2.2 Copy Functions and Customization Options

The Toshiba e-Studio 7506AC offers robust copying capabilities with customizable settings for optimal document reproduction. Users can adjust copy quality‚ duplex copying‚ and document editing features. Advanced options include page layout customization‚ image quality adjustments‚ and eco-friendly settings. The device also supports batch copying and secure copying‚ ensuring efficient and tailored copying solutions for various business needs.

2.3 Scan Functions and Image Quality Settings

The Toshiba e-Studio 7506AC offers advanced scanning features with high-resolution image quality. Users can scan documents to various formats‚ including PDF and JPEG‚ and adjust settings like DPI and compression for optimal output. The device also supports network scanning and secure scanning options‚ ensuring efficient and reliable document management with superior image clarity and customization options available.

2.4 Fax Functions and Integration

The Toshiba e-Studio 7506AC supports advanced faxing capabilities‚ including high-speed transmission and secure faxing options. Users can integrate fax functions with network systems for streamlined communication. The device offers customizable fax settings‚ such as resolution and compression‚ ensuring clear and efficient document transmission. Secure fax storage and password-protected faxing enhance confidentiality and data protection for sensitive documents.

Toshiba e-Studio 7506AC Imaging Manual

The Toshiba e-Studio 7506AC Imaging Manual provides detailed instructions for image-related functions‚ including scanning and printing. It covers setup‚ usage‚ and troubleshooting‚ ensuring high-quality image output and optimal device performance for all imaging tasks.

3.1 Purpose of the Imaging Manual

The Imaging Manual is designed for users of the Toshiba e-Studio 7506AC series‚ providing detailed guidance on imaging functions. It covers setup‚ usage‚ and troubleshooting for scanning and printing‚ ensuring high-quality image output and efficient operation. This manual is essential for users needing advanced imaging capabilities and customization options to meet specific requirements.

3.2 Key Features of the Imaging Manual

The Imaging Manual offers a comprehensive guide to the Toshiba e-Studio 7506AC’s imaging capabilities. It includes detailed instructions for scanning‚ printing‚ and image quality customization. The manual also provides troubleshooting tips and advanced features for optimizing output. Users can explore settings for resolution‚ color management‚ and document handling‚ ensuring precise control over imaging tasks and achieving professional results efficiently.

3.3 How to Download and Use the Imaging Manual

To download the Imaging Manual for Toshiba e-Studio 7506AC‚ visit the official Toshiba support website. Search for the model‚ then select the Imaging Manual from the available options. Download the PDF version and open it using a PDF reader. The manual provides detailed instructions for imaging tasks‚ ensuring optimal use of the device’s features.

Toshiba e-Studio 7506AC Copying Manual

The Toshiba e-Studio 7506AC Copying Manual guides users through copying functions‚ customization options‚ and troubleshooting. It ensures efficient and high-quality copying operations for optimal productivity.

4.1 Purpose of the Copying Manual

The Toshiba e-Studio 7506AC Copying Manual is designed to assist users in efficiently utilizing the device’s copying features. It provides detailed instructions for customizing copy settings‚ troubleshooting common issues‚ and optimizing output quality. This guide is essential for office staff and administrators seeking to streamline workflows and maintain consistent‚ high-quality document reproduction.

4.2 Key Features of the Copying Manual

The Toshiba e-Studio 7506AC Copying Manual highlights essential features such as customizing copy settings‚ optimizing output quality‚ and troubleshooting common issues. It also includes guides for advanced copying functions‚ like page editing and cover insertion. The manual ensures users can efficiently manage and enhance their copying workflows with clear‚ step-by-step instructions.

4.3 How to Access and Utilize the Copying Manual

The Toshiba e-Studio 7506AC Copying Manual can be accessed online via Toshiba’s official support website or downloaded as a PDF. Users can navigate through sections using bookmarks or search functions for quick access. The manual provides detailed step-by-step guides‚ enabling users to optimize copying functions and resolve issues efficiently. Regular updates ensure the latest features are covered.

Toshiba e-Studio 7506AC Operators Manual

The Operators Manual is essential for guiding users through setup‚ operation‚ and maintenance of the Toshiba e-Studio 7506AC; It ensures optimal performance and productivity.

5.1 Purpose of the Operators Manual

The Operators Manual is designed to guide users through the setup‚ operation‚ and maintenance of the Toshiba e-Studio 7506AC. It provides detailed instructions for basic and advanced functions‚ ensuring optimal performance. This manual serves as a go-to resource for troubleshooting and understanding device capabilities‚ helping users maximize efficiency and productivity.

5.2 Key Features of the Operators Manual

The Operators Manual offers detailed troubleshooting guides‚ step-by-step instructions‚ and comprehensive coverage of basic and advanced functions. It includes sections on device setup‚ maintenance‚ and optimal performance‚ ensuring users can efficiently operate the Toshiba e-Studio 7506AC. The manual also provides clear explanations of error codes and diagnostic tools for quick issue resolution.

5.3 How to Download and Refer to the Operators Manual

Visit the official Toshiba support website to download the Operators Manual in PDF format. Navigate to the “Support” section‚ select your model‚ and choose the manual. Refer to it for troubleshooting‚ maintenance‚ and operational guidance. The manual is compatible with models 5506AC‚ 6506AC‚ and 7506AC‚ ensuring comprehensive support for all functions.

Toshiba e-Studio 7506AC Software Installation Manual

Welcome to the Toshiba e-Studio 7506AC Software Installation Manual. This guide provides step-by-step instructions for installing and configuring software for optimal performance. Download the manual from the official Toshiba website for detailed installation procedures‚ driver setup‚ and troubleshooting tips to ensure smooth operation.

6.1 Purpose of the Software Installation Manual

The Toshiba e-Studio 7506AC Software Installation Manual is designed to guide users through the process of installing and configuring software for the device. It provides detailed instructions for driver installation‚ network setup‚ and troubleshooting common issues. The manual ensures compatibility with various operating systems and helps users optimize the device’s performance for seamless operation.

6.2 Key Features of the Software Installation Manual

The Software Installation Manual offers step-by-step instructions for installing drivers and software. It includes network configuration‚ compatibility checks‚ and troubleshooting tips. The manual supports various operating systems and provides optimization guidelines for performance. It ensures smooth integration with existing systems and helps resolve installation-related issues efficiently.

6.3 Step-by-Step Guide to Software Installation

Download the driver from Toshiba’s official site‚ ensuring compatibility with your OS. Run the installer‚ following on-screen prompts. Configure network settings for wireless or wired connections. Test functionality by printing a document. Troubleshooting sections address common issues‚ ensuring smooth installation and optimal performance for your Toshiba e-Studio 7506AC.

Toshiba e-Studio 7506AC Paper Preparation Manual

This manual outlines essential guidelines for proper paper handling and maintenance. It ensures optimal print quality and prevents jams by addressing paper types‚ sizes‚ and alignment.

7.1 Importance of Proper Paper Preparation

Proper paper preparation is crucial for smooth operation and optimal performance. It prevents jams‚ ensures consistent print quality‚ and minimizes downtime. Correct handling guidelines help maintain device efficiency and longevity‚ while improper preparation can lead to damage or subpar output. Adhering to these steps ensures reliable functionality and enhances overall user experience.

7.2 Guidelines for Paper Handling and Maintenance

Proper paper handling ensures smooth operation and minimizes jams. Use recommended paper types and weights‚ align settings with printer driver configurations‚ and store paper in dry‚ cool environments. Regularly clean paper trays and rollers to prevent dust buildup. Always follow Toshiba’s guidelines for loading and adjusting paper to maintain optimal print quality and device performance.

Toshiba e-Studio 7506AC Replacement Parts and Maintenance

Replacement parts like the DSDF Roller Kit and fuser ensure optimal performance. Regular maintenance‚ including cleaning and updating firmware‚ prevents issues and extends device lifespan.

8;1 Common Replacement Parts for Toshiba e-Studio 7506AC

Common replacement parts include the DSDF Roller Kit and fuser units‚ essential for maintaining print quality. Toner cartridges and imaging units are also frequently replaced to ensure consistent output. Regularly updating these components prevents wear and tear‚ ensuring the device operates efficiently and delivers high-quality results.

8.2 Maintenance Tips for Optimal Performance

Regularly clean the printer and scanner to prevent dust buildup. Check and update firmware for the latest features. Replace toner cartridges and drums as needed to maintain print quality. Schedule periodic inspections of rollers and fusers to ensure smooth operation. Proper maintenance extends the lifespan of the device and ensures consistent performance.

Toshiba e-Studio 7506AC Security Features

The Toshiba e-Studio 7506AC offers enhanced security features‚ including secure printing‚ password-protected access‚ and encrypted document handling. These features ensure data protection and prevent unauthorized access‚ maintaining confidentiality and compliance with organizational security standards. Regular updates and robust access controls further safeguard the device and its operations.

9.1 Secure Printing and Document Handling

The Toshiba e-Studio 7506AC ensures secure printing through features like Secure PDF and password-protected documents. Users can encrypt files before printing‚ preventing unauthorized access. The device also supports secure release‚ requiring authentication before printing sensitive documents. Additionally‚ secure document handling includes encrypted storage and overwrite functions to protect data on the device‚ ensuring confidentiality and compliance with security protocols. This robust security framework safeguards sensitive information from potential breaches or unauthorized access‚ making it ideal for industries requiring high data protection standards. The integration of these features into the e-Studio 7506AC enhances overall security‚ providing peace of mind for users handling confidential materials. Furthermore‚ regular firmware updates and access controls maintain the device’s security integrity‚ ensuring it remains protected against evolving threats. By implementing these measures‚ the Toshiba e-Studio 7506AC effectively balances productivity with security‚ catering to the needs of modern workplaces that prioritize data protection. Overall‚ the secure printing and document handling capabilities of the e-Studio 7506AC make it a reliable choice for organizations seeking to maintain stringent security standards.

9.2 Password Policy and Access Control

The Toshiba e-Studio 7506AC features robust password policies and access controls to enhance security. Role-based access ensures only authorized users can perform specific functions. Password complexity requirements‚ such as combining letters‚ numbers‚ and symbols‚ are enforced to prevent unauthorized access. These measures safeguard sensitive data and ensure compliance with organizational security standards‚ protecting against potential breaches. Regular updates maintain security integrity‚ providing reliable protection for users.

Toshiba e-Studio 7506AC Series Models and Manuals

The Toshiba e-Studio 7506AC series includes models like the 5506AC‚ 6506AC‚ and 7506AC. Each model offers specific manuals‚ ensuring tailored guidance for installation‚ operation‚ and maintenance.

10.1 Overview of the Toshiba e-Studio 5506AC‚ 6506AC‚ and 7506AC Models

Toshiba e-Studio 5506AC‚ 6506AC‚ and 7506AC models are multifunctional digital systems designed for high performance. They offer advanced print‚ copy‚ scan‚ and fax capabilities‚ catering to diverse office needs. Each model varies in features‚ with the 7506AC being the most advanced‚ providing enhanced security and efficiency for large-scale operations. These models ensure versatility and reliability.

10.2 Common Manuals Across the Series

The Toshiba e-Studio 5506AC‚ 6506AC‚ and 7506AC series share common manuals‚ including Imaging‚ Copying‚ and Operators guides. These manuals‚ available in PDF format‚ provide detailed instructions for print‚ copy‚ scan‚ and fax functions. They are essential resources for troubleshooting and optimizing device performance‚ ensuring users can fully utilize their multifunctional digital systems.

Troubleshooting Common Issues

The Toshiba e-Studio 7506AC manual addresses common issues like paper jams‚ error codes‚ and connectivity problems. Diagnostic tools and troubleshooting guides help resolve issues efficiently.

11.1 Common Problems and Solutions

Common issues with the Toshiba e-Studio 7506AC include paper jams‚ error codes‚ and connectivity problems. Solutions involve clearing jams‚ restarting the device‚ and checking network settings. The manual provides step-by-step troubleshooting for these and other issues‚ ensuring quick resolution and minimal downtime for users.

11.2 Diagnostic Tools and Error Codes

The Toshiba e-Studio 7506AC manual provides diagnostic tools and error codes to identify and resolve issues. Common error codes like C310‚ C320‚ and C330 indicate fuser failures or communication problems. Solutions include restarting the device‚ checking network connections‚ and updating firmware. Detailed explanations and repair steps are available in the troubleshooting section for quick resolution.

Frequently Asked Questions (FAQs)

The FAQs section addresses common inquiries about the Toshiba e-Studio 7506AC‚ including general operation‚ error resolution‚ and advanced features. It provides quick solutions and clarifications.

12.1 General FAQs About the Toshiba e-Studio 7506AC

General FAQs cover basic operations‚ manual downloads‚ and troubleshooting. Users often inquire about paper preparation‚ print quality‚ and error codes. The manual also addresses secure printing and password policies. FAQs provide quick solutions for common issues‚ ensuring efficient use of the device’s features and maintaining optimal performance. This section is essential for resolving everyday queries.

12.2 Technical FAQs and Advanced Features

Technical FAQs address advanced features like secure PDF‚ e-Filing‚ and password policies. Users can learn about e-FOLLOW setup for accounting and secure document release. The manual also covers QR-code printing and embedded applications‚ helping users utilize the device’s full potential for enhanced productivity and security in complex environments. These features ensure efficient document management and advanced functionality.

Toshiba e-Studio 7506AC Support and Resources

Toshiba offers official support‚ including contact information and online resources. Users can access forums‚ guides‚ and troubleshooting tips for advanced features like e-FILING and secure document release.

13.1 Official Toshiba Support and Contact Information

Toshiba provides official support resources‚ including contact details and comprehensive guides. Users can access troubleshooting tips‚ drivers‚ and manuals through Toshiba’s website. The manual emphasizes contacting Toshiba TEC CORPORATION for inquiries. Online forums and communities also offer assistance‚ ensuring users receive timely support for their Toshiba e-Studio 7506AC devices.

13.2 Online Communities and Forums for Assistance

Online communities and forums offer valuable support for Toshiba e-Studio 7506AC users. Platforms like Toshiba’s official support page and user-driven forums provide troubleshooting tips‚ driver downloads‚ and expert advice. These resources enable users to resolve issues independently or connect with experienced professionals‚ ensuring optimal device performance and addressing specific needs efficiently.

The Toshiba e-Studio 7506AC manual is an essential resource for mastering device operations. It provides comprehensive guidance‚ from basic functions to advanced troubleshooting‚ ensuring optimal performance.

14.1 Summary of Key Points

The Toshiba e-Studio 7506AC manual covers essential features‚ troubleshooting‚ and maintenance. It includes print‚ copy‚ scan‚ and fax functions‚ along with imaging and software installation guides. Proper paper preparation and common replacement parts are highlighted for optimal performance; The manual is a vital resource for users to maximize efficiency and resolve common issues effectively.

14.2 Final Thoughts on Using the Toshiba e-Studio 7506AC Manual

The Toshiba e-Studio 7506AC manual is an invaluable resource for users‚ offering detailed guidance for optimal device performance. It covers installation‚ operation‚ and troubleshooting‚ ensuring users can resolve issues and maximize productivity. Regularly referencing the manual helps users make the most of advanced features and maintain their printer’s efficiency effectively.

Continue Reading

pei waste watch schedule 2024 pdf

Welcome to the 2024 PEI Waste Watch Schedule, your guide to efficient waste management; This program, managed by the Island Waste Management Corporation, provides essential tools like the online search feature and downloadable PDF to help residents stay organized and compliant with collection dates for waste, compost, and recycling, supporting PEI’s environmental goals.

Overview of the Waste Watch Program

The PEI Waste Watch Program is a mandatory waste management system designed to help residents effectively sort and dispose of waste. Managed by the Island Waste Management Corporation, the program emphasizes proper sorting into three streams: recycling, compost, and general waste. It also includes special disposal options for bulky items and hazardous materials. The program provides tools like the online search tool and downloadable PDF schedules to help residents stay informed about collection dates. By participating, Islanders contribute to reducing waste and promoting sustainability. The program’s user-friendly resources ensure compliance and make waste management easier for all participants. Community involvement is key to achieving PEI’s environmental goals through this initiative.

Importance of Proper Waste Management in PEI

Proper waste management in Prince Edward Island is crucial for maintaining the province’s natural beauty and environmental health. The Waste Watch Program plays a vital role in reducing landfill use and promoting sustainability through effective sorting and disposal practices. By adhering to the program’s guidelines, residents help conserve resources, reduce greenhouse gas emissions, and protect wildlife. Proper waste management also supports public health by minimizing odors and pests. PEI’s commitment to waste reduction aligns with its environmental goals, making it a leader in sustainable practices. Community participation in the Waste Watch Program ensures a cleaner, greener future for Islanders and future generations. Every household’s efforts contribute to achieving these important environmental objectives.

Accessing the 2024 PEI Waste Watch Schedule

Access the 2024 PEI Waste Watch Schedule online or via a downloadable PDF. Use the address search tool to find collection dates and guidelines, or download the PDF for offline use.

How to Use the Online Search Tool

To use the PEI Waste Watch Schedule online search tool, enter your street number and name (e.g., 575 Main) in the search box. Select your address from the dropdown list that appears. Once selected, click the Search button to view your personalized collection calendar. This tool provides specific dates for waste, compost, and recycling pickup, ensuring you never miss a collection day. Additionally, you can download the schedule or set reminders for added convenience. The online tool is user-friendly and accessible, making it easy for residents to stay informed and compliant with waste management practices in PEI.

Downloading the 2024 Waste Watch Schedule PDF

Downloading the 2024 PEI Waste Watch Schedule PDF allows you to access your collection calendar offline. Visit the official website and use the online search tool to find your schedule. After entering your address and retrieving your collection details, a download option will be available. Save the PDF to your device for quick reference. This document includes dates for waste, compost, and recycling pickup, ensuring you stay organized. The PDF is a convenient resource for planning and setting reminders, helping you adhere to PEI’s waste management guidelines efficiently. By downloading, you can easily access your schedule anytime, anywhere, without needing an internet connection.

Understanding Your Collection Zone

Your collection zone determines the specific dates for waste, compost, and recycling pickup in your area. The Island Waste Management Corporation (IWMC) divides PEI into zones to organize collection services efficiently. To confirm your zone, visit the IWMC website and use the address search tool or refer to the 2024 PEI Waste Watch Schedule PDF. Understanding your zone is crucial for ensuring materials are placed curbside on the correct day. Residents in areas with seasonal road restrictions may need to place carts at the nearest accessible road by 7 a.m. on collection day. For more details, visit IWMC’s website and explore the interactive map or collection calendar.

Key Features of the Waste Watch Schedule

The Waste Watch Schedule highlights collection days for waste, compost, and recycling, allowing residents to set reminders and prepare materials efficiently for pickup, ensuring compliance with PEI’s waste management standards.

Collection Days for Waste, Compost, and Recycling

The 2024 PEI Waste Watch Schedule provides detailed collection days for waste, compost, and recycling. Residents can access their personalized schedule by entering their address online or via the PDF. Waste and compost are typically collected weekly, while recyclables are picked up once a month. Blue Bag 1 (paper products) and Blue Bag 2 (plastics, metals, and glass) must be sorted correctly for collection. Bulk items and special disposals have specific guidelines and may require dismantling. Seasonal cleanup services are also available, with materials sorted into compost and waste. Ensure carts and bags are placed curbside by 7:00 a.m. on the designated day for efficient pickup. Proper sorting and preparation are essential for smooth collection processes.

Setting Reminders for Pickup Days

Stay organized with the 2024 PEI Waste Watch Schedule by setting reminders for pickup days. The Recycle Coach App offers a convenient feature to notify residents of upcoming collections. Additionally, the online platform allows users to download and print their personalized schedule. Residents can also use digital calendars or set alarms on their devices to ensure they never miss a pickup. Proper preparation, including sorting waste, compost, and recyclables, ensures efficient collection. By staying informed and organized, Islanders can contribute to PEI’s environmental goals while maintaining a clean and sustainable community. Regular reminders help residents place their carts and bags curbside on time, avoiding missed collections and keeping the neighborhood tidy.

Preparation Guidelines for Efficient Collection

Ensure efficient waste collection by following proper preparation guidelines. Residents must sort materials into designated streams: waste, compost, and recycling (Blue Bag 1 and Blue Bag 2). Use approved containers and secure lids tightly to prevent spills. Avoid overfilling carts, as excess material may not be collected. Place bins and bags curbside by 7:00 a.m. on collection day, ensuring they are visible and accessible. Keep carts clean and maintain proper weight limits (220 lbs for waste carts, 50 lbs for additional bags). Regularly wash and maintain bins to minimize odors and pests. Proper preparation ensures smooth collection and helps maintain a clean, sustainable community. Adhering to these guidelines supports PEI’s environmental goals and keeps neighborhoods tidy.

Waste Sorting Guidelines

The PEI Waste Watch Schedule 2024 emphasizes proper sorting into waste, compost, and recycling streams. Blue Bag 1 is for paper products, while Blue Bag 2 handles plastics, metals, and glass. Proper sorting reduces environmental impact and supports community sustainability.

Recycling Streams: Blue Bag 1 and Blue Bag 2

The PEI Waste Watch Schedule 2024 organizes recyclables into two streams: Blue Bag 1 and Blue Bag 2. Blue Bag 1 is designated for paper products such as newspapers, cardboard, and office paper. Blue Bag 2 is for plastics, metals, glass, and cartons. Items must be clean, dry, and properly sorted to ensure they are collected. Corrugated cardboard should be flattened and bundled, while bulky items like appliances must be dismantled. Residents are encouraged to use transparent bags for visibility and adhere to weight limits (50 lbs) and size restrictions (4 ft). Proper sorting helps maximize recycling efficiency and supports PEI’s environmental goals.

Compost Sorting Tips

Proper compost sorting is essential for effective waste management in PEI. Residents are encouraged to use compost carts for organic materials like food scraps, yard waste, and paper products. To minimize odors and pests, wrap meat, fish, and pet waste in paper before adding them to the compost cart. Sprinkle baking soda, coffee grounds, or hydrated lime to absorb moisture and reduce odors. Regularly cleaning the cart with water and detergent is also recommended. Store the cart in a shady area to slow decomposition and reduce pests. Proper sorting ensures materials are processed efficiently, contributing to PEI’s environmental goals and maintaining a clean community.

Proper Handling of Waste Materials

Proper handling of waste materials is crucial for efficient collection and environmental compliance; Ensure waste carts are used correctly, with lids secured to prevent spilling. Place compost, recyclables, and waste in their designated streams to avoid contamination. Keep materials clean and dry, as moisture can attract pests and cause odors. For bulky items, dismantle them into manageable pieces under 50 lbs and 4 ft in length. Avoid overfilling carts, as this can hinder collection. Always follow PEI’s sorting guidelines to ensure drivers can collect materials without issues. Proper handling not only aids in efficient pickup but also supports PEI’s goal of reducing landfill waste and promoting sustainable practices. Compliance helps maintain a cleaner, greener community for all residents.

Special Disposal Options

Special disposal options in PEI include bulky item collection, hazardous waste drop-off, and seasonal cleanup services. Ensure items like furniture and appliances are properly dismantled for collection, and hazardous materials are handled safely through designated facilities. Seasonal cleanups allow for additional waste disposal, with guidelines ensuring proper sorting and compliance with environmental regulations. These services help manage non-routine waste efficiently while promoting sustainability across the province. Always refer to the Waste Watch Schedule for specific dates and requirements to ensure correct disposal practices.

Bulky Item Collection and Dismantling Requirements

Bulky items, such as furniture and appliances, require special handling for collection. Residents must dismantle large items into smaller pieces, ensuring each part weighs less than 50 lbs and measures under 4 ft in length. Items like barbecues or bicycles should be disassembled, with components bundled together if possible. These materials must be placed curbside on your designated collection day. Additional containers or bags for bulky items must not exceed weight or size limits. Clear, rigid containers are preferred for manual handling by collection crews. Proper sorting and dismantling ensure safe and efficient pickup. Always refer to the Waste Watch Schedule for specific guidelines to avoid missed collections or additional fees.

Hazardous Waste Disposal Guidelines

Hazardous waste, such as batteries, tires, and electronics, must not be disposed of through regular curbside collection. These items require special handling to prevent environmental harm. Residents are encouraged to take hazardous materials to designated Waste Watch Drop-Off Centres across PEI. Ensure items are properly sorted and packaged to meet acceptance criteria. For example, boat shrink wrap is accepted free of charge if clean and dry, while contaminated materials are rejected. Proper disposal of hazardous waste is crucial to protect the environment and public health. Always check the Waste Watch Schedule or the IWMC website for a full list of accepted materials and guidelines to ensure compliance with provincial regulations.

Seasonal Cleanup Services and Rules

PEI offers seasonal cleanup services twice a year, allowing residents to dispose of items not collected during regular waste pickup. These services are divided into spring and fall cleanups, with specific rules to ensure proper disposal. Materials must be sorted into compost and waste categories, and items like bulky furniture or appliances must be dismantled. The 2024 Waste Watch Schedule provides exact dates and guidelines for these cleanups. Residents can also refer to the IWMC website for detailed instructions on preparing materials. Proper participation in these programs helps maintain community cleanliness and supports PEI’s environmental goals by ensuring waste is managed responsibly.

Tools and Resources for Waste Management

The Recycle Coach App and Interactive Sorting Guide help residents navigate waste management effortlessly. Additionally, the Address Information Tool provides personalized collection details, ensuring compliance and efficiency for all Islanders.

Recycle Coach App: Features and Benefits

The Recycle Coach App is a powerful tool designed to simplify waste management for PEI residents. It offers personalized collection schedules, allowing users to input their address and receive tailored pickup dates for waste, compost, and recycling. The app also features a waste sorting guide, providing clear instructions on how to properly sort materials. Users can set reminders for collection days, ensuring they never miss a pickup. Additionally, the app includes a searchable database of recyclable and compostable items, helping residents make informed decisions. By downloading the Recycle Coach App, Islanders can efficiently manage their waste, reduce contamination, and contribute to PEI’s environmental goals. This user-friendly resource is available for both iOS and Android devices, making it accessible to all residents.

Interactive Sorting Guide for Recyclables

The Interactive Sorting Guide is a valuable resource for PEI residents to ensure proper waste sorting. This tool helps users determine which materials belong in Blue Bag 1, Blue Bag 2, compost carts, or regular waste. By searching for specific items, residents can quickly identify appropriate disposal methods. For example, Blue Bag 1 is designated for paper products like newspapers and cardboard, while Blue Bag 2 accepts plastics, metals, and glass. The guide also provides tips on preparing materials, such as rinsing containers and flattening cardboard. This resource reduces contamination rates and ensures recyclables are processed correctly. Regular updates keep the guide aligned with the latest waste management policies, making it an essential tool for Islanders aiming to contribute to PEI’s environmental sustainability goals.

Address Information Tool for Collection Details

The Address Information Tool is a convenient feature on the IWMC website that provides residents with personalized collection details. By entering your street number and name, you can quickly access your specific waste, compost, and recycling schedule. The tool also helps confirm your collection zone and offers a detailed collection calendar. This resource ensures that Islanders can stay informed about their pickup days and prepare materials accordingly. The tool is easily accessible online and is updated regularly to reflect any changes in the Waste Watch Program. By using this tool, residents can avoid missed collections and stay compliant with PEI’s waste management requirements, contributing to a cleaner and more sustainable environment for everyone.

Frequently Asked Questions (FAQs)

Explore the FAQs section for answers to common questions about the PEI Waste Watch Schedule 2024. Learn about missed collections, excess waste options, and cart maintenance procedures to ensure smooth waste management practices.

Missed Collection: What to Do Next

If your waste, compost, or recycling is missed, contact the Island Waste Management Corporation (IWMC) Customer Service within two business days. Provide your name, address, and a daytime phone number. If reporting via email or after hours, ensure all details are included. Missed collections are typically addressed promptly. If materials were not out by 7:00 a.m., hold them until the next scheduled collection or self-haul to a Waste Watch Drop-Off Centre, where a fee may apply. Properly sorted materials are essential for collection, so check sorting guidelines before the next pickup. Visit the IWMC website or refer to the 2024 PEI Waste Watch Schedule PDF for more details.

Excess Waste Management Options

For households generating excess waste, the IWMC offers flexible solutions. Residents can place up to two additional containers or small bulky items beside their carts, ensuring they are properly sorted and within weight and size limits (50 lbs and 4 ft). Use open, rigid containers with handles for easy manual dumping. Paper bags are recommended for compostables, while clear bags should be used for waste. Materials must be sorted according to Waste Watch guidelines. During seasonal cleanups, the two-container limit is waived, but items must still meet size and weight requirements. Always check the 2024 PEI Waste Watch Schedule PDF for specific details on excess waste management and sorting criteria to ensure compliance and efficient collection.

Cart Maintenance and Replacement Process

The Island Waste Management Corporation (IWMC) owns and assigns waste carts to properties based on serial numbers. Residents must leave assigned carts at the property when moving. For new homes, allow two weeks for cart delivery. Carts are under warranty; contact IWMC for repairs or replacements. Do not paint, drill holes, or alter carts, as this voids the warranty. Securing carts with bungee cords is prohibited, as they pose safety risks and interfere with collection. Ensure lids close properly to prevent pests and odors. Regularly clean carts with water and detergent or vinegar. For damaged or missing carts, contact IWMC promptly to maintain efficient waste collection services and adhere to program guidelines.

Additional Tips for Effective Waste Management

Secure carts with rocks or bricks to prevent animal interference. Sprinkle repellents like cayenne pepper or baking soda to deter pests. Store carts in shady areas to reduce odors and maintain cleanliness for efficient collection.

Minimizing Odors and Pests in Compost Carts

To minimize odors and pests in compost carts, use boxboard or paper towels to line kitchen bins and contain scraps. Sprinkle baking soda, coffee grounds, or hydrated lime to absorb moisture and reduce odors. Wrap meat, fish, and pet waste in paper before adding to the cart. Store carts in shady areas to reduce heat and moisture buildup. Regularly wash carts with a garden hose and detergent or vinegar to maintain cleanliness. Keep lids closed tightly and avoid overfilling to prevent pests like raccoons and insects. These practices help ensure efficient collection and contribute to a cleaner, greener PEI.

Securing Carts to Prevent Animal Interference

Securing your waste and compost carts is essential to prevent animal interference. Use heavy objects like rocks or bricks to hold lids down, deterring raccoons and pests. Avoid using bungee cords, as they can injure workers or damage equipment. Keep carts in a visible location, such as the right side of your driveway, especially during snowy conditions. Ensure lids are tightly closed and avoid overfilling to prevent attractants. Regularly cleaning carts with detergent or vinegar and storing them in shady areas can also reduce odors and pests. Proper securing helps maintain neighborhood cleanliness and supports effective waste collection in PEI, aligning with the Waste Watch Program’s goals. Regular maintenance ensures your carts remain animal-proof and collection-ready.

Preparing for Collection Day: Best Practices

To ensure smooth collection, place carts and blue bags curbside by 7:00 a.m. on your designated day. Keep them visible, especially during snowy conditions, by positioning them on the right side of your driveway. Avoid placing materials on top of or behind snowbanks. Secure lids tightly to prevent animals from accessing contents. For windy days, stack heavier items like compost cart contents or bundled cardboard at the bottom. Properly sort waste, compost, and recyclables according to PEI Waste Watch guidelines. Handle excess materials by using approved containers or bags, ensuring they are sorted and within weight limits. Regularly cleaning carts and storing them in shaded areas can reduce odors and pests, ensuring efficient collection and maintaining neighborhood cleanliness. Proper preparation supports PEI’s environmental goals and keeps the community clean.

The 2024 PEI Waste Watch Schedule is a vital tool for organized and sustainable waste management. By adhering to its guidelines, residents contribute to PEI’s environmental goals and maintain a cleaner, greener community.

Staying Compliant with Waste Watch Regulations

Compliance with the PEI Waste Watch Schedule 2024 is essential for maintaining efficient waste management. Residents must adhere to the mandatory sorting system, separating waste into recyclables, compost, and landfill materials. Proper use of Blue Bag 1 and Blue Bag 2 is crucial, with clean, dry materials only. Collection days must be respected, and carts placed curbside by 7 a.m. Excess waste should follow guidelines, with no mixed materials. Failure to comply may result in missed collections or penalties. Understanding and following these regulations ensures a smoother process for both residents and collection crews, contributing to PEI’s environmental sustainability goals. Refer to the 2024 Waste Watch Schedule for detailed guidelines.

Contributing to PEI’s Environmental Goals

The PEI Waste Watch Schedule 2024 plays a vital role in supporting the province’s environmental objectives. By adhering to the program’s guidelines, residents help reduce landfill use, promote recycling, and enhance composting efforts. Proper sorting of materials ensures resources are efficiently reused, aligning with PEI’s commitment to sustainability. The program encourages community-wide participation, fostering a culture of environmental stewardship. Through initiatives like the Recycle Coach App and educational resources, Islanders gain the tools needed to make eco-friendly choices. By staying compliant and engaged, residents contribute to PEI’s vision of a greener future, preserving the province’s natural beauty for future generations.

Continue Reading

température de cuisson des viandes pdf

Understanding proper meat cooking temperatures is essential for ensuring food safety and achieving optimal flavor. This guide provides insights into safe internal temperatures, cooking methods, and tools to help you cook meats perfectly every time.

Importance of Temperature Control

Temperature control is critical in meat cooking to ensure food safety and achieve optimal flavor. Proper internal temperatures prevent undercooking, which can lead to foodborne illnesses, and overcooking, which results in tough, dry meat. For example, ground meats like beef, pork, and veal require a minimum internal temperature of 71°C (160°F), while poultry must reach 80°C (176°F) to ensure safety. Additionally, temperature control helps preserve the natural juices and tenderness of the meat. Low-temperature cooking methods, such as slow cooking between 65°C to 80°C (149°F to 176°F), can enhance the quality of the final dish by preventing moisture loss and promoting even cooking. Monitoring temperature also allows for precise doneness, whether cooking steak, roasts, or sausages. By adhering to temperature guidelines, home cooks can deliver consistently delicious and safe meals.

Brief Overview of Cooking Methods

Cooking methods vary widely, each requiring specific temperature controls to achieve desired results. Slow cooking, conducted at low temperatures (65°C to 80°C or 149°F to 176°F), is ideal for tenderizing tougher cuts of meat. This method prevents moisture loss and ensures even cooking. Roasting, often done at higher temperatures (around 200°C or 392°F), is perfect for larger cuts like roasts, promoting a caramelized crust while maintaining juiciness. Grilling and pan-searing are high-heat methods that quickly sear the surface, locking in flavors and textures. For ground meats and sausages, precise temperature control is crucial to avoid undercooking. Regardless of the method, using a thermometer ensures meats reach safe internal temperatures. Combining techniques, such as searing before slow cooking, enhances flavor and texture. Each method requires careful monitoring to balance safety and quality, making temperature control a cornerstone of successful meat preparation.

Understanding Internal Temperature

Internal temperature is crucial for ensuring meat is cooked safely and evenly. It refers to the core temperature of the meat, which determines doneness and prevents undercooking or overcooking.

Role of Thermometers

A thermometer is an indispensable tool for ensuring meats are cooked to a safe and desirable temperature. It provides accurate readings of the internal temperature, eliminating guesswork and preventing undercooking or overcooking. Digital thermometers are highly recommended for their precision and speed, while meat thermometers can be left in the meat during cooking. When using a thermometer, insert the probe into the thickest part of the meat, avoiding bones or fat. This ensures a accurate reading. Thermometers are especially crucial for methods like roasting or grilling, where visual cues may be unreliable. By relying on a thermometer, you can achieve consistent results, prevent foodborne illnesses, and ensure your meat is cooked to the perfect doneness every time.

Safe Minimum Internal Temperatures

Safe minimum internal temperatures are critical to ensure meat is cooked properly, preventing foodborne illnesses. For beef, veal, and lamb, the recommended temperature is 63°C (145°F). Pork and ground meats, including sausages, require a higher temperature of 71°C (160°F). Poultry, such as chicken and turkey, must reach 74°C (165°F) to ensure safety. These temperatures apply to the thickest part of the meat, avoiding bones or fat. For whole cuts like roasts, the temperature should be checked in multiple areas. Ground meats and sausages must be uniformly cooked throughout. Always use a food thermometer to verify these temperatures, as visual inspection alone is unreliable. Cooking to these temperatures ensures pathogens like Salmonella and E. coli are eliminated, making the meat safe to eat while maintaining tenderness and flavor.

Resting After Cooking

Resting meat after cooking is a crucial step often overlooked but essential for achieving the best results. When meat is cooked, the heat forces juices toward the surface, making the exterior dry and the interior undercooked. Allowing the meat to rest ensures even redistribution of these juices, resulting in a more tender and flavorful dish. The recommended resting time varies depending on the type and size of the meat. For smaller cuts like steaks or chops, 5-10 minutes is sufficient. Larger cuts, such as roasts, should rest for 15-30 minutes. During this time, the internal temperature may rise slightly, a process known as “carryover cooking.” Covering the meat loosely with foil during resting helps retain heat without trapping steam, which can make the texture soggy. This practice applies to all meats, including poultry and pork, and is especially beneficial for slow-cooked dishes. Resting ensures a juicy, evenly cooked final product every time.

Specific Temperature Guidelines for Meats

  • Beef and Veal: 63°C (145°F) for medium-rare, rising to 71°C (160°F) for well-done.
  • Pork and Lamb: 71°C (160°F) to ensure safety and tenderness.
  • Poultry: 74°C (165°F) for whole birds and ground meats.
  • Ground Meats and Sausages: 71°C (160°F) to prevent foodborne illness.

Beef and Veal

For beef and veal, the recommended internal temperature is at least 63°C (145°F) for medium-rare and up to 71°C (160°F) for well-done cuts. This ensures food safety while preserving tenderness and flavor.

  • Whole cuts like roasts should reach 63°C (145°F) internally, then rest before slicing.
  • Steaks can be cooked to desired doneness, with 71°C (160°F) for well-done.
  • Ground beef and veal require 71°C (160°F) to prevent foodborne illness.

Resting the meat after cooking allows juices to redistribute, enhancing tenderness. Low-temperature cooking (60-75°C) is ideal for maintaining moisture and flavor in beef and veal dishes.

Pork and Lamb

Cooking pork and lamb to the correct temperature ensures safety and tenderness. The recommended internal temperature for pork is at least 71°C (160°F), including ground pork and sausages, to eliminate harmful pathogens.

  • Whole cuts of pork, such as roasts or chops, should reach 71°C (160°F) internally.
  • Lamb also requires careful attention, with whole cuts needing a minimum of 63°C (145°F) for medium-rare and up to 71°C (160°F) for well-done.
  • Ground lamb or pork mixtures must reach 71°C (160°F) to ensure food safety.

Resting the meat after cooking is crucial, as it allows juices to redistribute, enhancing flavor and tenderness. Low-temperature roasting (60-75°C) is ideal for larger cuts of pork and lamb, ensuring even cooking and retaining moisture.

Poultry

Cooking poultry to the correct temperature is vital for food safety and flavor. The internal temperature for whole poultry, such as chicken or turkey, should reach at least 82°C (180°F) to ensure all harmful pathogens are eliminated.

  • For ground poultry, including chicken and turkey, the minimum internal temperature is 74°C (165°F).
  • Stuffing cooked inside poultry must also reach 74°C (165°F) to prevent foodborne illness.
  • When cooking poultry, always use a meat thermometer to check the thickest part of the breast or thigh, avoiding bones or fat.

Undercooking poultry can lead to serious health risks, so never rely solely on visual cues. Proper cooking ensures tender, juicy meat while maintaining safety standards. Always let poultry rest briefly after cooking to retain juices and flavor.

Ground Meats and Sausages

Cooking ground meats and sausages requires careful attention to temperature to ensure food safety. The minimum internal temperature for ground meats, including beef, pork, and veal, is 71°C (160°F).

  • Sausages, whether fresh or pre-cooked, should also reach an internal temperature of 71°C (160°F) to eliminate harmful bacteria.
  • For poultry-based ground meats, such as ground chicken or turkey, the internal temperature must reach 74°C (165°F).
  • When cooking sausages, ensure the thermometer probes the thickest part of the sausage, avoiding the casing.
  • Avoid pressing down on sausages while cooking, as this can push juices out and lead to uneven cooking.

Always use a meat thermometer for accuracy, as visual cues alone are unreliable. Properly cooked ground meats and sausages are essential for preventing foodborne illnesses while maintaining flavor and texture.

Cooking Methods and Temperatures

Cooking methods like slow cooking, roasting, and grilling require specific temperature controls. Slow cooking uses low temperatures (65-80°C) for tender results, while roasting and grilling often use higher heat for caramelization and texture.

Slow Cooking

Slow cooking is a method that involves cooking meat at a low temperature for an extended period, typically between 65°C and 80°C (149°F to 176°F). This technique ensures that tougher cuts of meat become tender and flavorful without losing moisture. It is ideal for dishes like stews, braises, and pot roasts. The low heat breaks down connective tissues, transforming them into gelatin, which enhances the dish’s texture and richness. When using a slow cooker, it’s essential to maintain a consistent temperature to prevent undercooking or overcooking. The internal temperature of the meat should still reach the safe minimum internal temperature for the specific type of meat being cooked. For example, beef and veal should reach at least 63°C (145°F), while pork and lamb require a minimum of 71°C (160°F). Always use a meat thermometer to verify the internal temperature, especially when cooking ground meats or sausages, which need to reach 71°C (160°F) to ensure food safety. This method is not only forgiving but also convenient, as it allows for unattended cooking once the ingredients are prepared and the temperature is set. Additionally, slow cooking can be adapted to various types of proteins and vegetables, making it a versatile option for home cooks. By following the guidelines for temperature and time, anyone can achieve perfectly cooked, tender, and juicy results every time. This approach is particularly beneficial for busy individuals, as it allows for preparation in advance and minimal monitoring during the cooking process. Moreover, the even heat distribution in slow cookers helps to prevent hot spots, ensuring a uniform cooking process. Overall, slow cooking is a reliable and flavorful way to prepare a wide variety of dishes, especially those that require prolonged cooking times to achieve the desired texture and taste.

Roasting

Roasting is a popular cooking method that involves cooking meat in the oven using dry heat. To achieve the best results, it’s crucial to preheat the oven to the correct temperature, typically around 200°C (392°F), before placing the meat inside; For larger cuts like roasts, a general rule of thumb is to cook for 15 minutes per pound at this temperature. However, the exact time and temperature may vary depending on the type and size of the meat. Always sear the meat in a pan before roasting to create a flavorful crust. Use a roasting pan with a rack to allow air to circulate evenly under the meat. Baste the meat with its juices periodically to keep it moist and enhance flavor. For precise doneness, use a meat thermometer to check the internal temperature. Beef and veal should reach at least 63°C (145°F), while pork and lamb require a minimum of 71°C (160°F). Proper roasting ensures a tender, juicy, and deliciously caramelized final product. This method is ideal for special occasions or hearty meals. Always let the meat rest for a few minutes before carving to allow juices to redistribute. By following these guidelines, you can achieve a perfectly roasted dish every time.

Grilling

Grilling is a versatile and flavorful cooking method that involves cooking meat over direct or indirect heat. Whether using a charcoal or gas grill, achieving the right temperature is key to perfectly cooked meat. Preheat the grill to 200°C (392°F) for most meats, ensuring even heat distribution. For direct grilling, sear the meat at a higher temperature to create a crust, then finish cooking at a lower temperature to prevent burning. Always use a meat thermometer to check internal temperatures: 63°C (145°F) for beef and veal, 71°C (160°F) for pork and lamb, and 74°C (165°F) for poultry. Avoid pressing down on the meat with your spatula, as this can squeeze out juices. For optimal results, let the meat rest for a few minutes after grilling to allow juices to redistribute. Grilling is ideal for steaks, chops, and sausages, offering a smoky flavor and caramelized texture. Adjust cooking times based on the thickness of the meat and your desired level of doneness. Proper grilling ensures a delicious and safe dining experience. Use a marinade or seasoning before grilling to enhance flavor. Always clean and oil the grates to prevent sticking. Grilling is a quick and enjoyable way to cook meat to perfection. Ensure the meat reaches the safe minimum internal temperature to avoid foodborne illness. Ground meats and sausages should be cooked to at least 71°C (160°F). Achieve professional results by monitoring temperature and cooking time carefully. Grilling is perfect for outdoor gatherings and casual meals, offering a unique charred flavor that elevates any dish. Experiment with different wood chips or sauces for added flavor profiles. Proper grilling techniques ensure tender, juicy, and flavorful results every time.

Achieving Perfect Doneness

Perfect doneness balances flavor, texture, and safety. Use thermometers for accuracy, ensuring meats reach their safe internal temperatures. Visual cues and touch tests can also guide you to your desired level of doneness effectively, ensuring a delicious result every time.

Visual Cues

Visual cues play a crucial role in determining the doneness of meat. For example, a cooked steak will typically show a reduction in thickness and a change in color, with the center transitioning from red to pink or brown.

When cooking ground meats, ensure they are fully browned with no visible pink, as this indicates thorough cooking. For poultry, juices should run clear when pierced, and the skin should be golden and crispy.

Lamb and pork can be assessed by their surface texture and color, with a well-cooked exterior appearing caramelized and firm to the touch. Always cross-reference visual cues with internal temperature readings for accuracy. This balanced approach ensures both safety and flavor.

Touch Test

The touch test is a traditional method to gauge meat doneness, especially useful when a thermometer isn’t available. For beef, press the meat gently; a rare steak feels soft and squishy, while a medium steak offers slight resistance and a firm edge. A well-done steak feels hard and unyielding.

Pork and lamb can be tested similarly. A rare cut will feel soft, while a medium or well-done piece will firm up noticeably. For poultry, the thickest part of the breast should feel springy but not squishy, and the juices should feel warm when pressed.

Ground meats are trickier, as they lack a clear texture change. Always ensure they are fully cooked by checking their color and internal temperature. The touch test is most reliable for whole muscle meats. Pairing it with a thermometer ensures accuracy and food safety.

Temperature Chart

A temperature chart is an essential tool for ensuring meats are cooked to safe and optimal levels. Below is a concise guide based on the provided data:

  • Beef/Veal: 63°C (145°F) for medium-rare, 71°C (160°F) for medium, and 77°C (170°F) for well-done.
  • Pork/Lamb: 71°C (160°F) for medium and 77°C (170°F) for well-done.
  • Poultry: 74°C (165°F) for breasts and 82°C (180°F) for whole birds.
  • Ground Meats/Sausages: 71°C (160°F) to ensure food safety.

These temperatures are the safe minimum internal temperatures for preventing foodborne illness. Always use a food thermometer to verify doneness. Remember, meat continues to cook slightly after being removed from heat. This chart serves as a quick reference for achieving perfectly cooked meats every time.

Mastery of meat cooking temperatures ensures safety, flavor, and texture. Always use thermometers, follow guidelines, and let meat rest. Proper techniques guarantee delicious results every time, making you a confident home cook.

Recap of Key Points

To ensure safe and delicious meat cooking, key points include using thermometers for accurate internal temperatures, adhering to minimum safe temperatures, and allowing meat to rest after cooking. These practices prevent overcooking and retain juices, enhancing flavor and texture. Proper techniques like roasting, grilling, and slow cooking at appropriate temperatures are also crucial. Always refer to guidelines for specific meats, such as beef, pork, poultry, and ground meats, to achieve perfect doneness. Remember, consistent temperature control and resting are essential for a professional finish in home cooking.

Final Tips for Home Cooks

For perfect meat cooking, always preheat your oven or grill to ensure consistent temperature. Sear meats at high heat briefly to lock in flavors before finishing at lower temperatures. Use a reliable thermometer to monitor internal temperatures accurately. Allow meats to rest after cooking to redistribute juices and retain tenderness. For even cooking, pat dry meats before seasoning to prevent steam from interfering with browning. Experiment with marinades or rubs to enhance flavor profiles. Lastly, invest in a meat thermometer and refer to temperature charts for specific cuts and types of meat. By following these tips, home cooks can achieve professional-quality results, ensuring meats are both safe to eat and full of flavor. Proper temperature control and technique make all the difference in creating memorable dishes.

Continue Reading