Welcome to the 4-in-1 crib instructions manual, your guide to safely assembling and using a versatile crib that converts into a toddler bed, daybed, and youth bed.
1.1 Overview of the 4-in-1 Crib Features
The 4-in-1 crib is a versatile and durable furniture piece designed to grow with your child, offering four distinct configurations: a standard crib, toddler bed, daybed, and youth bed. Built with high-quality materials, it ensures safety and stability through all stages. The crib features adjustable mattress height settings, allowing you to lower it as your child grows. Its sleek, timeless design blends seamlessly with various nursery styles. The crib is constructed with solid wood, providing long-lasting durability. Additional features include a sturdy frame, secure railings, and easy-to-follow conversion steps. The mattress support is designed to accommodate a standard crib mattress, ensuring proper fit and safety. This crib is an excellent investment for parents seeking a practical, long-lasting solution for their child’s sleeping needs.
1.2 Importance of Following the Manual
Following the instructions in the 4-in-1 crib manual is essential to ensure the safe and correct assembly of the crib. Proper assembly prevents structural issues that could lead to accidents or injuries. The manual provides detailed steps to guide you through each phase, from unpacking to final checks. Deviating from the instructions can result in a poorly constructed crib, which may fail to meet safety standards. Additionally, incorrect assembly can void warranties or cause damage to the product. By adhering to the manual, you ensure the crib is stable, secure, and suitable for your child. Always read the instructions carefully before starting and double-check each step to avoid mistakes. This attention to detail guarantees a safe and durable product for years to come.
1.3 Safety Precautions Before Assembly
Before starting the assembly of your 4-in-1 crib, it is crucial to take necessary safety precautions to ensure a safe and successful process. First, gather all tools and parts in a clear, flat workspace away from children. Avoid using power tools near pets or small children, as they can cause distractions or accidents. Always follow the recommended assembly steps and avoid shortcuts, as this can lead to structural weaknesses. Keep loose clothing and long hair tied back to prevent entanglement with tools. Additionally, ensure that all small parts, such as screws and bolts, are kept out of reach of children to prevent choking hazards. Finally, double-check that all parts are included and undamaged before beginning. By adhering to these precautions, you can minimize risks and ensure a safe assembly experience.
Pre-Assembly Checklist
Before assembling your 4-in-1 crib, ensure all parts and tools are accounted for, and the workspace is clear and safe for assembly.
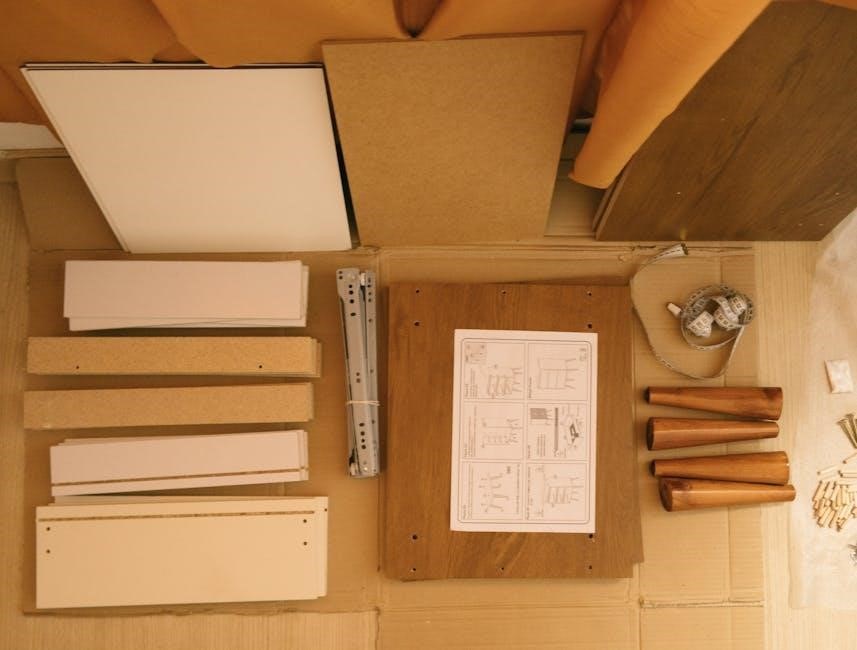
2.1 Unpacking and Organizing Parts
Carefully unpack all components from the box, ensuring no damage or missing items. Lay parts on a soft surface to prevent scratches. Organize hardware separately.
2.2 Tools Required for Assembly
To assemble the 4-in-1 crib, you will need specific tools. Ensure you have an Allen wrench (provided) and a Phillips head screwdriver. These tools are essential for securing bolts and screws. Additionally, keep all hardware organized to avoid misplacement. Small parts, such as Allen bolts, may pose a choking hazard, so store them safely out of reach of children. Refer to the diagrams in the manual to confirm the correct tools for each step. Proper tools ensure a secure and efficient assembly process. Always double-check that you have all necessary tools before starting to avoid delays. Organize your workspace to keep tools and parts within easy reach.
2.3 Familiarizing Yourself with Diagrams
Before starting assembly, take time to familiarize yourself with the diagrams provided in the manual. These visual guides will help you understand each step clearly. Each diagram illustrates the correct placement of parts, such as rails, sides, and mattress supports. Pay attention to labels and symbols, which indicate specific tools or actions required. By studying the diagrams, you can identify potential challenges and plan your assembly process effectively. This step ensures that you understand how components connect and helps prevent errors. Properly interpreting diagrams is crucial for a safe and successful assembly of your 4-in-1 crib. Always refer back to them if you encounter confusion during the process.

Assembly Instructions
This section provides a detailed, step-by-step guide to assembling your 4-in-1 crib, ensuring safety and stability for your child. Follow each instruction carefully.
3.1 Step-by-Step Assembly Process
Start by unpacking and organizing all parts. Begin with the crib frame, attaching the sides and rails securely using the provided Allen bolts. Next, install the mattress support, ensuring it is level and tightly fastened. Proceed to assemble the headboard and footboard, attaching them to the frame. Use a Phillips screwdriver and Allen wrench for all fasteners. Tighten all bolts and screws firmly to ensure stability. Double-check each step to avoid errors. Finally, place the mattress inside and verify that all parts are correctly assembled before use. Always refer to the diagrams for visual guidance.
3.2 Attaching Crib Sides and Rails
Begin by aligning the left and right crib sides with the frame. Use the provided Allen bolts to secure them tightly. Ensure the sides are level and properly seated. Next, attach the front and back rails, connecting them to the sides using the bolts. Tighten all connections firmly to maintain stability. Refer to the diagrams for correct alignment. Double-check that all rails are securely fastened before proceeding to the next step. Properly attaching the sides and rails is crucial for the crib’s structural integrity and safety. Make sure no bolts are loose to prevent any wobbling or instability. Once completed, move on to securing the mattress support.
3.3 Securing the Mattress Support
Locate the mattress support frame and align it with the crib base. Use the provided Allen bolts to attach it securely. Ensure the support is level and properly seated. Tighten the bolts firmly using an Allen wrench, checking for snugness. Double-check that all connections are secure to prevent any movement. The mattress support must be tightly fastened to ensure the crib’s stability and safety. Once secured, verify that the mattress fits perfectly within the crib, with no gaps between the mattress and the sides. A properly secured mattress support is essential for your baby’s safety and comfort. Proceed to the next step only when this is completed.
3.4 Tightening All Bolts and Screws
Once the crib components are assembled, inspect all bolts and screws to ensure they are properly secured. Use the Allen wrench and Phillips screwdriver provided in the tools section to tighten each connection firmly. Start with the mattress support bolts, followed by the side rails and frame connections. Tighten in a systematic order to avoid uneven pressure. Double-check each bolt and screw to ensure there are no loose parts. Properly tightened hardware is critical for the crib’s stability and safety. If any bolt or screw feels loose, tighten it immediately. Avoid over-tightening, as this could damage the crib’s structure. Once all connections are secure, proceed to the final assembly verification step.
3.5 Final Assembly Verification
After completing the assembly, perform a thorough inspection to ensure all parts are correctly installed and secure. Check the mattress support for proper alignment and stability. Verify that all bolts and screws are tightly fastened without being over-tightened. Test the crib’s stability by gently rocking it from side to side and ensuring there is no wobbling. Inspect the sides and rails for any gaps or misalignments. Ensure all hardware is accounted for and that no small parts are loose, as they may pose a choking hazard. Finally, place the mattress inside and confirm it fits snugly without any gaps. Once everything is verified, the crib is ready for safe use. Always refer back to the manual if you notice any issues during this verification process.

Safety Guidelines
Always follow safety warnings to ensure your child’s well-being. Use a firm, tight-fitting mattress and avoid loose bedding. Never add pillows or extra padding. Keep the crib away from windows and curtains to prevent entanglement hazards. Regularly inspect for loose parts or damage. Ensure the crib is placed on a stable, flat surface. Avoid overloading the crib with toys or heavy items. Supervise your child during transitions between crib modes. Keep small parts out of reach to prevent choking. Refer to the manual for specific safety recommendations and adhere to all guidelines to create a secure sleeping environment for your baby.
4.1 General Safety Warnings
Always follow safety guidelines to ensure your child’s well-being. Use a firm, tight-fitting mattress and avoid loose bedding. Never add pillows or extra padding. Keep the crib away from windows and curtains to prevent entanglement hazards. Regularly inspect for loose parts or damage. Ensure the crib is placed on a stable, flat surface. Avoid overloading the crib with toys or heavy items. Supervise your child during transitions between crib modes. Keep small parts out of reach to prevent choking. Refer to the manual for specific safety recommendations and adhere to all guidelines to create a secure sleeping environment for your baby. Failure to follow these warnings could result in serious injury or death.
4.2 Mattress Size and Fit Requirements
For optimal safety and comfort, use a mattress that meets the standard crib size of 28″ x 52.375″. Ensure the mattress fits snugly within the crib, leaving no gaps between the mattress and the crib sides. The mattress should be firm and tightly fitting to prevent any movement or shifting. Avoid using mattresses that are too thick or too thin, as they may compromise the crib’s structural integrity. Always check that the mattress lies flat and does not bow or sag. Proper fit is essential to prevent potential hazards, such as entrapment or suffocation. Refer to the manual for specific measurements and guidelines, as mattress size requirements may vary slightly by manufacturer.
4.3 Ensuring Crib Stability
Stability is crucial for your child’s safety. Always ensure the crib is placed on a firm, level surface, avoiding uneven or soft flooring. Check that all legs are evenly balanced and that no wobbling occurs. During assembly, verify that all bolts and screws are tightened securely to avoid any movement. If the crib converts into other forms, ensure all transition mechanisms are locked in place according to the instructions. Never leave the crib unattended if it appears unstable. Regularly inspect the crib for any signs of wear or damage that could affect its stability. A stable crib reduces the risk of accidents and provides a secure environment for your child. Always follow the manufacturer’s guidelines for maintaining stability across all configurations.

Maintenance and Upkeep
Regularly clean the crib with a soft cloth and mild detergent to prevent dirt buildup. Inspect for loose parts and tighten them immediately. Store hardware safely.
5.1 Cleaning the Crib
Regular cleaning is essential to maintain the crib’s hygiene and durability. Use a soft, damp cloth with mild detergent to wipe down all surfaces. Avoid harsh chemicals or abrasive cleaners, as they may damage the finish. For stubborn stains, gently scrub with a slightly dampened cloth, then dry thoroughly. Never use bleach or acidic solutions, as they can harm the materials. Ensure the crib is completely dry before placing a mattress or bedding inside to prevent moisture buildup. Avoid soaking any parts, as this could compromise the structural integrity. For additional freshness, a clean, dry towel can be used to wipe down surfaces after cleaning. Always follow the manufacturer’s guidelines for cleaning products to ensure safety and longevity.
5.2 Inspecting for Loose Parts
Regularly inspect the crib for loose parts to ensure stability and safety. Check all bolts, screws, and joints to confirm they are tightly secured. Use the Allen wrench or screwdriver provided in the toolkit to tighten any loose connections. Pay special attention to moving parts, such as the mattress support and side rails, as they bear significant weight. Inspect the hardware for signs of wear or damage, and replace any compromised components immediately. Avoid over-tightening, as this could strip screws or damage the crib’s frame. Perform this check daily for visible parts and weekly for a thorough inspection. If you find any issues, consult the troubleshooting section or contact customer support for assistance. Regular inspections ensure the crib remains safe and sturdy for your child.
Conversion Options
The 4-in-1 crib offers versatility with options to convert into a toddler bed, daybed, and youth bed, adapting to your child’s growth with easy adjustments.
6.1 Converting to a Toddler Bed
Converting your 4-in-1 crib to a toddler bed is a straightforward process that prepares your child for independence. Begin by removing the crib sides and installing the toddler bed rail, ensuring a safe transition. Use the Allen wrench provided to secure the rail tightly. Place the mattress at the lowest setting for easy access. Follow the manual’s diagrams to avoid errors. Double-check all bolts and screws for stability. Ensure the bed is on a firm, flat surface and remove any crib bedding. This conversion marks an exciting milestone in your child’s growth, offering a comfortable and secure sleeping environment. Always confirm the bed’s stability before use.
6.2 Adjusting to a Daybed
Converting your crib to a daybed is a great option for older toddlers, offering a comfortable and versatile sleeping solution. Begin by removing one of the crib side panels and attaching the daybed rail using the provided Allen wrench. Ensure all bolts are securely tightened for stability. Lower the mattress to the middle or lowest position to accommodate the daybed configuration. Place the bed on a firm, flat surface and keep bedding minimal to avoid hazards. Regularly inspect the structure for loose parts and ensure the daybed remains stable. This transition provides a cozy space for your child to rest or play, adapting to their growing needs while maintaining safety and comfort. Always follow the manual’s specific guidelines for this conversion.
6.3 Setting Up as a Youth Bed
Transitioning your crib to a youth bed is an exciting milestone, offering a larger, more comfortable sleeping area for older children. Remove all crib sides and attach the youth bed frame extensions using the provided hardware. Ensure the mattress support is lowered to its highest position and secured tightly. Follow the manual’s instructions to install the youth bed rails and headboard if included. Tighten all bolts and screws thoroughly to ensure stability. Place the bed on a sturdy, flat surface and use appropriate bedding suitable for the youth bed configuration. Regularly inspect the structure for any wear or loose parts. This setup accommodates growing children, providing a safe and comfortable sleeping environment while maintaining the durability and versatility of the original crib design. Always refer to the manual for specific assembly steps and safety precautions.
6.4 Reverting to the Crib Mode
To revert your 4-in-1 crib back to its original crib mode, follow these steps: Remove any additional components added for toddler, daybed, or youth bed configurations. Reattach the crib sides and rails using the original hardware provided. Ensure all bolts and screws are tightly secured to maintain stability. Lower the mattress support to its lowest position and verify it is firmly locked in place. Double-check that all safety features, such as the side rail locks, are functioning properly. Refer to your manual for specific instructions on reversing earlier conversions. Once complete, ensure the crib meets all safety standards before placing your baby inside. Regular inspections are recommended to maintain the crib’s integrity and ensure a safe sleeping environment.

Troubleshooting Common Issues
Common issues include parts not fitting, wobbling, or loose connections. Ensure all bolts are tightened evenly and refer to the manual forcorrect alignment. If parts are missing or damaged, contact customer support immediately. Always verify hardware compatibility and follow safety guidelines to avoid assembly errors.
7.1 Missing or Damaged Parts
If any parts are missing or damaged during assembly, stop immediately and contact customer support. Do not attempt to substitute or improvise with alternative hardware. Check all boxes thoroughly to ensure no components are overlooked. Refer to the parts list in the manual for verification. For damaged items, request replacements promptly to avoid delays. Keep all original packaging until assembly is complete. Failure to use authentic parts may compromise safety and void the warranty. Always prioritize your child’s safety by adhering to the manufacturer’s guidelines.
7.2 Difficulty in Assembly
If you encounter difficulty during assembly, take a moment to review the instructions carefully. Ensure all parts are correctly identified and matched to their corresponding diagrams. Double-check that you are using the correct tools, such as a Phillips head screwdriver or Allen wrench, as specified. If confusion arises, consider seeking assistance from another person or consulting online resources for additional guidance. Patience is key, as rushing may lead to errors. If issues persist, contact customer support for clarification or troubleshooting. Remember, proper assembly is critical for your child’s safety, so never proceed if unsure about any step.
Thank you for following the 4-in-1 crib instructions manual. Proper assembly and adherence to safety guidelines ensure a safe and enjoyable experience for your child. Store this manual for future reference and perform regular checks to maintain the crib’s stability and functionality.
8.1 Storage of Instructions
After completing the assembly and ensuring your crib is safe and functional, store this manual in a dry, secure location. Use the provided envelope attached to the mattress support for easy access. Keeping the instructions handy ensures you can refer to them for future disassembly, conversions, or maintenance. Avoid exposing the manual to moisture or damage, as it contains crucial information for the crib’s proper use. If you misplace the manual, you may face difficulties during disassembly or conversions. Consider making a digital copy for added security. Proper storage ensures the manual remains a valuable resource for years to come.
8.2 Final Checks Before Use
Before placing your baby in the crib, conduct a thorough inspection to ensure all parts are securely attached and tightened. Check for any loose bolts or screws, as these can compromise the crib’s stability. Verify that the mattress fits snugly and meets the specified size requirements. Ensure the crib is placed on a firm, flat surface and that all safety guidelines have been followed. Double-check that no small parts are accessible to the child. Finally, test the crib’s stability by gently rocking it to ensure there is no wobbling. These final checks are crucial to guarantee a safe environment for your child. Refer to the manual for specific requirements and ensure everything aligns with the recommended standards.