Flange binding is a popular quilting technique that adds a decorative touch using two fabrics, creating a unique edge without hand stitching for a professional finish․
Understanding Flange Binding
Flange binding is a quilting technique that combines two fabrics to create a decorative edge․ It involves sewing a narrow accent fabric (flange) alongside the main binding fabric, resulting in a subtle, professional-looking finish․ The flange adds a pop of color or texture, enhancing the quilt’s appearance without hand stitching․ To achieve this, the flange fabric is cut slightly wider than the binding fabric, ensuring it remains visible after sewing․ The process involves cutting strips, sewing them together with a 1/4-inch seam, and pressing the seams open․ This method allows quilters to add a unique detail to their projects, making it a versatile and attractive alternative to traditional binding techniques․ Proper alignment and pressing are key to a polished result․
Materials and Tools Needed
To create a flange binding, you will need two contrasting fabrics: one for the main binding and another for the flange․ Cut the binding fabric into strips approximately 1-3/8 inches wide and the flange fabric into 1-5/8-inch-wide strips․ You will also need a sewing machine, a rotary cutter, a cutting mat, a ruler, and scissors for precise cuts․ A seam ripper, iron, and ironing board are essential for pressing seams․ Additionally, have matching thread for both fabrics and pins or fusible thread to secure the strips during sewing․ Ensure all tools are within reach to streamline the process and achieve a professional finish․
Preparing the Fabric Strips
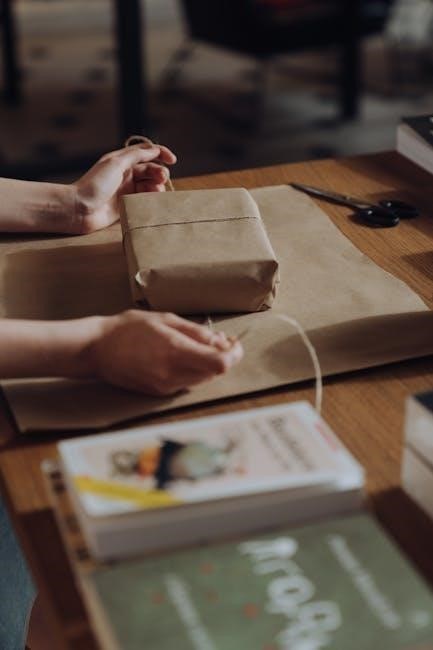
Start by cutting your fabric into strips for both the binding and the flange․ The binding fabric should be cut into 1-3/8-inch-wide strips, while the flange fabric should be 1-5/8 inches wide․ This ensures the flange is 1/4 inch wider than the binding, creating a subtle decorative edge․ Use a rotary cutter and mat for precise cuts, ensuring the strips are straight and even․ If your fabric pieces are not long enough, sew multiple strips together using a diagonal seam to minimize bulk․ Press the seams open to maintain a smooth finish․ Once all strips are prepared, set them aside for the next step in creating the flange binding․
Creating the Flange Binding
Cut binding fabric into 1-3/8-inch-wide strips and flange fabric into 1-5/8-inch-wide strips․ Sew binding and flange strips together with a 1/4-inch seam, right sides together․ Press seams open and fold in half lengthwise for a polished finish․
Sewing Binding and Flange Together
Place the binding and flange strips right sides together, aligning their edges․ Sew along the length with a 1/4-inch seam allowance․ Press the seam open, ensuring the seam allowance lies toward the binding fabric․ This step ensures a flat, smooth finish․ Fold the combined strip in half lengthwise, pressing to create a crisp edge․ If needed, piece strips together using diagonal seams for a seamless look․ Always press seams open to prevent bulk and maintain a professional appearance․ Proper alignment ensures the flange fabric creates a decorative accent without overwhelming the binding․ This method allows for a clean, polished finish suitable for any quilt design․
Pressing the Seams
Pressing is a critical step in creating a professional flange binding․ After sewing the binding and flange strips together, carefully press the seams to ensure a smooth finish․ Use a hot iron with steam to press the seam allowance toward the binding fabric․ This ensures the flange fabric remains visible as a decorative accent․ Avoid pressing too aggressively, as this may distort the fabric․ Open the seam and press again to flatten it completely․ For a crisp edge, fold the combined strip in half lengthwise and press lightly․ Proper pressing ensures the flange lies flat and even, creating a polished appearance․ This step is essential for achieving a clean, professional-looking binding․
Joining the Strips
Joining the strips is a straightforward process that ensures a seamless flange binding․ To connect the binding and flange strips, align their ends at a 45-degree angle and sew them together with a diagonal seam․ This method reduces bulk and creates a smooth edge․ Press the seams open to minimize thickness․ For longer bindings, repeat this process to piece together multiple strips․ Ensure the flange fabric remains consistent in width throughout the joining process․ If using bias-cut strips, handle them gently to avoid stretching․ Properly joining the strips ensures the binding lies flat and even, preparing it for the next steps in the process․ This step is crucial for achieving a professional and polished finish․
Trimming Excess Fabric
Trimming excess fabric is an essential step to ensure a clean, professional finish for your flange binding․ After sewing the binding and flange strips together, carefully trim the excess fabric using sharp scissors or a rotary cutter and mat․ Trim close to the stitching line, leaving about 1/4 inch of fabric to prevent the seams from fraying․ Be precise to avoid cutting too close, as this could weaken the binding․ For mitered corners, trim the excess fabric at a 45-degree angle to maintain the integrity of the corner․ This step ensures the binding lies flat and even, preparing it for attachment to the quilt․ Proper trimming prevents bulkiness and creates a smooth, polished appearance․
Attaching the Flange Binding
Attaching the flange binding involves sewing it to the quilt’s edge, ensuring proper alignment and a smooth application․ This step securely integrates the binding with the quilt․
Sewing to the Quilt Back
Begin by aligning the raw edge of the flange binding with the quilt’s back edge, ensuring proper fit․ Place the binding strip with its outer fabric facing down toward the quilt․ Starting about 4-5 inches from one end, sew a 1/4-inch seam, mitering corners as you go․ Use a walking foot for even stitches․ As you sew, gently guide the binding to maintain alignment․ Fold the binding back at the end, leaving a small tail to secure later․ This step ensures the flange binding is securely attached to the quilt back, preparing it for folding to the front․ Keep the stitches consistent and check for alignment to achieve a professional finish․
Folding to the Front
Once the flange binding is sewn to the quilt back, carefully fold it to the front, ensuring the accent flange fabric is visible․ Press the fold to create a crisp crease, then align the binding’s raw edge with the quilt’s front edge․ Fold the binding over, making sure the flange remains exposed․ Use a 1/4-inch seam allowance to machine stitch in place, starting from where the binding was initially attached․ As you sew, guide the binding smoothly, ensuring it lies flat․ This step secures the binding to the quilt’s front, creating a polished look․ The flange adds a decorative touch, while the binding provides a clean finish․ This method eliminates the need for hand stitching, making it efficient and professional․
Handling the Corners
Handling the corners when applying flange binding requires precision to ensure a neat and professional finish․ To achieve this, begin by sewing the binding and flange strips together, leaving a small excess at each corner for ease of turning․ When you reach a corner, stop sewing about 1/4 inch before the edge․ Fold the binding strip at a 45-degree angle, aligning the raw edges carefully․ Then, resume sewing from the fold, ensuring the flange remains visible on both sides․ Press the seams open to create a sharp crease, which helps the binding lie flat․ Trim any excess fabric at the corners to prevent bulkiness․ This method ensures the flange binding turns smoothly, maintaining the decorative accent while finishing the quilt’s edges neatly․
Tips and Tricks
For a flawless flange binding, use fusible thread to eliminate pinning and ensure alignment․ Add a pop of color with contrasting fabrics, and press seams open for a crisp finish․ Always measure accurately and utilize online tutorials for visual guidance to master the technique effortlessly․
Using Fusible Thread
Using fusible thread for flange binding is an innovative technique that simplifies the process by eliminating the need for pinning․ This special thread, with its adhesive properties, holds the binding and flange fabrics together as you sew, ensuring perfect alignment․ After sewing, ironing activates the adhesive, securing the layers without shifting․ It’s essential to follow the thread manufacturer’s instructions for temperature and settings to avoid damaging fabrics․ Fusible thread doesn’t replace sewing but aids in maintaining precise placement during the sewing process․ Ideal for beginners, it prevents unevenness and enhances the finish․ For best results, use a walking foot on your sewing machine to guide fabrics smoothly, especially with multiple layers․ Testing on a small project first is recommended to gauge effectiveness and durability․ Choose thread colors that blend with fabrics for a seamless look․ While it offers convenience, ensure proper sewing techniques for long-lasting results․ With careful use, fusible thread can be a valuable tool in achieving professional-looking flange binding․
Adding a Pop of Color
Adding a pop of color to your flange binding is a creative way to enhance your quilt’s visual appeal․ By using a contrasting fabric for the flange, you can create a thin, vibrant accent that adds depth and interest․ To achieve this, cut your flange fabric slightly wider than your binding fabric, ensuring it will be visible once sewn․ Sew the flange and binding strips together with a 1/4-inch seam, then press the seam allowance toward the binding side․ This technique allows the flange to peek out, creating a striking border․ Choose colors that complement your quilt’s palette for a cohesive look or opt for bold contrasts for a dynamic effect․ This method is perfect for adding personality to your project without additional hand stitching․
Advanced Techniques
Explore expert-level methods like double flange binding and invisible seams for a polished finish․ These techniques involve precision sewing and specialty tools to enhance your project’s sophistication․
Double Flange Binding
Double flange binding adds an extra layer of elegance by incorporating two contrasting fabrics․ Cut the main binding and flange strips slightly wider than usual․ Sew the flange fabric to the binding fabric with a 1/4-inch seam, pressing the seam allowance toward the binding side․ Fold the combined strip in half lengthwise and press again; Attach this double-layered binding to your quilt, ensuring the flange fabric creates a thin accent line visible from the front․ For a polished look, miter the corners and secure the ends neatly․ This technique allows for a subtle pop of color while maintaining the durability of a traditional binding․ It’s ideal for quilters looking to add complexity to their projects without hand stitching․
Invisible Seams
Invisible seams in flange binding are achieved by carefully matching fabric patterns and using a narrow seam allowance․ This technique ensures that the stitching is nearly undetectable from the front of the quilt․ To achieve this, sew the binding and flange strips together with a 1/4-inch seam, pressing the seams open to minimize bulk․ Fold the combined strip in half lengthwise and press again to create a crisp edge․ When attaching the binding to the quilt, align the edges precisely and sew with a matching thread color․ The result is a seamless appearance, with the flange fabric creating a subtle accent line․ This method is ideal for quilters who want a polished, professional finish without visible stitching or handwork․

Variations on the Technique
Flange binding offers versatility, with multiple variations to suit different quilting styles․ One popular variation involves using contrasting fabrics for the binding and flange, creating a striking visual effect․ Another option is to adjust the width of the flange, from narrow accents to wider decorative strips․ Some quilters incorporate fusible thread to eliminate pinning, while others explore double flange binding for added dimension․ Additionally, the flange can be sewn with a bias seam for a diagonal look or with invisible seams for a clean finish․ Experimenting with prints and solids for the flange fabric further enhances customization․ These variations allow quilters to tailor the technique to their project’s unique needs, ensuring a personalized and professional result․
Free PDF Tutorial
A free PDF tutorial on flange binding is available, offering a step-by-step guide to mastering this quilting technique․ The tutorial, created by Elaine Huff, provides detailed instructions and photos to help quilters of all skill levels achieve a professional finish․ It covers cutting fabric strips, sewing the binding and flange together, and attaching the finished binding to a quilt․ The guide emphasizes the use of fusible thread to eliminate the need for pinning, making the process faster and easier․ Additionally, it explores variations, such as bias stripping and double flange binding, to enhance creativity․ Perfect for beginners and experienced quilters alike, this resource ensures a smooth and enjoyable learning experience․ Download the tutorial from trusted quilting websites like Missouri Star Quilt Company or Fabric Cafe for a comprehensive guide to flange binding․
Choosing the Right Colors and Fabrics
Choosing the right colors and fabrics for flange binding is essential to achieve a professional and visually appealing finish․ Select a main binding fabric that complements the quilt’s design and an accent fabric for the flange to add a pop of color․ Contrasting colors create a striking decorative edge, while matching colors offer a subtle look․ Ensure both fabrics are of similar weight and texture for a seamless finish․ Cotton fabrics are ideal due to their stability and ease of sewing․ Cut the binding fabric slightly narrower than the flange fabric to ensure the accent fabric is visible․ Consider the overall aesthetic of the quilt and choose fabrics that enhance its theme or style․ Proper fabric selection ensures the flange binding becomes a beautiful, eye-catching detail․
Common Mistakes to Avoid
When creating flange binding, common mistakes include cutting fabric strips inaccurately, which can lead to uneven edges․ Ensure the flange fabric is cut slightly wider than the binding fabric for proper visibility․ Another mistake is sewing the binding and flange strips together with an incorrect seam allowance, which can cause the flange to disappear or the binding to appear too bulky․ Additionally, not pressing the seams properly can result in a stiff or puckered finish․ Avoid starting the binding at the wrong place, as this can leave awkward loose ends․ Finally, mitering corners incorrectly can disrupt the clean look of the flange binding․ Attention to detail and precise measurements are key to achieving a professional finish․
Benefits of Flange Binding
Flange binding offers a elegant and professional finish to quilts, adding a decorative accent that enhances the overall design․ It allows quilters to incorporate an additional color or pattern, creating visual interest without overwhelming the quilt’s main design․ This technique is ideal for those who want to avoid hand stitching, as it is entirely machine-sewn․ Flange binding is also versatile, suitable for both traditional and modern quilts․ It provides a clean, polished edge that protects the quilt’s seams from wear and tear․ Additionally, flange binding is a great way to add a subtle pop of color, making it a perfect choice for quilters looking to elevate their projects with a unique and stylish detail․
Flange binding is a versatile and elegant technique that enhances the beauty of any quilt․ It allows quilters to add a decorative accent with minimal effort, creating a professional finish without the need for hand stitching․ By incorporating a contrasting flange fabric, quilters can add a subtle yet striking detail that elevates their projects․ This method is perfect for both traditional and modern quilts, offering a clean and polished edge that protects the seams․ With its ease of use and ability to add a pop of color, flange binding is a must-try technique for quilters of all skill levels․ It’s a great way to give your quilts a unique and stylish finishing touch․
Additional Resources
For those wanting to dive deeper into flange binding, there are numerous resources available․ The Missouri Star Quilt Company offers an excellent tutorial on baby quilts with flange binding, while Elaine Huff provides a free PDF guide on flange binding techniques․ Websites like Fabric Cafe and E․E․ Schenck Company offer detailed instructions and tips․ Additionally, fusible thread methods and step-by-step photo guides can be found online, making it easier to master this technique․ These resources ensure quilters of all levels can achieve a professional, polished finish for their projects․

