The 2017 Chevrolet Cruze Owners Manual serves as a comprehensive guide, providing essential information on vehicle maintenance, safety features, and operational instructions to ensure optimal performance and longevity.
Purpose and Structure of the Manual
The 2017 Chevrolet Cruze Owners Manual is designed to provide clear, concise information to help drivers understand and operate their vehicle effectively. The manual is divided into logical sections, each focusing on specific aspects of the car, such as maintenance, safety features, and technology. It begins with an introduction to the manual’s purpose and structure, followed by detailed explanations of key systems and features. The guide uses straightforward language and visual aids to ensure accessibility for all users. By organizing information systematically, the manual enables owners to quickly locate answers to common questions and gain confidence in their ability to care for and drive their Chevrolet Cruze.
Important Safety Information and Warnings
The 2017 Chevrolet Cruze Owners Manual emphasizes critical safety information to ensure driver and passenger well-being. It highlights essential precautions, such as proper seatbelt usage, airbag functionality, and child safety locks. The manual also provides warnings against potential hazards, like exceeding tire pressure limits or ignoring dashboard alerts. Drivers are advised to familiarize themselves with safety features, such as the Tire Pressure Monitoring System and Electronic Stability Control, to prevent accidents. Additionally, the manual stresses the importance of adhering to recommended maintenance schedules to avoid system malfunctions. By following these guidelines, owners can minimize risks and ensure a safe driving experience. Always refer to the manual for specific safety instructions.
How to Use the Manual Effectively
To maximize the benefits of the 2017 Chevrolet Cruze Owners Manual, start by reviewing the table of contents to locate specific topics quickly. Use the index for keyword searches to find detailed information efficiently. Pay attention to icons and bold text, which highlight important sections like safety warnings and maintenance schedules. For troubleshooting, refer to the dedicated section for common issues and solutions. Bookmark frequently accessed pages or use digital tools to search within the manual. Always cross-reference information with the vehicle’s specifications to ensure accuracy. By following these steps, owners can navigate the manual effortlessly and make informed decisions about their vehicle’s care and operation.
Vehicle Overview
The 2017 Chevrolet Cruze is a compact sedan and hatchback, offering a 1.4-liter turbocharged engine, available in manual or automatic transmissions, with modern design and advanced features for comfort and efficiency.
Key Features and Specifications
The 2017 Chevrolet Cruze boasts a 1.4-liter turbocharged four-cylinder engine, delivering 153 horsepower and 177 lb-ft of torque. It offers a choice of six-speed manual or automatic transmissions, ensuring smooth acceleration and fuel efficiency. With an EPA rating of up to 40 mpg on the highway, the Cruze is ideal for both city and long-distance driving. Key features include a 7-inch touchscreen infotainment system with Apple CarPlay and Android Auto compatibility, a rearview camera, and advanced safety technologies like lane keep assist and forward collision alert. The sleek design combines a sporty exterior with a refined, comfortable interior, making it a versatile choice for everyday commuting.
Model Variants and Options
The 2017 Chevrolet Cruze is available in multiple trim levels, including L, LS, LT, and Premier, each offering distinct features and upgrades; The L trim serves as the base model, while the Premier provides luxury amenities. A hatchback body style was introduced for the 2017 model year, offering increased cargo space and versatility. Optional features include a diesel engine, providing enhanced fuel efficiency, and advanced safety technologies like the Teen Driver Safety system. Buyers could also choose between six-speed manual or automatic transmissions, catering to different driving preferences. Additional options include upgraded infotainment systems, a rearview camera, and premium interior materials, allowing owners to customize their Cruze to suit their needs.
Exterior and Interior Design Elements
The 2017 Chevrolet Cruze features a sleek and modern exterior design with a prominent grille, stylish headlights, and a aerodynamic shape. The interior is designed for comfort and functionality, with high-quality materials and a well-organized layout. The cabin offers ample space for passengers, with supportive seating and a quiet ride. The dashboard includes a user-friendly interface, while the center console houses essential controls. Available features such as ambient lighting and premium upholstery enhance the interior experience. The exterior options include alloy wheels and vibrant color choices, allowing owners to personalize their vehicle. Overall, the Cruze blends practicality with sophisticated design elements.
Maintenance and Servicing
Regular maintenance is crucial for the 2017 Chevrolet Cruze to ensure optimal performance, efficiency, and longevity. Follow the recommended schedules for oil changes, tire rotations, and inspections to maintain its reliability and safety features. Refer to the manual or consult a Chevrolet dealership for personalized servicing advice and genuine parts. Proper care will enhance your driving experience and extend the vehicle’s lifespan. Always address any issues promptly to prevent potential problems and keep your Cruze running smoothly. Regular servicing ensures your car remains in top condition, delivering consistent performance and efficiency over time.
Scheduled Maintenance Intervals
Regular maintenance is essential for the 2017 Chevrolet Cruze. The manual recommends oil changes every 5,000 to 7,500 miles, depending on driving conditions. Tire rotations should occur every 7,500 miles to ensure even wear. The cabin air filter should be replaced annually or every 15,000 miles. Brake fluid should be replaced every 2 years, and the engine air filter every 30,000 miles; Spark plugs are recommended to be replaced at 100,000 miles. The timing belt should be inspected at 50,000 miles and replaced at 100,000 miles. Following these intervals ensures optimal performance, fuel efficiency, and extends the lifespan of your vehicle. Always refer to the manual for specific recommendations tailored to your driving habits and conditions.
Tire Care and Pressure Guidelines
Proper tire care is crucial for the 2017 Chevrolet Cruze. The recommended tire pressure can be found on the placard on the driver’s side door jamb. Ensure tires are inflated to these specifications for optimal performance and safety. Under-inflation can lead to reduced fuel efficiency, uneven tire wear, and increased risk of a blowout. Check tire pressure monthly and before long trips using a reliable tire pressure gauge. Rotate tires every 7,500 miles to ensure even wear. Inspect tires regularly for damage or wear, and replace them if tread depth is below 1/16 of an inch. Proper tire maintenance enhances handling, safety, and overall vehicle performance.
- Always refer to the manual for specific tire recommendations.
- Never mix tire types or sizes without consulting the manual.
- Check the spare tire pressure monthly as well.
Fluid Checks and Replacement
Regular fluid checks are essential for maintaining the health of your 2017 Chevrolet Cruze. Engine oil, coolant, transmission fluid, brake fluid, and windshield washer fluid levels should be inspected monthly or during fuel stops. Always use the type of fluid specified in the manual to avoid damage. Engine oil should be replaced every 5,000 to 7,500 miles, while coolant and transmission fluid may need replacement at higher intervals, typically around 50,000 to 150,000 miles. Brake fluid should be changed every 10 years or as needed. Always refer to the manual for specific guidelines and intervals to ensure proper vehicle maintenance and performance.
- Check engine oil level using the dipstick located under the hood.
- Coolant and transmission fluid levels can be checked via reservoirs.
- Brake fluid level is monitored through the reservoir cap on the master cylinder.
Tip: Use the correct fluid type to maintain vehicle warranty and performance.
Battery Maintenance Tips
Proper battery maintenance is crucial for the longevity and reliability of your 2017 Chevrolet Cruze. Regularly inspect the terminals for corrosion and clean them with a wire brush if necessary. Ensure the connections are tight and secure. Avoid deep discharges by keeping the battery charged, especially during prolonged periods of inactivity. If storing the vehicle for an extended time, disconnect the negative terminal to prevent drainage. Always use the correct charging equipment and avoid overcharging, as it can damage the battery. Replace the battery every 5-7 years or when signs of weakness appear, such as slow engine crank or dim lights. Refer to the manual for specific guidelines.
- Inspect terminals for corrosion and clean as needed.
- Keep the battery charged, especially during storage.
- Disconnect the negative terminal during long storage.
- Replace the battery every 5-7 years or as needed.
Tip: Always wear gloves and safety goggles when handling the battery.

Safety Features
The 2017 Chevrolet Cruze is equipped with advanced safety features, including a comprehensive airbag system, electronic stability control, and available technologies like forward collision alert and lane keep assist.
- 10 standard airbags for enhanced protection.
- Stability control for improved traction and stability;
- Optional advanced driver assistance systems.
These features work together to provide a safer driving experience.
Passive Safety Features
The 2017 Chevrolet Cruze is designed with a robust suite of passive safety features to protect occupants in the event of a collision. Key components include:
- A comprehensive airbag system with 10 standard airbags, including front, side, and knee airbags for enhanced protection.
- 3-point seat belts with pretensioners and load limiters to minimize injury risk by securely holding passengers in place.
- A high-strength steel body structure engineered to absorb and distribute crash forces, maintaining the integrity of the passenger compartment.
These features work together to provide superior occupant protection and peace of mind for drivers and passengers alike.
Active Safety Technologies
The 2017 Chevrolet Cruze incorporates advanced active safety technologies to enhance driver confidence and prevent accidents. Key features include:
- Forward Collision Alert, which warns drivers of potential frontal collisions.
- Lane Keep Assist, helping the vehicle stay within lane markings by gently steering if drifting occurs.
- Rear Cross Traffic Alert, providing alerts when vehicles approach from either side while reversing.
- Teen Driver Mode, enabling parents to monitor and limit certain vehicle functions for new drivers.
These technologies work seamlessly to assist drivers in various driving scenarios, promoting safer and more attentive driving practices.
Driver Assistance Systems
The 2017 Chevrolet Cruze offers a range of driver assistance systems designed to enhance convenience and awareness on the road. These include:
- Adaptive Cruise Control, which adjusts speed to maintain a safe distance from the vehicle ahead.
- Lane Centering, assisting with steering to keep the vehicle centered in its lane.
- Automatic Emergency Braking, which applies the brakes in potential collision situations.
- Rearview Camera, providing a clear view behind the vehicle for safer reversing.
These systems work together to reduce driver workload and improve safety, though they should not replace attentive driving practices.

Operating the Vehicle
Start the engine, adjust settings, and monitor performance via the instrument cluster. Use the infotainment system for navigation and connectivity. Always check tire pressure and fluid levels before driving.
Instrument Cluster and Controls
The instrument cluster in the 2017 Chevrolet Cruze provides essential information at a glance, including speed, RPM, fuel level, and warning indicators. The controls are intuitively designed, with the infotainment system centrally located for easy access to navigation, Bluetooth, and audio settings. Steering wheel-mounted buttons allow for safe control of cruise control and phone functions. The gearshift and parking brake are ergonomically positioned for comfort. The manual also highlights the Teen Driver system, which monitors and limits certain features for novice drivers. Additional controls, such as those for heating and cooling, are straightforward and user-friendly. Always refer to the manual for specific guidance on customizing settings and troubleshooting any issues.
Starting and Driving the Vehicle
Before starting the 2017 Chevrolet Cruze, ensure the parking brake is engaged and the transmission is in park (automatic) or first gear (manual). Insert the key into the ignition or press the start button if equipped with keyless start. Buckle up and ensure all passengers are secured. Check mirrors and surroundings for safety. Start the engine and allow it to idle briefly before driving. Monitor the instrument cluster for any warning lights. Shift into gear smoothly and accelerate gradually. Use cruise control for steady speeds on highways. For manual transmissions, shift gears according to RPM levels. Always follow proper starting and driving procedures for a safe and efficient experience.
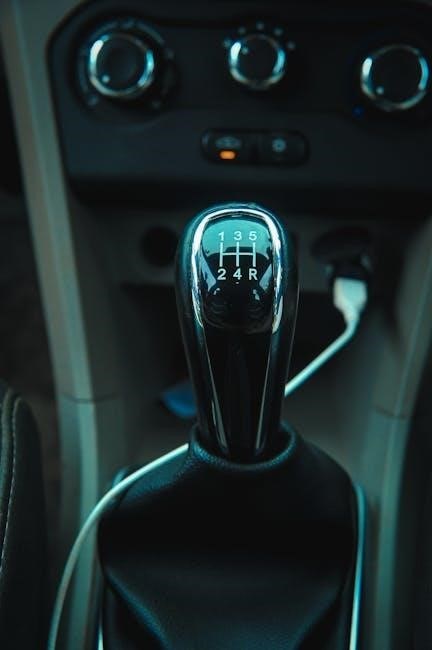
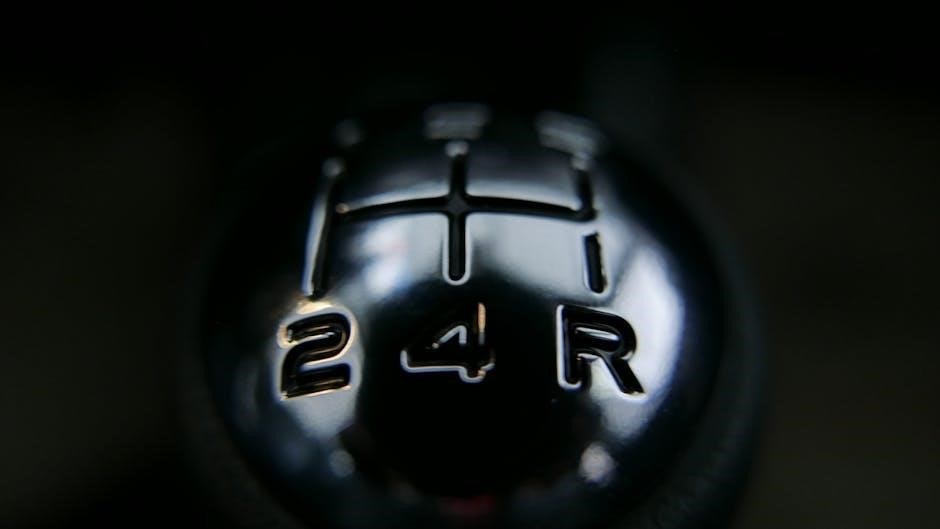
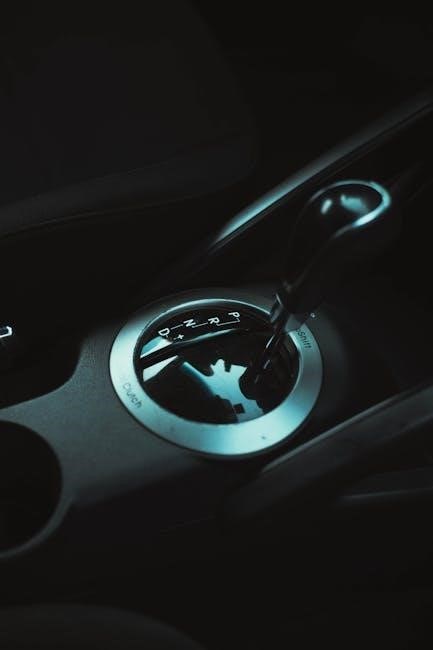
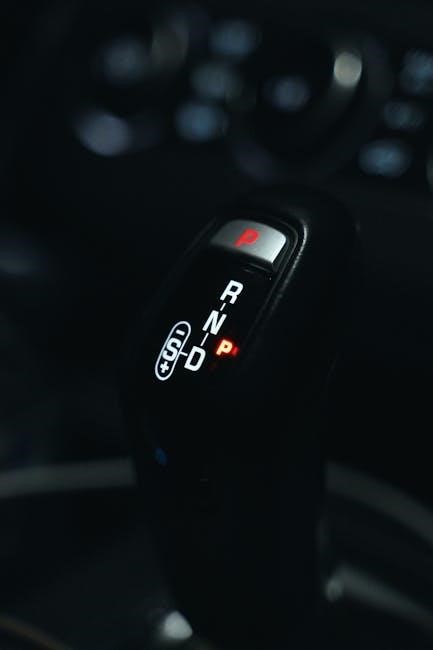
Transmission and Gear Shift Patterns
The 2017 Chevrolet Cruze offers both 6-speed manual and automatic transmissions. For manual models, shift gears by pressing the clutch and moving the gearshift through each position. First gear is for starting, reverse for backing up, and higher gears for increasing speed. Use the clutch smoothly to avoid jerking. For automatic models, shift into drive (D) for normal driving, (L) for low-speed towing, and (M) for manual mode. Proper shifting ensures efficient fuel use and smooth acceleration. Always downshift before descending hills manually to maintain control. Familiarize yourself with the shift pattern to optimize performance and safety.

Technology and Infotainment
The 2017 Chevrolet Cruze features a 7-inch touchscreen infotainment system with Bluetooth, Apple CarPlay, and Android Auto compatibility. Voice commands and navigation enhance connectivity and driver convenience.
Infotainment System Overview
The 2017 Chevrolet Cruze offers an intuitive 7-inch touchscreen infotainment system, designed to enhance connectivity and entertainment. It supports Bluetooth for hands-free calling and audio streaming, as well as Apple CarPlay and Android Auto for seamless smartphone integration. The system also features voice command functionality, allowing drivers to control settings without distraction. Additional amenities like a 4G LTE Wi-Fi hotspot provide a connected driving experience. The interface is user-friendly, with clear menus and responsive touch controls. This system ensures a modern, tech-driven experience, keeping passengers entertained and informed on the go.
Pairing Bluetooth Devices
To pair a Bluetooth device with your 2017 Chevrolet Cruze, start by enabling Bluetooth on your phone. On the infotainment system, navigate to the Settings menu and select Bluetooth. Choose “Pair Device” and follow the on-screen instructions. The system may prompt you to enter a PIN, typically ‘0000’ or ‘1234’, to complete the pairing process. Once connected, your phone will be linked to the vehicle’s infotainment system, allowing for hands-free calls and audio streaming. If pairing issues arise, restart the system or ensure your phone is in discovery mode. This feature enhances convenience and safety while driving.
Using Apple CarPlay and Android Auto
The 2017 Chevrolet Cruze supports Apple CarPlay and Android Auto for seamless smartphone integration. To use these features, connect your phone via USB to the infotainment system. Select the appropriate option from the system menu to enable CarPlay or Android Auto. Once connected, you can access apps like Maps, Music, and Messages directly on the touchscreen. Voice commands are also available for hands-free control. Ensure your phone’s software is updated for compatibility. This feature enhances connectivity and convenience, allowing you to stay connected while driving safely. Refer to the manual for troubleshooting tips if issues arise during setup or use.
Navigation and Voice Commands
The 2017 Chevrolet Cruze features an advanced infotainment system with navigation and voice command capabilities. To use navigation, select the “Navigation” option from the infotainment menu and enter your destination using voice commands or the touchscreen. Voice commands allow you to input addresses, search for points of interest, and receive turn-by-turn directions hands-free. The system also provides real-time traffic updates and alternative route suggestions. For voice commands, press the voice control button on the steering wheel and speak clearly. Ensure your system is updated with the latest maps for accuracy. This feature enhances convenience and safety, keeping your eyes on the road while navigating. Refer to the manual for detailed instructions on customizing settings or troubleshooting voice recognition issues.

Troubleshooting and Repairs
The 2017 Chevrolet Cruze manual provides detailed troubleshooting guides for common issues, including dashboard warning lights and mechanical repairs. It offers step-by-step solutions to help owners identify and address problems promptly, ensuring safety and preventing further damage.
Common Issues and Solutions
The 2017 Chevrolet Cruze Owners Manual outlines common issues owners may encounter, such as dashboard warning lights, transmission fluid checks, and infotainment system glitches. For dashboard lights, the manual advises checking the specific symbol and referring to the troubleshooting section. Transmission fluid levels should be monitored regularly, and topping up is detailed in the maintenance guide. For infotainment issues, restarting the system or updating software may resolve problems. Additionally, the manual provides solutions for common concerns like headlight bulb replacement and clock setting. It emphasizes the importance of addressing issues promptly to prevent further damage and ensure safe, efficient vehicle operation.
Diagnosing Dashboard Warning Lights
The 2017 Chevrolet Cruze Owners Manual provides a detailed guide for diagnosing dashboard warning lights, ensuring drivers can identify and address issues promptly. Each light, such as the check engine, oil pressure, or battery symbols, is explained with possible causes. The manual advises checking the vehicle’s systems or visiting a certified technician if the issue persists. It emphasizes understanding these indicators to maintain safety and prevent potential damage. This section is crucial for owners to interpret warnings accurately and take appropriate actions, ensuring their Cruze runs smoothly and efficiently at all times.
Basic Repair and Maintenance Tasks
The 2017 Chevrolet Cruze Owners Manual outlines essential repair and maintenance tasks to keep your vehicle in optimal condition. Regular oil changes, tire pressure checks, and fluid level inspections are highlighted as critical for performance and longevity. The manual provides step-by-step guidance for tasks like replacing air filters, inspecting belts, and checking brake pads. It also covers basic troubleshooting, such as jump-starting the battery or replacing headlight bulbs. For more complex issues, the manual recommends consulting a certified technician to avoid damage. By following these guidelines, owners can ensure their Cruze runs efficiently and safely, maintaining its reliability over time.
Legal and Warranty Information
The 2017 Chevrolet Cruze Owners Manual includes details on warranty coverage, vehicle identification number (VIN) location, and regulatory compliance, ensuring owners understand their rights and obligations regarding the vehicle.
Vehicle Identification Number (VIN)
The Vehicle Identification Number (VIN) is a unique 17-character code assigned to your 2017 Chevrolet Cruze. It provides essential details about your vehicle, including its make, model, year of production, engine type, and manufacturing location. The VIN can be found on the driver’s side doorjamb or on a plate near the windshield. It is crucial for vehicle registration, insurance, and service purposes. Always ensure the VIN matches the one listed in your ownership documents to verify authenticity. This information is detailed in the 2017 Chevrolet Cruze Owners Manual for easy reference and verification.
Warranty Coverage and Terms
The 2017 Chevrolet Cruze comes with a comprehensive warranty program designed to protect your investment. The basic warranty typically covers repairs and replacements for parts and labor for a specified period, usually 3 years or 36,000 miles. The powertrain warranty extends coverage for up to 5 years or 60,000 miles, ensuring critical engine and transmission components are protected. Additionally, Chevrolet offers a corrosion protection warranty and roadside assistance programs. For detailed terms, conditions, and limitations, refer to the 2017 Chevrolet Cruze Owners Manual. Always consult the manual or contact a Chevrolet representative for specific warranty information tailored to your vehicle.
Compliance and Regulatory Information
The 2017 Chevrolet Cruze is designed to meet or exceed all applicable federal, state, and local safety and emissions regulations. It complies with Federal Motor Vehicle Safety Standards (FMVSS) and Environmental Protection Agency (EPA) requirements. The vehicle features emissions controls, including a catalytic converter and exhaust gas recirculation system, to minimize environmental impact. The manual provides detailed information on regulatory compliance, including proper disposal of hazardous materials and adherence to fuel standards. Always refer to the Owners Manual for specific guidelines on maintaining compliance with local laws and regulations during vehicle operation and maintenance.
Exterior and Interior Features
The 2017 Chevrolet Cruze boasts a sleek exterior design with a prominent grille and stylish headlights, while the interior offers a comfortable cabin with premium materials and advanced technology features.
Exterior Components and Accessories
The 2017 Chevrolet Cruze features a sleek and modern exterior design with a prominent front grille, stylish headlights, and a sporty rear bumper. Available in sedan and hatchback body styles, the Cruze offers a versatile appearance to suit different preferences. Exterior components include power-adjustable mirrors, LED daytime running lights, and optional alloy wheels for enhanced aesthetics. Accessories such as roof racks and spoiler kits can be added to personalize the vehicle. The exterior is built with durable materials, ensuring long-lasting performance and a polished look. These elements contribute to the Cruze’s appeal, making it a standout choice in its class.
Interior Comfort and Convenience
The 2017 Chevrolet Cruze offers a well-appointed interior designed for comfort and convenience. The cabin features premium materials, supportive seating, and ample legroom for both front and rear passengers. The infotainment system includes a 7-inch touchscreen with Bluetooth connectivity, Apple CarPlay, and Android Auto, ensuring seamless integration with modern devices. Additional convenience features such as automatic climate control, cruise control, and a rearview camera enhance the driving experience. The interior also boasts a quiet ride due to advanced noise-reduction technologies. These elements create a comfortable and connected environment, making the Cruze an ideal choice for daily commuting and long-distance travel.
Storage and Cargo Solutions
The 2017 Chevrolet Cruze offers practical storage and cargo solutions to enhance versatility. The trunk provides ample space for luggage or groceries, with a capacity of up to 14.8 cubic feet in sedan models. For added flexibility, the split-folding rear seats allow you to accommodate larger items when needed. Additionally, the Cruze features underfloor storage compartments in the trunk for keeping valuables out of sight. Cargo nets and tie-downs are available to secure items during transit. The cabin also includes convenient storage options like door pockets, a center console bin, and a glovebox, ensuring everyday items are within easy reach. These features make the Cruze a practical choice for both daily errands and road trips.
Performance and Capability
The 2017 Chevrolet Cruze delivers a balance of power and efficiency with its 1.4-liter turbocharged engine, producing 153 horsepower and 177 lb-ft of torque, available with a 6-speed manual or automatic transmission for up to 40 MPG highway, while the lightweight body and four-wheel independent suspension enhance handling dynamics.
Engine Options and Specifications
The 2017 Chevrolet Cruze offers a range of engine options, including a 1.4-liter turbocharged four-cylinder engine that delivers 153 horsepower and 177 lb-ft of torque. This engine is available with either a six-speed manual or a six-speed automatic transmission. Additionally, a diesel engine option is available for the sedan model, providing enhanced fuel efficiency. The engines are designed to balance performance and efficiency, making the Cruze suitable for both city driving and highway cruising. The 1.4-liter turbocharged engine achieves an estimated 30 MPG in the city and 40 MPG on the highway, while the diesel option offers even greater fuel economy. These specifications ensure the Cruze meets the needs of drivers seeking a reliable and efficient vehicle.
Transmission Types and Fuel Efficiency
The 2017 Chevrolet Cruze is available with a six-speed manual or six-speed automatic transmission, offering drivers a choice between hands-on control and seamless shifting. The 1.4-liter turbocharged engine achieves an estimated 30 MPG in the city and 40 MPG on the highway with the automatic transmission, while the manual transmission delivers 28 MPG city and 39 MPG highway. A diesel engine option is also available, providing even greater fuel efficiency for long-distance driving. These transmission and engine combinations ensure the Cruze is both economical and responsive, catering to a variety of driving preferences and needs.
Handling and Driving Dynamics
The 2017 Chevrolet Cruze delivers a balanced blend of comfort and responsiveness, making it a pleasure to drive in various conditions. Its refined suspension system absorbs road irregularities smoothly, while precise steering provides confident control. The Cruze’s aerodynamic design enhances stability at higher speeds, ensuring a composed ride. Available in L, LS, LT, and Premier trims, the Cruze offers sport-tuned suspension in higher trims for sharper handling. The optional diesel engine provides robust torque, further elevating driving dynamics. Additionally, features like the Driver Mode Selector allow customization of the driving experience, catering to both efficiency and performance preferences, making the Cruze a versatile choice for everyday commuting or spirited driving sessions.